Open Source Pick And Place Has A $450 BOM Cost

Give your grizzled and cramped hands a break from stuffing boards with surface mount components. This is the job of pick and place machine, and over the years these tools of the trade for Printed Circuit Board Assembly (PCBA) have gotten closer to reality for the home shop; with some models diving below the $10,000 mark. But if you’re not doing it professionally, those are still unobtanium.

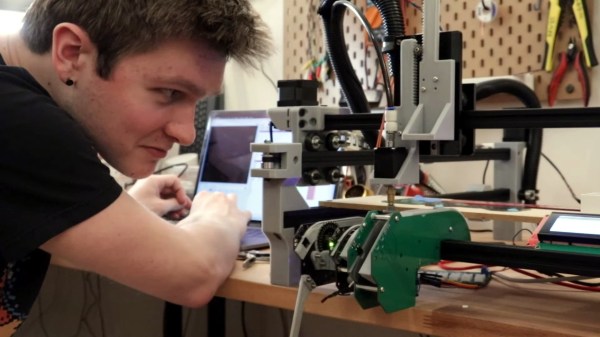
The cost of this one, on the other hand, could be explained away as a project in itself. You’re not buying a $450 shop tool, you’re purchasing materials to chase the fever dream of building an open source pick and place machine. There are two major parts here, an X/Y/Z machine tool that can also rotate the vacuum-based parts picker, and the feeders that reel out components to be placed. All of this is working, but there’s still a long road to travel before it becomes a set and forget machine.
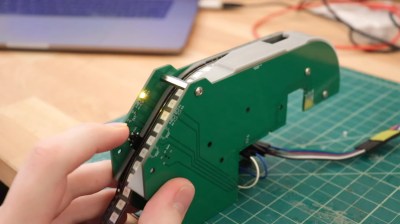
The rubber hits the road in two ways with pick and place machines: the feeders, and the optical placement. The feeders are where [Stephen Hawes] has done a ton of work, all shown in his video series that began back in January. The stackup of PCBs and 3D-prints hangs on the front rail of the gantry assembly, is adjustable for tape widths, and uses an interesting PCB encoder wheel and worm-gear for fine-tuning the feed. [Stephen’s] main controller board, a RAMPS shield for and Arduino Mega that runs a customized version of Marlin, can work with up to 32 of these feeders.

So far it doesn’t look like he’s tackled a vision system, although the Bill of Materials does include  “Downwards Camera”, confirming this is a planned feature. Vision is crucial in commercial offerings, with at least one downward camera for precise board positioning, and often an up-facing camera as well to ensure component position and orientation (if not multiple cameras for each purpose). Without these, the machine would be dead reckoning and that can lead to drift over the size of the board and the duration of the placement run as well as axial misalignment. Adding vision shouldn’t be a ground-up effort though, as [Stephen] chose to use OpenPnP to drive the machine and that project already has vision support. This will be much simpler to add when compared to the complexity of the feeders.

[Stephen] admits that much work still needs to be done and he would love to have help dialing in the performance of the feeder design, and fleshing out features on the road to perfection. Although we suspect that as in the early days of bootstrapping 3D printers, a project like this can never be truly finished. At least it’ll make his next run of LED glowties a lot easier to fabricate.

Continue reading “Open Source Pick And Place Has A $450 BOM Cost”

Help Us Throw More Cycles At The Coronavirus Problem

The Hackaday community has answered the call and put their computers put to work folding proteins found in the coronavirus. Team_Hack-a-Day ranks #44 in the world so far this month, and I’ve seen us rank as high as #19 on 24-hour leaderboards.

Want to join the fight? Donate some of those computing cycles you’re not using to battling SARS‑CoV‑2. You’re probably not an epidemiologist or a vaccine researcher, but you can make their jobs easier by providing them with the data they need through the Folding@home Project.

As Dan Maloney explained in his excellent article on protein folding, understanding the incredibly complex folding behavior of the proteins in the virus will be key to finding treatments and possibly a vaccine. Folding@home connects countless computers via the internet and is now the largest supercomputer in the world, consisting of over 3.5 million CPUs and over half a million GPUs. The resulting data is freely available to researchers.

Let’s take a look at how easy it is to get up and running, how a GPU can supercharge a setup, and dip into the stats for Team_Hack-a-Day’s effort.

Continue reading “Help Us Throw More Cycles At The Coronavirus Problem”

Hackaday Podcast 066: The Audio Overdub Episode; Tape Loop Scratcher, Typewriter Simulator, And Relay Adder

Hackaday editors Elliot Williams and Mike Szczys stomp through a forest full of highly evolved hardware hacks. This week seems particularly plump with audio-related projects, like the thwack-tackular soldenoid typewriter simulator. But it’s the tape-loop scratcher that steals our hearts; an instrument that’s kind of two-turntables-and-a-microphone meets melloman. We hear the clicks of 10-bit numbers falling into place in a delightful adder, and follow it up with the beeps and sweeps of a smartphone-based metal detector.

Take a look at the links below if you want to follow along, and as always, tell us what you think about this episode in the comments!

Direct download (60 MB or so.)

Continue reading “Hackaday Podcast 066: The Audio Overdub Episode; Tape Loop Scratcher, Typewriter Simulator, And Relay Adder”

FDA Approves Ventilator Designed By NASA’s Jet Propulsion Laboratory

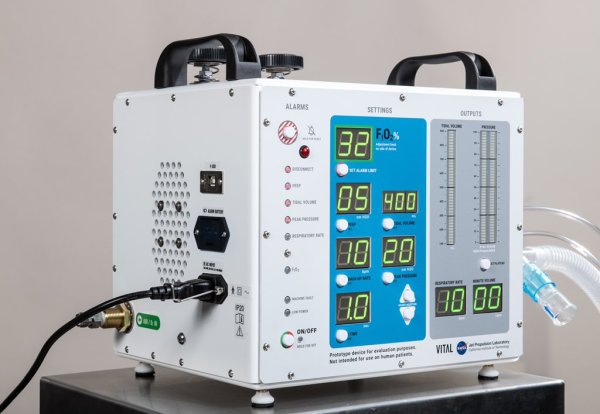
Yesterday NASA’s Jet Propulsion Laboratory announced that their ventilator design has received Emergency Use Authorization from the US Food and Drug Administration. This paves the way for the design to be manufactured for use in the treatment of COVID-19 patients.

JPL, which is tightly partnered with the California Institute of Technology, designed the ventilator for rapid manufacturing to meet the current need for respiratory tools made scarce by the pandemic. The design process took only 37 days and was submitted for FDA approval around April 23rd. They call it VITAL — Ventilator Intervention Technology Accessible Locally — a nod to NASA’s proclivity for acronyms.

Continue reading “FDA Approves Ventilator Designed By NASA’s Jet Propulsion Laboratory”

Hackaday Podcast 065: Game Boy Hacks Galore, Cable Robo Elbow, Pi Cam Solargraphy, And The Deepest Sub Is Crushing It

Hackaday editors Mike Szczys and Elliot Williams cover the hacks that made us happy over the past week. There’s an incredible cable-driven robotic elbow hack whose quality is only eclipsed by the fantastic explanation of how it works (like a block and tackle). Getting data like WiFi credentials into your embedded project may be just a blinking Android app away. Try your hand at digital solargraphy with creative use of f-stop and post processing. And Mike ogles an RC F-35 project while Elliot goes gaga for the deepest of all submarine designs.

Take a look at the links below if you want to follow along, and as always tell us what you think about this episode in the comments!

Take a look at the links below if you want to follow along, and as always, tell us what you think about this episode in the comments!

Direct download (60 MB or so.)

Continue reading “Hackaday Podcast 065: Game Boy Hacks Galore, Cable Robo Elbow, Pi Cam Solargraphy, And The Deepest Sub Is Crushing It”

New Contest: Making Tech At Home

Put that parts bin to good use and build something! That’s the gist of the Making Tech at Home contest where your inner pack rat can shine by building from the parts you have on hand.

So what are you supposed to build? We’re not particular, we just want it to be cool. Grab everyone’s attention with an awesome project, and then win our hearts with the story of where you found the components.

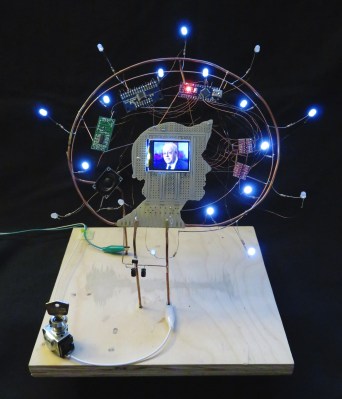
Daniel Domínguez’s Parts Bin Self Portrait is an excellent example

An excellent example is the Parts Bin Self Portrait seen here that was a runner-up in the Circuit Sculpture contest. [Daniel Domínguez] talks about cutting out his silhouette from a scrap of prototyping board, pulling dev boards out of the parts box, and finding a ceiling fan on the side of the road which ended up donating the wire from the windings of its motor.

Your story is what’s important here. You can build a sleek and beautiful bit of gear that doesn’t look hacky at all — tell us about what the finished project does, but we also need to hear what parts you had on hand, where they came from, and what led you to use them. There is an element of satisfaction when that broken thermostat that you’ve been squirreling way for ten years, or the accidentally ordered reel of 0402 resistors, ends up getting used. Dust off that electronics hoard and get building!

Prizes Sent Out Throughout the Contest

This contest runs until July 28th, but you won’t have to wait that long to score some loot. Thirty entries will win a grab bag of stuff from Digi-Key and we’ll pick a few projects every week as we work toward that number. Help us decide what to send in those grab bags by voting for the gear you like the most.

Once the contest wraps up, three top winners will receive a mega grab bag stuffed with $500 worth of components. You know… to add to your parts bin for all those future builds.

If you’re anything like us, people deliver their broken stuff to you because they’ve heard you build things out of broken electronics. You feel torn about keeping old hardware around, but feel guilty about sending it to the landfill. When you order parts you get multiples just so you have them on hand for the next project. You were made for this competition, and no matter who the prizes go to, we want a look inside your parts bin.

KiCad Panelization Made Easy

There’s a new Python-based script that will panelize your KiCad circuit boards from the command line. The project by [Jan Mrázek] is called KiKit and works on .kicad_pcb files to arrange them in a grid with your choice of mousebites or v-cuts for separating the boards after production.

When working with smaller boards it’s common practice to group them together into panels. This is done to speed up PCB assembly as multiple boards can have solder paste applied, go through a pick and place machine, and be sent into the reflow oven as a single unit. Often this is done manually, but in many cases this script will save you the time while delivering the results you need.

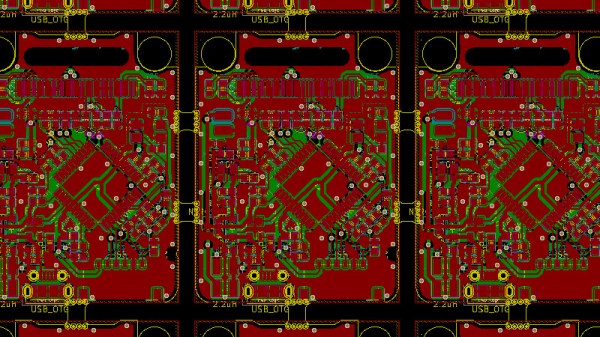
Let’s say you really wanted to make a whole bunch of those Xling open source Tamagotchi-like key fobs we saw a couple of weeks back. Using KiKit you can gang up six of the boards at a time, using “mousebites” to keep them together during production but make it easy to separate them after all the components are soldered:

/usr/local/bin/kikit panelize grid --space 3 --gridsize 2 3 --tabwidth 3 --tabheight 3 --htabs 2 --vtabs 1 --mousebites 0.5 1 0.25 --radius 1 Xling/hardware/xling.kicad_pcb xling_panel.kicad_pcb

You can see that the parameters let you set space between the boards, number of boards in the grid, width of the tabs, tab dimensions, number of tabs between boards, and even the radius of the curve where the tabs meet the board. These settings were pulled from the examples page, which demonstrates outcomes for many different settings options.

If you want to give this a try, we suggest installing directly from the repository, as improvements are ongoing and the pip3 version didn’t have all of the options shown in the examples. For us this was as easy as sudo python3 setup.py install and then calling the script with the full path /usr/local/bin/kikit.

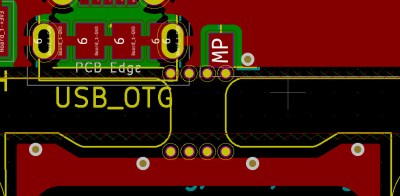
Results from this board are both impressive and cautionary. You can see the top edge of the design is recessed yet the most up-to-date version of KiKit was still able to make the connection. However, how this affects the USB connector on the bottom of the board design may be something to consider before pulling the trigger on your panel order.