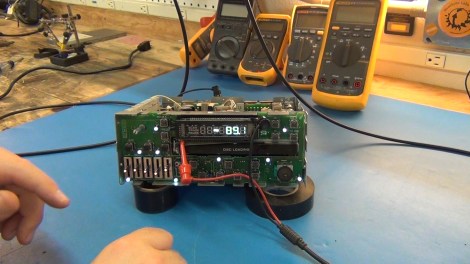
Repairing A VFD Driver On A Car Stereo

We love seeing repairs and always marvel at the ability to track down the problem. [Todd] seems to have a knack for this. He was met with a lot of adversity when trying to get the Vacuum Fluorescent Display working on his car stereo. A lot of persistence, and a little bit of taking the easier way out let him accomplish his goal.

The head unit is out of his 1994 Jeep. He knew the radio functionality still worked, but the display was completely dark. After getting it out of the dashboard he connected it to a bench supply and started probing around. He established that the data lines were still working by setting the radio to auto scan mode and testing with a multimeter. When he went to measure the cathode pins he didn’t get any reading. It seems the driver which supplies that signal is burnt out.

One easy fix would be to replace the parts from a scavenged unit. [Todd] hit the junkyard and picked up one from a Jeep that was just one model year apart from his. Alas, they weren’t exactly the same, and although he swapped out a chip (using a neat heated solder sucker) it didn’t work. In the end he simply dropped in a power resistor to use the 12V rail as a 1V at 0.1A source for the filament.

You can see his repair extravaganza in the video after the break. If you’re looking for tips on scavenging these types of displays check out this post.

Continue reading “Repairing A VFD Driver On A Car Stereo”

An Actively Cooled Cloud Chamber

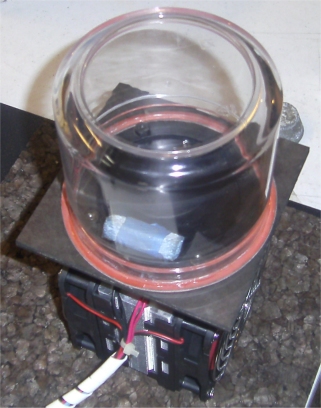
This cloud chamber is designed to keep the environment friendly for observing ionizing radiation. The group over at the LVL1 Hackerspace put it together and posted everything you need to know to try it out for yourself.

A cloud chamber uses a layer of alcohol vapor as a visual indicator of ionizing particles. As the name suggests, this vapor looks much like a cloud and the particles rip though it like tiny bullets. You can’t see the particles, but the turbulence they cause in the vapor is quite visible. Check out the .GIF example linked at the very bottom of their writeup.

The chamber itself uses a Peltier cooler and a CPU heat sink. The mounting and insulation system is brilliant and we think it’s the most reliable way we’ve seen of putting one of these together. Just remember that you need a radioactive source inside the chamber or you’ll be waiting a long time to see any particles. They’re using a test source here, but we saw a cloud chamber at our own local Hackerspace that used thoriated tungsten welding rods which are slightly radioactive.

[Thanks JAC_101]

Automated Home Brewing System Has An Insanely Professional Controller

So you know how on Breaking Bad, the chemist [Gale Boetticher] sets up an impressive rig to brew the best cup of coffee? Well what do you think of a group of engineers taking on beer as their side project? This rig, which we do think is pretty insane, is the result of embedded system engineers developing an automated brewing system.

[Ben_B] started from humble beginnings. He built a PID controlled smoker much like the one we saw last Monday. From there he ground out several iterations of brewing hardware, adding a bit of automation at each step along the way. But things really took off when the events department at his company, National Instruments, took notice. They put the team on the task of assembling professional grade control hardware for the unit. And of course while we’re spending the company dime why not chrome those boiling vessels at the same time. The finished project was shown off at a trade show to help promote the company.

The post thread linked at the top has shots of the complicated mounting and wiring that went into the controller. We’re not sure how much intervention is actually necessary during a session. But with all the sensors, pumps, valves, filters, and whatnot we wouldn’t be surprised if all you need to do is pitch some yeast into what comes out of it.

Wiring Up A Lot Of LED Segment Displays

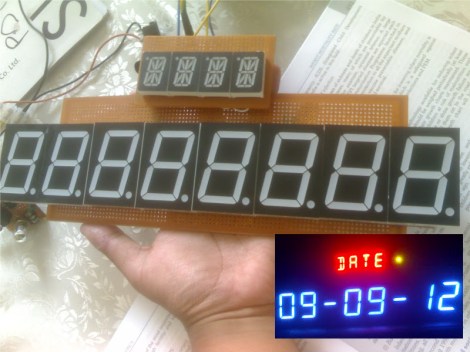
One look at this display and you know there’s a whole lot of pins that need to be wired up. Now look at what those display modules are mounted on. That’s right, [Kemley] is using point-to-point soldering to rig up this big display. It sports four sixteen segment modules on top for alpha-numeric information, and eight large seven segment modules for displaying numbers only.

We’re not certain as to how the electronics are arranged. When talking about the 16-segment modules he mentions that all four are in parallel with NPN transistors to switch the common anode of each. That’s easy enough to understand. But when you get a look at the transistor board you’ll see 24 of them in use. He’s included a 150 ohm resistor on the collector of each transistor. It must be set up to only allow one segment of each group to switch on at a time? We’d guess that each segment is divided into two (upper and lower pins are multiplexed separately), which would explain the double set of transistors. As for date and time, an Arduino board monitors a DS1307 RTC and manages the scanning of the display.

NES Light Gun Gets A Burning Laser Upgrade

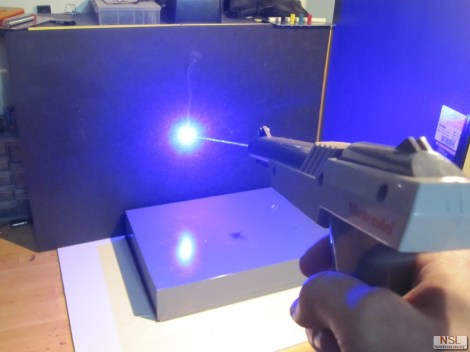
The Nintendo Light Gun makes a perfect burning laser. Of course it’s been gutted to make this happen. Nonetheless, the retro look can’t be beat, and the gun form factor is just what you need in a laser weapon.

This will literally burn your eye out of your head, so [Justin] and his buddies over a North Street Labs are all wearing protective goggles designed for this laser’s wavelength. But they also built a safety into the zapper itself. At the beginning of the video clip (embedded after the break) you will see there’s a key lock mounted in the butt. This lock completes the circuit between the battery and driver board. The 2W output is achieved by a 445nm M140 diode. A lot went into the heat sink and mounting cylinder to make sure the diode doesn’t just burn up after a few seconds of use.

Continue reading “NES Light Gun Gets A Burning Laser Upgrade”

Galaxy SIII Hack Puts Android In Your Dashboard

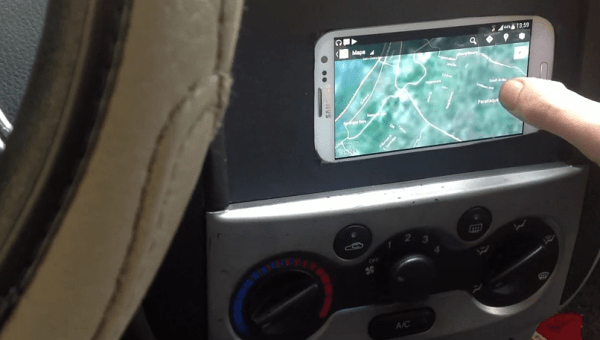
Here’s how you can have a hands-free, no worries about the battery, Android experience while you drive. [Steve] removed the head unit from his car and replaced it with a Samsung Galaxy SIII Android phone. The look is pretty nice, but we do have a few suggested improvements if you try this one for yourself.

It started simply by removing the factory stereo which left a double-height opening in the dashboard. [Steve] cut a piece of wood to fit the gaping hole, painting it a grey that would compliment the interior colors of the car. The phone is mounted on this plate, with plenty of room for the USB and audio cables. From there it is finished up with another wooden plate which has a cutout for the touch screen. See the final project, as well as glimpses of the installation, in the video after the break.

[Steve] demonstrates using the GPS features and playing music. We’d improve this in a couple of ways. First off, using something like the IOIO board you could add a physical volume knob, which we’re not interested in giving up for a touch screen quite yet. If you were willing to go the extra mile, a CAN-BUS chip could be added too that would monitor button presses from the steering wheel music controls.

Continue reading “Galaxy SIII Hack Puts Android In Your Dashboard”

Classic Game Of Snake On An ARM Controller

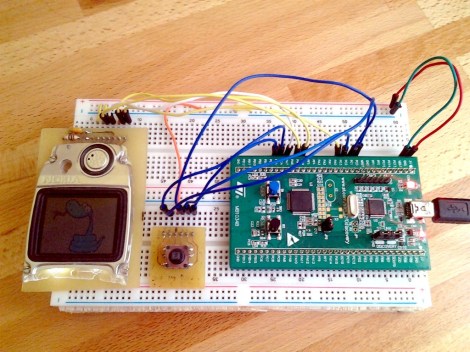
Every now and again we take a break from looking at all of your awesome projects and get to work on our own. I thought I’d take a minute to show off my game of Snake. It’s a classic that I remember playing on a graphing calculator (TI-83) back in high school. I had never written my own version and decided it would be a good reason to spend some more time on the ARM platform.

The dev board I’m using is the STM32 F0 Discovery board. Once I had a usable template for compiling the code on a Linux box everything else just started to fall into place. The screen is from a Nokia 3595. Several years back I cut off the keypad and made a breakout board for it. It’s pretty dim but it’s small and uses SPI so it tends to be my go-to display for prototyping. But I did get my hands on an SSD1289 TFT screen (after writing about this project) for about $16 and I’ve had some success with that. It uses a parallel interface so it’s not as easy to hook up and I’ve had some crosstalk issues when running at 24 MHz.

But I digress. Check out the demo video of my simple game after the break. There are more details about my programming choices at post link above. You will see this hardware again soon. I’m working on an On Chip Debugging primer and these ARM dev boards are perfect for it!

Continue reading “Classic Game Of Snake On An ARM Controller”