How To Run A Clock For A Century

What’s going to keep a clock running for a century, unattended? Well, whatever’s running it will have to sip power, and it’s going to need a power source that will last a long time. [Jan Waclawek] is looking into solar power for daytime, and capacitors for nighttime, to keep his clock running for a hundred years.

This project carries on from [Jan]’s previous project which looked at what kind of power source could power the gadgets around his house for a century without needing intervention – ie., no batteries to replace, no winding etc. [Jan] whittled his choices down to a combination of solar power and polypropylene film capacitors. Once the power had been sorted, a clock was chosen in order to test the power supply. The power consumption for a clock will be low during the night – it would only need a RTC circuit keeping track of the time – so a few low-leakage capacitors can be used. When daylight returns or a light is switched on, the solar circuit would power the clock’s display.

At the moment, [Jan] has a proof of concept circuit working, using the ultra-low-power microcontroller on a STM32L476 DISCOVERY board and a few 10 μF 0805 size capacitors, when fully charged by the solar panel, the clock’s display lasts for about two minutes.

Take a look at [Jan]’s project for more details, and check out his previous project where he narrowed down the components for a hundred-year power supply. [Jan]’s prototype can be seen in action after the break. Also take a look at this master clock that signals slave clocks and runs for a year on a single AA battery.

Continue reading “How To Run A Clock For A Century”

Custom Designed Keyboard Needs A Custom Made Metal Case

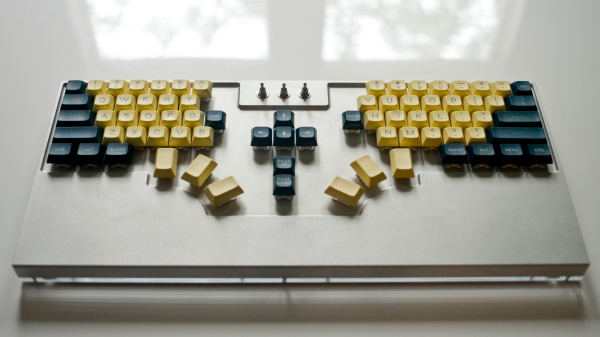
It’s hardly news that mechanical keyboard users love their keyboards.  When it comes to custom keyboards, though, [Cameron Sun] has taken things to the next level, by designing his own keyboard and then having the case custom milled from aluminum.  If a Macbook and an ErgoDox had a baby, it would look like this!

[Cameron] had been using a 60 percent keyboard (a keyboard with around 60% of the keys of a standard keyboard) but missed the dedicated arrow keys, as well as home/end and pgup/pgdown keys. Thus began the quest for the ultimate keyboard! Or, at least, the ultimate keyboard for [Cameron.]

Keyboards begin and end with a layout, so [Cameron] started with keyboard-layout-editor.com, a site where you can create your own keyboard layout with the number of keys you’d like. The layout was a bit challenging for [Cameron] using the online tool, so the editing was moved into Adobe Illustrator. Once the layout was designed, it was time to move on to the case. Wood was considered, but ultimately, aluminum was decided upon and the basic shape was milled and then the key holes were cut using a water jet.

An interesting addition to the keyboard were three toggle switches. These allow [Cameron] to choose a modified layout for use when gaming, and also to move some of the keys’ locations so that one side of the keyboard can be used for gaming.

Custom keyboard layouts are getting more and more popular and there are lots of DIY cases to hold those layouts. [Cameron] has upped the ante when it comes to cases, though. If you’re interested in building your own keyboard, we have you covered with articles like The A to Z of Building Your Own Keyboard. If you’re looking for more custom cases, perhaps a concrete one is what you want?

Via Reddit.

Nonpareil RPN HP-41 Calculator Build

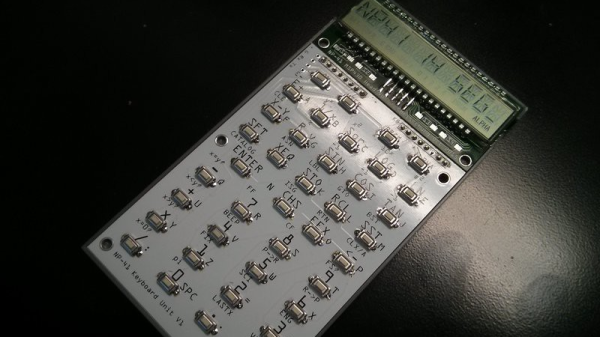
The early HP Reverse Polish Notation calculators have a special place in the hearts of engineers and tinkerers as there are lots of projects involving them. They haven’t been produced in decades, but [Chris Chung] has used some open source code to create DIY hardware version of the HP-41 Reverse Polish Notation (RPN) calculator.

The open source code behind the calculator is the Nonpareil High-Fidelity Calculator Simulator, and [Chris] has used it along with a custom designed readout and PCBs to create a working prototype. The simulator uses the original byte code of the HP-41 so the its behavior is exactly the same as the original calculator.

[Chris] has designed the PCBs so that the buttons and the screen are separate and join together. This neat idea means that he can try out different screens or different button PCBs and mix-and-match to find the combination that works best. He’s also designed a 3D printed case for the calculator. He does prefer using the bare buttons on the board to the 3D printed ones he printed for use with the case.

We love calculators here so there have been a bunch of articles over the years. Check out the documentation that comes along with this open source calculator, or check out this pocket calculator that emulates two other pocket calculators!

Continue reading “Nonpareil RPN HP-41 Calculator Build”

Laser Draws Weather Report

Have you ever wished that a laser could tell you the weather? If you have, then [tuckershannon] has you covered. He’s created a machine that uses a laser and some UV sensitive paper to draw the temperature and a weather icon! And that’s not all! It’s connected to the internet, so it can also show the time and print out messages.

Building on [tuckershannon]’s previous work with glow-in-the-dark drawing, the brains inside this machine is a Raspberry Pi Zero. The laser itself is a 5mw, 405nm laser pointer with the button zip-tied down. Two 28BYJ-48 stepper motors are used to orient the laser, one for the rotation and another for the height angle. Each stepper motor is connected to a motor driver board and then wired directly to the Pi.

The base and arm that holds the laser were designed in SolidWorks and then 3d printed. The stepper motors are mounted perpendicular to one another and then the laser pointer mounted at the end. The batteries have been removed from the laser and the terminals are also wired directly to the raspberry pi. The Pi is then connected to Alexa via IFTTT so that it can be controlled by voice from anywhere.

The real beauty of [tucker]’s laser drawing machine is that is will draw out the temperature and weather icon, as well as drawing the time in either digital or analog forms! We’ve seen [tuckershannon]’s work before. The precursors to this project were his clock which uses a robotic arm with a UV LED on it to draw the time and another clock which uses similar robotic arm only with a laser attached. Let’s hope we get to see the rest of [tucker]’s progress!

Continue reading “Laser Draws Weather Report”

Boozer Tells The Internet How Much You Drink (If You Want It To)

Over the past few years, Reddit user [callingyougoulet] has created Boozer, a DIY beer dispenser that keeps track of how much of your brew you have left in your kegs. Installed in a Keezer (a freezer that contains beer kegs and faucets) [callingyougoulet]’s dispenser uses a Raspberry Pi to keep track of things. A series of flow sensors determine how much liquid has passed through them and, when the drink is poured, can calculate how much you poured and how much you have left.

Starting with a chest freezer, [callingyougoulet] built a nice wooden surround as well as installed a tower on top to hold the faucets. The top of the freezer has nice granite tiles covering it, and some LED accent lighting adds to the end product. However, taking the granite off in order to get at the kegs inside takes some time (about 20 minutes.)

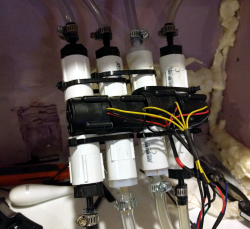
Inside the freezer is the Raspberry Pi and four flow sensors, each one connected to a GPIO port on the Pi. After some calibration, the Python code running on the Pi can calculate a pretty close estimate of the amount of liquid poured. There’s also a temperature sensor in the freezer, so that you can tell how cool your beer is.
If the build had stopped there, it would have been a great project as-is, but [callingyougoulet] added twitter, Slack and MQTT outputs as options, so that a home automation system (or the entire internet) can tell how much and when you’ve been drinking and, more importantly, you can know how much is left in your kegs! There are some very cool keg cooling builds on the site, such as, a kegerator built from the ground up, and a very elegant kegerator built on the cheap check them out for ideas!

Via Reddit.

This Robot Barfs Comics!

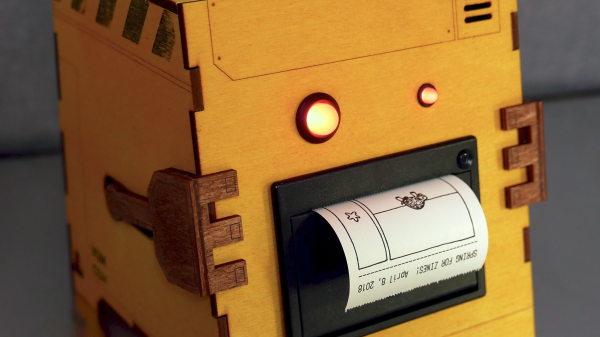
If there’s one thing that’s more fun than a comic, it’s a randomly generated comic. Well, perhaps that’s not true, but Reddit user [cadinb] wrote some software to generate a random comic strip and then built a robot case for it. Push a button on the robot and you’re presented with a randomly generated comic strip from the robot’s mouth.

The software that [cadinb] wrote is in Processing, an open source programming language and “sketchbook” for learning to code if you’re coming from a visual arts background. The Processing code determines how the images are cropped and placed and what kind of background they get. Each image is hand drawn by [cadinb] and has information associated with it so the code knows what the main focus of the image is. Once the panels are created, the final image is passed on to a thermal printer for printing. Everything is controlled from a Python script running on a Raspberry Pi and the code, strip artwork, and case is all available online to check out.

Now that the comic can print, a case is needed for the printer and controls. [cadinb] designed a case in Illustrator after creating a prototype out of foam core. The design was laser cut and then coloured – the main body with fabric dye and the arms stained with coffee!

Now [cadinb] has a robot that can sit on his table at conventions and a fan can press a button and have a randomly generated comic strip printed out before their eyes! We have a neat article about printing a comic on a strand of hair, and one about bringing the Banana Jr. 6000 to life!

Continue reading “This Robot Barfs Comics!”

Rey’s Blaster Shoots Glow-in-the-Dark Bullets

Youtuber and rubber band enthusiast [JoergSprave] is a big fan of Star Wars, and he loved the look of the blaster that Han Solo gave to Rey. He’d seen a few replicas of Rey NN-14 gun, but hadn’t seen any that actually fired anything, so he set out to make one that did.

The build itself is from plywood, with a paint job to make it look like an old blaster. What makes the build really cool is the bullets used: glow sticks! [Joerg] created space in the magazine for three glow sticks, so you’ve got a couple of shots before you have to reload. Crack ’em, load them up and then fire away!

The glow sticks give the blaster fire a great look (especially in the dark!) and it’s really easy to find the shots after you’ve fired them. We’ve featured [Joerg]’s builds a few times on the site, and his build videos are a lot of fun. Check out his compressed air crossbow bolt gatling gun, or his machete shooting slingshot.

Continue reading “Rey’s Blaster Shoots Glow-in-the-Dark Bullets”