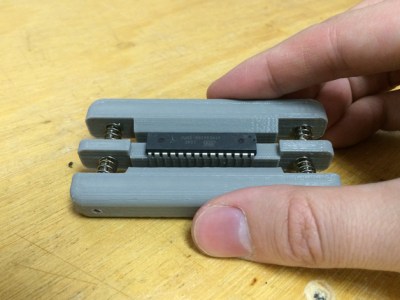
Underwater distributed sensor network

Open Source Underwater Distributed Sensor Network

One way to design an underwater monitoring device is to take inspiration from nature and emulate an underwater creature. [Michael Barton-Sweeney] is making devices in the shape of, and functioning somewhat like, clams for his open source underwater distributed sensor network.
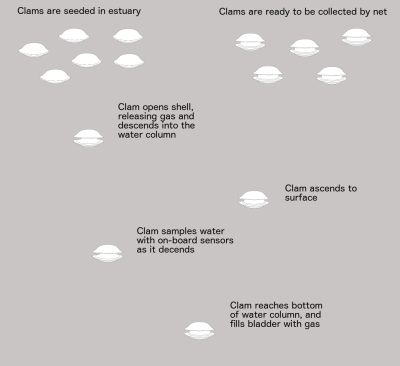
Underwater distributed sensor network descent and ascentThe clams contain the electronics, sensors, and means of descending and ascending within their shells. A bunch of them are dropped overboard on the surface. Their shells open, allowing the gas within to escape and they sink. As they descend they sample the water. When they reach the bottom, gas fills a bladder and they ascend back to the surface with their data where they’re collected in a net.

Thus far he’s made a few clams using acrylic for the shells which he’s blown himself. He soldered the electronics together free-form and gave them a conformal coating of epoxy. He’s also used a thermistor as a stand-in for other sensors and is already working on a saturometer, used for measuring the total dissolved gas (TDG) in the water. Knowing the TDG is useful for understanding and mitigating supersaturation of water which can lead to fish kills.

He’s also given a lot of thought into the materials used since some clams may not make it back up and would have to degrade or be benign where they rest. For example, he’s been using a lithium battery for now but would like to use copper on one shell and zinc on another to make a salt water battery, if he can make it produce enough power. He’s also considering using 3D printing since PLA is biodegradable. However, straight PLA could be subject to fouling by underwater organisms and would require cleaning, which would be time-consuming. PLA becomes soft when heated in a dishwasher and so he’s been looking into a PLA and calcium carbonate filament instead.

Check out his hackaday.io page where he talks about all these and more issues and feel free to make any suggestions.

RoMeLa's ALPHRED - quadruped robot

RoMeLa’s Sideways Walking Robot Has Evolved More Limbs

Despite the success shown in prototypes from groups like Boston Dynamics, bipedal walking is still really hard to implement. When the robot lifts one leg, it has to shift its center of gravity over the other leg to avoid falling sideways.

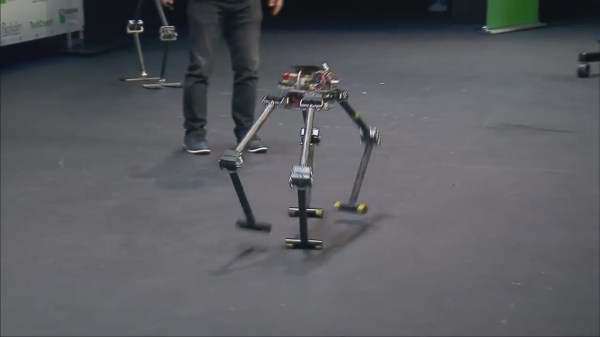
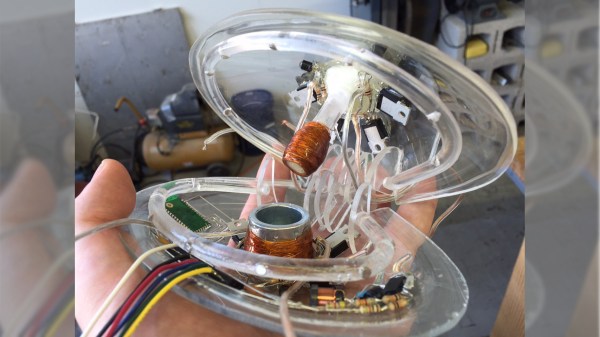
The Autonomous Legged Personal Helper Robot with Enhanced Dynamics (ALPHRED) is getting around this problem by coming at it from a different angle. ALPHRED walks sideways and throws away the distinction between arms and legs.

The bot is RoMeLa at UCLA’s latest evolution in their approach to traditional bipedal roadblocks. Sideways walking is something we covered when we talked about their previous version, NABi, which had only two legs. ALPHRED expands that to four limbs. As the video below shows, all four limbs can be used for walking using either a wide, stable sprawl or the limbs can reorient to a narrower dog or horse-like stance for faster running.

Beyond walking, one or two of the limbs can be put to use as hands to open a door or hand over a package, which is why they refer to them as limbs instead of legs or hands. Only an animation is shown of that configuration but RoMeLa is a robotics lab which we keep an eye on so we’ll let you know if they demonstrate it.

The video goes on to show a neat actuator with active compliance which they call BEAR, Back-drivable Electromagnetic Actuator for Robots. A search turned up no further details but let us know in the comments if you have any. We also liked seeing how they use a speaker to give a rough idea of the amount of current being drawn. While it’s both practical and a hack, it also adds a nice sci-fi touch.

Continue reading “RoMeLa’s Sideways Walking Robot Has Evolved More Limbs”

No-Battery HD Video Streaming Does It With Backscatter

What if Google Glass didn’t have a battery? That’s not too far fetched. This battery-free HD video streaming camera could be built into a pair of eyeglass frames to stream HD video to a nearby phone or other receiver using no bulky batteries or external power source. Researchers at the University of Washington are using backscatter to pull this off.

The problem is that a camera which streams HD video wirelessly to a receiver consumes over 1 watt due to the need for a digital processor and transmitter. The researchers have separated the processing hardware into the receiving unit. They then send the analog pixels from the camera sensor directly to backscatter hardware. Backscatter involves reflecting received waves back to where they came from. By adding the video signal to those reflected waves, they eliminated the need for the power-hungry transmitter. The full details are in their paper (PDF), but here are the highlights.

Battery-free camera design approach

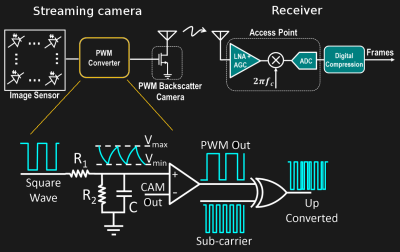
On the camera side, the pixel voltages (CAM Out) are an analog signal which is fed into a comparator along with a triangular waveform. Wherever the triangle wave’s voltage is lower than the pixel voltage, the comparator outputs a 0, otherwise, it outputs a 1. In this way, the pixel voltage is converted to different pulse widths. The triangular waveform’s minimum and maximum voltages are selected such that they cover the full possible range of the camera voltages.

The sub-carrier modulation with the XOR gate in the diagram is there to address the problem of self-interference. This is unwanted interference from the transmitter of the same frequency as the carrier. And so the PWM output is converted to a different frequency using a sub-carrier. The receiver can then filter out the interference. The XOR gate is actually part of an FPGA which also inserts frame and line synchronization patterns.

They tested two different implementations with this circuit design, a 112 x 112 grayscale one at up to 13 frames per second (fps) and an HD one. Unfortunately, no HD camera on the market gives access to the raw analog pixel outputs so they took HD video from a laptop using USB and ran that through a DAC and then into their PWM converter. The USB limited it to 10 fps.

The result is that video streaming at 720p and 10 fps uses as low as 250 μW and can be backscattered up to sixteen feet. They also simulated an ASIC which achieved 720p and 1080p at 60 fps using 321 μW and 806 μW respectively. See the video below for an animated explanation and a demonstration. The resulting video is quite impressive for passive power only.

If the University of Washington seems familiar in the context of backscatter, that’s because we’ve previously covered their battery-free (almost) cell phone. Though they’re not the only ones experimenting with it. Here’s where backscatter is being used for a soil network. All of this involves power harvesting, and now’s a great time to start brushing up on these concepts and building your own prototypes. The Hackaday Prize includes a Power Harvesting Challenge this year.

Continue reading “No-Battery HD Video Streaming Does It With Backscatter”

Richard Feynman: A Life Of Curiosity And Science

It was World War II and scientists belonging to the Manhattan Project worked on calculations for the atomic bomb. Meanwhile, in one of the buildings, future Nobel Prize winning theoretical physicist Richard Feynman was cracking the combination lock on a safe because doing so intrigued him. That’s as good a broad summary of Feynman as any: scientific integrity with curiosity driving both his work and his fun.

If you’ve heard of him in passing it may be because of his involvement on the Space Shuttle Challenger disaster commission or maybe you’ve learned something from one of his many lectures preserved on YouTube. But did you know he also played with electronics as a kid, and almost became an electrical engineer?

He was the type of person whom you might sum up by saying that he had an interesting life. The problem is, you have to wonder how he fit it all into one lifetime, let alone one article. We’ll just have to let our own curiosity pick and choose what to say about this curious character.

Continue reading “Richard Feynman: A Life Of Curiosity And Science”

Jeremy Cook's strandbeest kit RC conversion

Stepper Motor And Key Fob Controlled Strandbeest

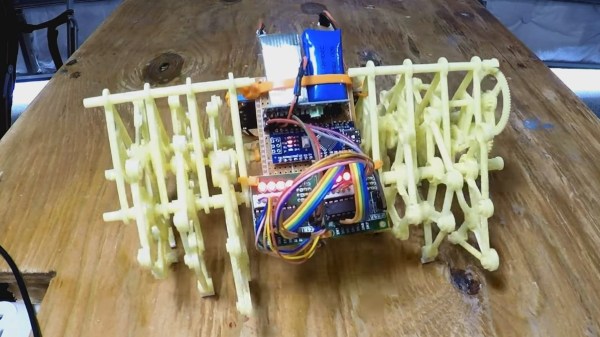
We never tire of watching Strandbeests with their multitude of legs walking around, and especially enjoy the RC ones. [Jeremy Cook], prolific Strandbeest maker, just made one by motorizing and adding remote control to a small, plastic wind-powered kit.

We’ve seen a Strandbeest kit conversion like this before, such as this DC motor one but it’s always interesting to see how it can be done differently. In [Jeremy’s], he’s gone with two inexpensive $2.00 stepper motors. The RC is done using a keyfob transmitter with a receiver board wired into an Arduino Nano’s analog pins. He tried driving it directly off the LiPo batteries but had issues which he solved by adding a 5-volt regulator. Check out his build and the modified Strandbeest walking around in the video below.

Continue reading “Stepper Motor And Key Fob Controlled Strandbeest”

Scratch-Built Ornithopter: Here’s How I Flapped My Way To Flight

One of humankind’s dreams has always been to fly like a bird. For a hacker, an achievable step along the path to that dream is to make an ornithopter — a machine which flies by flapping its wings. An RC controlled one would be wonderful, controlled flight is what everyone wants. Building a flying machine from scratch is a big enough challenge, and a better jumping-off point is to make a rubber band driven one first.

I experimented with designs which are available on the internet, to learn as much as possible, but I started from scratch in terms of material selection and dimensions. You learn a lot about flight through trial and error, and I’m happy to report that in the end I achieved a great little flyer built with a hobby knife and my own two hands. Since then I’ve been looking back on what made that project work, and it’s turned into a great article for Hackaday. Let’s dig in!

Continue reading “Scratch-Built Ornithopter: Here’s How I Flapped My Way To Flight”

GPS synchronized Nixie tube clock from kit

3D Printed Tool Tips To Straighten DIP Chips And Unstraighten Resistors

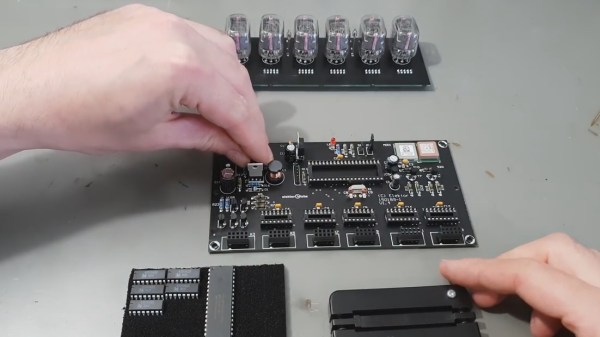
Watching someone assemble a kit is a great way to see some tools you may have not encountered before and maybe learn some new tricks. During [Marco Reps’] recent build of a GPS synchronized Nixie clock kit we spied a couple of handy tools that you can 3D print for your own bench.

Fresh from the factory Dual Inline Package (DIP) chips come with their legs splayed every so slightly apart — enough to not fit into the carefully designed footprints on a circuit board. You may be used to imprecisely bending them by hand on the surface of the bench. [Marco] is more refined and shows off a neat little spring loaded tool that just takes a couple of squeezes to neatly bend both sides of the DIP, leaving every leg the perfect angle. Shown here is a 3D printed version called the IC Pin Straightener that you can throw together with springs and common fasteners.
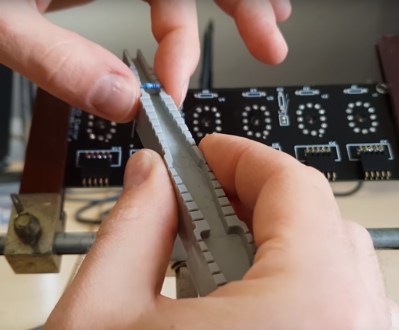
Another tool which caught our eye is the one he uses for bending the metal film resistor leads: the “Biegelehre” or lead bending tool. You can see that [Marco’s] tool has an angled trench to account for different resistor body widths, with stepped edges for standard PCB footprint spacing. We bet you frequently use the same resistor bodies so 3D printing is made easier by using a single tool for each width. If you really must copy what [Marco] is using, we did find this other model that more closely resembles his.

As for new tricks, there are a lot of small details worth appreciating in the kit assembly. [Marco] cleans up the boards using snips to cut away the support material and runs them over sandpaper on a flat surface. Not all Nixie tubes are perfectly uniform so there’s some manual adjustment there. And in general his soldering practices are among the best we’ve seen. As usual, there’s plenty of [Marco’s] unique brand of humor to enjoy along the way.

We have a warm spot in our heart for simple tools you can whip up on the ‘ole 3D printer. Check out the PCB vise, a set of ball and socket helping hands, and a collection of toolbag essentials.

Continue reading “3D Printed Tool Tips To Straighten DIP Chips And Unstraighten Resistors”