Magic 8-Ball Gets A Modern Makeover

Back in 2012, [sjm4306] was surprised when his breadboard rendition of the classic “Magic 8-Ball” popped up on Hackaday. If he had known the project was going to be enshrined on these hallowed pages, he might have tidied things up a bit. Now with nearly a decade of additional electronics experience, he’s back and ready to show off a new and improved version of the project.

The 3D printed case helps sell the look.

Conceptually, not much has changed from the original version. Press a button, get a random response. But on the whole the project is more refined, and not just because it’s moved over to a custom PCB.

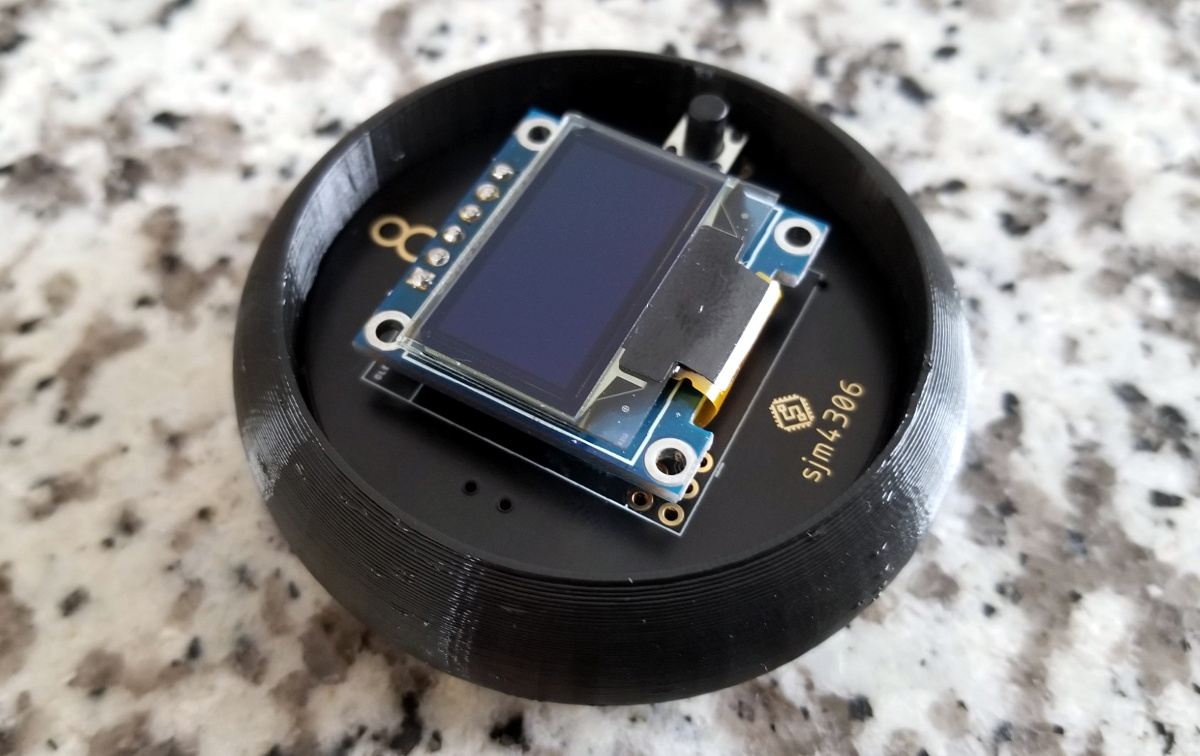
The original version used a PIC16F886 with a charge controller and experimental RTC, but this time around [sjm4306] has consolidated all the functionality into the ATmega328P and is powering the whole thing with a simple CR2032 coin cell. As you can see in the video after the break, assembly is about as quick and straight-forward as it gets.

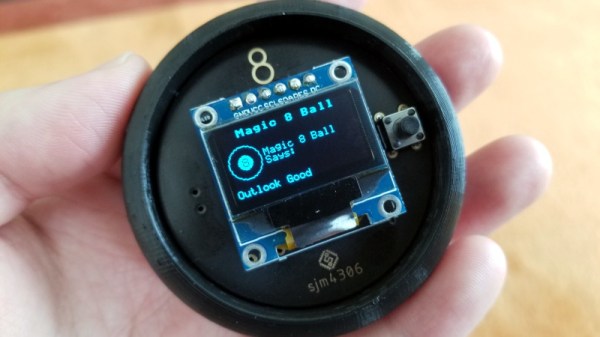
As with the original, there’s no accelerometer onboard. If you want to see a new message from your mystic companion, you’ve got to hold the button to “shake” the ball. A timer counts how long the button is held down, which in turn seeds the pseudorandom number generator that picks the response. Since each person will naturally hold the button for a slightly different amount of time, this keeps things from getting repetitive.

We don’t often see creators revisit their projects from the olden days, but we’d certainly like to. Consider this an open invitation to any hacker who wants to show off how much they’ve refined their skills; do-overs are always welcome here at Hackaday.

Continue reading “Magic 8-Ball Gets A Modern Makeover”

DIY ESP32 Video Doorbell Locks Out Big Brother

There’s no question that being able to see who’s at your front door from your computer or mobile device is convenient, which is why the market is currently flooded with video doorbells. Unfortunately, it’s not always clear who else has access to the images these devices capture. Organizations such as the Electronic Frontier Foundation have argued that by installing one of these Internet-connected cameras on their front door, consumers are unwittingly contributing to a mass surveillance system that could easily be turned against them.

Luckily, there’s a solution. As [Sebastian] shows in his latest project, you can build your own video doorbell that replicates the features of the commercial offerings while ensuring you’re the only one who has access to the data by leveraging open source, community developed projects such as ESPHome and Home Assistant. At the same time, modern manufacturing techniques like desktop 3D printing and low-cost PCB fabrication mean your DIY doorbell doesn’t have to look like you made it yourself.

The project starts with a custom PCB that combines the ESP32, a camera module, a capacitive touch sensor, a relay to optionally trigger an electronic door lock, and a DC-DC converter that will let you power the device from a wide range of input voltages. The board even has a spot where you can solder on an additional 8 MB of external PSRAM for the ESP32, which will enable the chip to capture higher resolution video.

The electronics are housed in a minimalistic 3D printed enclosure that would fit right in alongside similar gadgets from the likes of Ring and Arlo; especially if you have access to a CNC and can cut the front panel out of acrylic. The lighted touch sensor looks phenomenal, and really gives the device a professional feel. That said, it doesn’t look like the case would last very long if exposed to harsh weather and there are some obvious physical security issues with this approach. But to be fair, we’ve seen the same problem with commercial hardware.

Naturally with a project like this, the hardware is only half of the story. It takes a considerable amount of software poking and prodding to get things like mobile device notifications working, and as a special added annoyance, the process is different depending on which MegaCorp produced the OS your gadget is running. [Sebastian] has documented the bulk of the process in the video after the break, but the finer points will likely need some adjustment depending on how you want to set things up.

This is an exceptionally impressive project for sure, but if the whole slick futuristic look isn’t your style, you could always opt to go with the DIY video door bell that looks like it came from an alternate reality version of 1986.

Continue reading “DIY ESP32 Video Doorbell Locks Out Big Brother”

New Part Day: Hackboard 2, An X86 Single-Board Computer

From the old Gumstix boards to everyone’s favorite Raspberry Pi, common single-board computers (SBCs) have traditionally had at least one thing in common: an ARM processor. But that’s not to say hackers and makers haven’t been interested in an SBC with a proper x86 processor. Which is why the $99 Hackboard 2 is so exciting. With a modern x86 chip at the core it’s akin to a small footprint desktop motherboard, but with all the extra features that we’ve come to expect in a hacker-friendly SBC.

So what’s the big deal? In a word, compatibility. The fact that these diminutive computing devices shied away from the x86 architecture that most of us have been using on our desktops and laptops since the 1980s originally introduced software compatibility issues, but this was largely outweighed by the advantages of ARM. The latest NVIDIA Jetson is running on an ARM chip for the same reason the smartphone in your pocket is: they’re smaller, cheaper, and more energy efficient than x86.

However they’re rarely more powerful. Even the latest and greatest Raspberry Pi 4, often touted as a viable desktop replacement thanks to its quad core Cortex-A72, will get absolutely trounced by the pokiest of Intel’s Celeron CPUs. The performance gap is just too great. While the Pi can admirably handle most of the tasks the hacker community asks of it, there will always be a call for a board that puts raw processing power before anything else.

Sucking down nearly 40 watts at full tilt, the Hackboard 2 isn’t the SBC you’d want to use for a solar powered weather station. But if you’re putting together a set top box to play back video and run the occasional emulator, its Celeron N4020 processor and Intel UHD 600 GPU represent the most powerful combination available for a device of this size.

Continue reading “New Part Day: Hackboard 2, An X86 Single-Board Computer”

TI EZ430-Chronos Turned Medical Alert Wearable

Long before the current smartwatch craze, Texas Instruments released the eZ430-Chronos. Even by 2010s standards, it was pretty clunky. Its simple LCD display and handful of buttons also limited what kind of “smart” tasks it could realistically perform. But it did have one thing going for it: its SDK allowed users to create a custom firmware tailored to their exact specifications.

It’s been nearly a decade since we’ve seen anyone dust off the eZ430-Chronos, but that didn’t stop [ogdento] from turning one into a custom alert device for a sick family member. A simple two-button procedure on the watch will fire off emails and text messages to a pre-defined list of contacts, all without involving a third party or have to pay for a service contract. Perhaps most importantly, the relatively energy efficient eZ430 doesn’t need to be recharged weekly or even daily as would be the case for a modern smartwatch.

To make the device as simple as possible, [ogdento] went through the source code for the stock firmware and commented out every function beyond the ability to show the time. With the watch’s menu stripped down to the minimum, a new alert function was introduced that can send out a message using the device’s 915 MHz CC1101 radio.

Messages and recipients can easily be modified.

The display even shows “HELP” next to the appropriate button so there’s no confusion. A second button press is required to send the alert, and there’s even a provision for canceling it should the button be pressed accidentally.

On the receiving side, [ogdento] is using a Raspberry Pi with its own CC1101 radio plugged into the USB port. When the Python scripts running on the Pi picks up the transmission coming from the eZ430 it starts working through a list of recipients to send messages to. A quick look at the source code shows it would be easy to provide your own contact list should you want to put together your own version of this system.

We’ve seen custom alert hardware before, but like [ogdento] points out, using the eZ430-Chronos provides a considerable advantage in that its a turn-key platform. It’s comfortable to wear, reliable, and fairly rugged. While some would argue against trusting independently developed code for such a vital task, at least the hardware is a solved problem.

Watch Life Tick Away, One LED Segment At A Time

In the grand scheme of things, a single human lifetime is a drop in the bucket. Even if we don’t like to acknowledge it, we all know the meter is running so to speak. Yet you’re still squandering your precious time on this Earth by reading Hackaday instead of doing something constructive. Of course nobody is burning up more time on this site than those of us who are writing it all, so don’t feel too bad.

To remind us that life is fleeting, [Dries Depoorter] has designed the Shortlife: a device that counts down until your expected departure date. Before you get too excited, it can’t predict the future. The gadget is programmed with the vital statistics for the individual user, and data provided by the World Health Organization is used to calculate how much of your estimated life expectancy has already elapsed. Some would find this information depressing, while others will no doubt look at it as a source of inspiration. Us? We just think its a slick piece of gear.

The Shortlife is made up of a custom PCB mounted to a marbled block of recycled plastic. On the board there’s an ATmega328 microcontroller, a MAX7219 LED driver, and of course the red LED segment displays. Three of them are the classic seven count, while the rightmost display sports fourteen segments for a bit of added accuracy. All the user has to do if they want to watch their remaining time slip away is plug the device into a USB power source and set the current time.

We’ve seen similar mortal countdown clocks in the past, but the Shortlife certainly brings a certain level of elegance to the idea. Plus we also like the fact that you’re just a line of code or two away from having the display tick down to some other date in the future when that whole existential crisis kicks in

Solar Pi Zero E-Paper Photo Frame Waits For The Right Moment

One of the biggest advantages of electronic paper is that it doesn’t require a constant power source to display a static image. Depending on the application, this can lead to a massive energy savings compared to more traditional display technologies. Of course, the electronics that actually drive the display are another story entirely. You need to reduce the energy requirements of the whole system if you really want to stretch your battery life.

So when [Giacomo Miceli] wanted to put together this solar powered e-paper photo frame, he had to come up with some creative ways to curb the energy consumption of the Raspberry Pi Zero that runs the show. While the 10.3 inch 1872 × 1404 panel would only require the occasional burst of power to flick over to a new image, the Pi would be a constant drain on the internal battery pack. Considering he wanted the frame to recharge from ambient light with an array of small solar panels, that simply wouldn’t do.

The solution came in the form of a PiJuice HAT and some scripts that decide how often the Pi is to be powered on based on the current battery level. If there’s enough power, it might be every hour or so. But the lower the charge, the longer the delay. When the energy situation is particularly dire, the Pi might only be turned on every couple of days. With the Pi off and the e-paper not drawing any power, all of the energy produced by the solar panels can be devoted to recharging the frame’s 1,000 mAh battery.

When the Pi does get booted up, it quickly connects to a server to download a new image and update the display. After that, it ascertains the current battery level and determines how long the PiJuice should wait before turning it back on. After these tasks are complete, it will turn itself off until the next scheduled event. All told, [Giacomo] says the Pi is only up and running for about a minute each time the image is refreshed on the e-paper. He says the system has been running for six weeks now, with the battery level occasionally dipping down to 40% or so before it climbs back up.

Admittedly the energy consumption of the frame could be cut drastically by replacing the Raspberry Pi with a simple microcontroller, but we appreciate the creativity. Besides, the power and flexibility afforded by the Pi means this frame could be taught quite a few new tricks with some updated software.

Hackaday Podcast 098: China’s Moon Rocks, Antikythera Revelations, Creality Vs Octoprint, And RC Starship

Hackaday editors Elliot Williams and Tom Nardi contemplate a few of the most interesting stories that made their way through the tubes this week. We’ll learn how old VHS tapes can be turned into a unique filament for your 3D printer, and realize that the best way to learn about a 2,000 year old computer is to break out the hand drill and make one yourself. Hobby grade RC gear and a some foam board stand in for SpaceX’s next-generation Mars spacecraft, and a manufacturer of cheap 3D printers attempts to undercut a popular open source project with hilarious results. Finally, we’ll take a close look at some hidden aluminum boogers and discuss how China’s history making trek to the Moon might be a prelude to the country making a giant leap of their own.

Take a look at the links below if you want to follow along, and as always, tell us what you think about this episode in the comments!

Direct download (60 MB)

Places to follow Hackaday podcasts:

Continue reading “Hackaday Podcast 098: China’s Moon Rocks, Antikythera Revelations, Creality Vs Octoprint, And RC Starship”