A Curiously Strong Z80 In Your Pocket

Like many hackers, [Tom Szolyga] has soft spot for the venerable Z80. The number of instructions and registers made it relatively easy to program in ASM, and he still has fond memories of the refreshingly straightforward CP/M operating system he used to run on them back in the day. In fact, he loves Z80 computers so much he decided to build one that he could carry around in his pocket.

The result is the Minty Z80, so-called because it lives inside a tin formerly inhabited by every hacker’s favorite curiously strong mint. But the goal of this build wasn’t just to make it small, but also make it convenient to work with. [Tom] is using a ATmega32A to help interface the Z84C0008 microprocessor with the modern world, which allows for niceties such as support for a micro SD card. There’s no onboard USB-to-serial capability, but with an external adapter connected to the Minty’s header, it’s easy to use log into this microcosm of classic computing with a terminal emulator running on a computer or mobile device.

[Tom] has provided the schematics and Bill of Materials for the Minty Z80 on the project’s Hackaday.io page, but as of the latest update, he’s holding off on releasing the board files until he’s sure that all the bugs have been worked out. There’s no word yet if he found any show stoppers in the first iteration of the board design, but he’s posted a picture of the fully assembled miniature retrocomputer in all its glory which seems like a good sign.

The design of the Minty Z80 is similar to that of the Z80-MBC2 by [Just4Fun], but on an even smaller scale. It’s encouraging to see several projects leveraging modern design and components to prevent classic computing from becoming little more than a distant memory.

India’s Moon Mission Is Far From Over

India’s Chandrayaan-2 mission to the Moon was, in a word, ambitious. Lifting off from the Satish Dhawan Space Centre on July 22nd, the mission hoped to simultaneously deliver an orbiter, lander, and rover to our nearest celestial neighbor. The launch and flight to the Moon went off without a hitch, and while there were certainly some tense moments, the spacecraft ultimately put itself into a stable lunar orbit and released the free-flying lander so it could set off on its independent mission.

Unfortunately, just seconds before the Vikram lander touched down, an anomaly occurred. At this point the Indian Space Research Organisation (ISRO) still doesn’t know exactly what happened, but based on the live telemetry stream from the lander, some have theorized the craft started tumbling or otherwise became unstable between three and four kilometers above the surface.

Telemetry indicates a suboptimal landing orientation

In fact, for a brief moment the telemetry display actually showed the Vikram lander completely inverted, with engines seemingly accelerating the spacecraft towards the surface of the Moon. It’s unclear whether this was an accurate depiction of the lander’s orientation in the final moments before impact or a glitch in the real-time display, but it’s certainly not what you want to see when your craft is just seconds away from touchdown.

But for Chandrayaan-2, the story doesn’t end here. The bulk of the mission’s scientific goals were always to be accomplished by the orbiter itself. There were of course a number of scientific payloads aboard the Vikram lander, and even the Pragyan rover that it was carrying down to the surface, but they were always secondary objectives at best. The ISRO was well aware of the difficulties involved in making a soft landing on the Moon, and planned their mission objectives accordingly.

Rather than feel sorrow over the presumed destruction of Vikram and Pragyan, let’s take a look at the scientific hardware aboard the Chandrayaan-2 orbiter, and the long mission that still lies ahead of it.

Continue reading “India’s Moon Mission Is Far From Over”

Scratch Built Media Player Channels 1980s Design

No, you aren’t looking at a 30 year old Teac graphic equalizer that somebody modified. The MWA-002 Network Music Player created by [GuzziGuy] is built entirely from new components, and easily ranks up there with some of the most gorgeous pieces of homebrew audio gear we’ve ever seen. Combining modular hardware with modern manufacturing techniques, this 1980s inspired build is a testament to how far we’ve come in terms of what’s possible for the dedicated hacker and maker.

The enclosure, though it looks all the world like a repurposed piece of vintage hardware, was built with the help of a CNC router. It’s constructed from pieces of solid oak, plywood, and veneered MDF that have all been meticulously routed out and cut. Even the front panel text was engraved with the CNC and then filled in with black paint to make the letters pop.

Internally, the MWA-002 is powered by a Raspberry Pi 3 running Mopidy to play both local tracks and streaming audio. Not satisfied with the Pi’s built-in capabilities, [GuzziGuy] is using a Behringer UCA202 to produce CD-quality audio, which is then fed into a TPA3116 amplifier. In turn, the output from the amplifier is terminated in a set of female jacks on the player. Just like the stereo equipment of yore, this player is designed to be connected to a larger audio system and doesn’t have any internal speakers.

The primary display is a 256×64 Futaba GP1212A02A FVD which has that era-appropriate glow while still delivering modern features. [GuzziGuy] says it was more difficult to interface with this I2C display than the LCDs he used in the past due to the lack of available libraries, but we think the final product is proof it was worth the effort. He bought both the VFD spectrum analyzer and LED VU meter as turn-key modules, but the center equalizer controls are completely custom; with dual MCP3008 ADCs to read the state of the sliders and the Linux Audio Developer’s Simple Plugin API (LADSPA) to tweak the Pi’s audio output accordingly.

We’re no strangers to beautiful pieces of audio gear here at Hackaday, but generally speaking, most projects involve modernizing or augmenting an existing device. While those projects are to be admired, the engineering that goes into creating something of this caliber from modular components and raw building materials is really an accomplishment on a whole different level.

Atomic Pi Gets A 3D-Printed Mac Makeover

The Atomic Pi is a pretty impressive piece of kit for the price, but it’s not exactly a turn-key kind of product. Even to a greater extent than what you might normally expect with a “dev” board like this, the user is responsible for putting together the rest of the pieces required to actually utilize it. But with this design by [Renri Nakano], you can turn the Atomic Pi into something that’s dangerously close to being a practical computer, and a trendy one at that.

Inspired by the 2019 Apple Mac Pro “Cheese Grater”, this 3D printable enclosure for the Atomic Pi is equal parts form and function. It integrates the necessary power supply to get things up and running without the need for the official breakout board or power module, which is good, since at the time of this writing they don’t seem to be available anyway. Plus it has a cool looking power button, so that’s got to count for something.

There’s also an integrated USB hub to give the Atomic Pi a bit more expandability, and a short HDMI extension cable that puts a video port on the back of the case. [Renri] even thought to leave an opening so you could run the wires for your wireless antennas.

At this point, we’ve seen several projects that mimic the unique case design of the 2019 Mac Pro. The level commitment ranges from recreating the design in CAD and milling it out of aluminum to just sticking a Raspberry Pi inside of a literal cheese grater from the kitchen. Naturally we enjoy a well executed Internet meme as much as the next hacker, but all the same, we were glad to see [Renri] put in the effort to make sure this case was more than just a pretty face.

[Thanks to baldpower for the tip.]

DJ Xiaomi Spins Beats And Brushes At The Same Time

Direct from the “Just Because I Can” department, this blog post by [Eddie Zhang] shows us how easy it is to get the Xiaomi robotic vacuum cleaner working as what might be the world’s most unnecessary Spotify Connect speaker. Will your home be the next to play host to an impromptu performance by DJ Xiaomi? Judging by the audio quality demonstrated in the video after the break, we doubt it. But this trick does give us a fascinating look at the current state of vacuum hacking.

For the first phase of this hack, [Eddie] makes use of Dustcloud, an ongoing project to document and reverse engineer various Xiaomi smart home gadgets. Using the information provided there you can get root-level SSH access to your vacuum cleaner and install your own software. There’s a sentence you never thought you’d read, right?

With the vacuum rooted, [Eddie] then installs a Spotify Connect client intended for the Raspberry Pi. As they’re both ARM devices, the software will run on the Xiaomi bot well enough, but the Linux environment needs a little tweaking. Namely, you need to manually create an Upstart .conf file for the service, as the vacuum doesn’t have systemd installed. There goes another one of those unexpected sentences.

We’re certainly no stranger to robotic vacuum hacking, though historically the iRobot Roomba has been the target platform for such mischief. Other players entering the field can only mean good things for those of us who get a kick out of seeing home appliances pushed outside of their comfort zones.

Continue reading “DJ Xiaomi Spins Beats And Brushes At The Same Time”

Steel Battalion Controller Grows Up And Gets A Job

We’re going to go out on a limb here and say that the controller for Steel Battalion on the original Xbox is the most impressive video game peripheral ever made. Designed to make players feel like they were really in the cockpit of a “Vertical Tank”, the controller features dual control sticks, three pedals, a gear selector, and dozens of buttons, switches, and knobs. Unfortunately, outside of playing Steel Battalion and its sequel, there’s not a whole lot you can do with the monstrous control deck.

HID Report Descriptor

But now, nearly 20 years after the game released, [Oscar Sebio Cajaraville] has not only developed an open source driver that will allow you to use the infamous mech controller on a modern Windows machine, but he’s part of the team developing a new game that can actually be played with it. Though gamers who are imagining piloting a futuristic combat robot in glorious 4K might be somewhat disappointed to find that this time around, the Steel Battalion controller is being used to operate a piece of construction equipment.

In his blog post, [Oscar] focuses on what it took to develop a modern Windows driver for a decades old controller. It helps that the original Xbox used what was essentially just a rewiring of USB 1.0 for its controllers, so connecting it up didn’t require any special hardware. Unfortunately, while the controller used USB to communicate with the console, it was not USB-HID compliant.

As it turns out, Microsoft actually provides an open source example driver that’s specifically designed to adapt non-HID USB devices into a proper game controller the system will recognize. This gave [Oscar] a perfect starting point, but he still needed to explore the controller’s endpoints and decode the data it was sending over the wire. This involved creating a HID Report Descriptor for the controller, a neat trick to file away mentally if you’ve ever got to talk to an oddball USB device.

In the end, [Oscar] created a driver that allows players to use the Steel Battalion controller in his game, BH Trials. Unfortunately there’s something of a catch, as drivers need to be signed by a trusted certification authority before Windows 10 will install them. As he can’t quite justify the expense of this step, he’s written a second post that details what’s required to turn driver signing off so you can get the device working.

Earlier this year we saw an incredible simulator built around the Steel Battalion controller, were an external “coach” could watch you play and give you tips on surviving the virtual battlefield. But even that project still used the original game; hopefully an open source driver that will get this peripheral working on Microsoft’s latest OS will help spur the development of even more impressive hacks.

Continue reading “Steel Battalion Controller Grows Up And Gets A Job”

Particle Mesh Powers The Internet Of Fans

With the winter months not far off, [Ben Brooks] was looking for a way to help circulate the heat from his wood-burning fireplace throughout his home. Rather than go with a commercial solution, he decided to come up with his own automated air circulation system powered by the mesh networking capabilities of one of his favorite pieces of tech, the Particle Photon.

Particle Xeon remote sensor

The idea here is pretty simple: use a remote temperature sensor to tell a fan located behind the fireplace when it’s time to kick on and start sharing some of that warmth with the rest of the house. But as usual, it ended up being a bit trickier than anticipated. For one, when [Ben] took a close look at the Vornado 660 fan he planned on using, he realized that its speed controller was “smart” enough that simply putting a relay on the AC line wouldn’t allow him to turn it on and off.

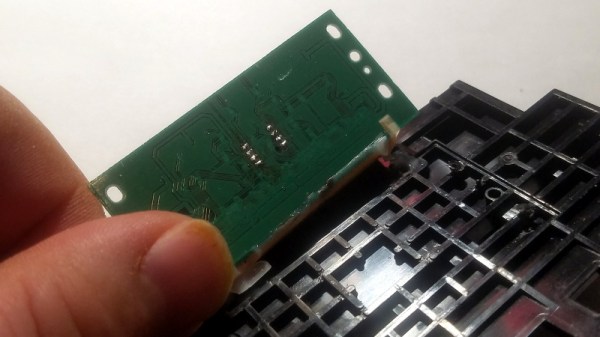
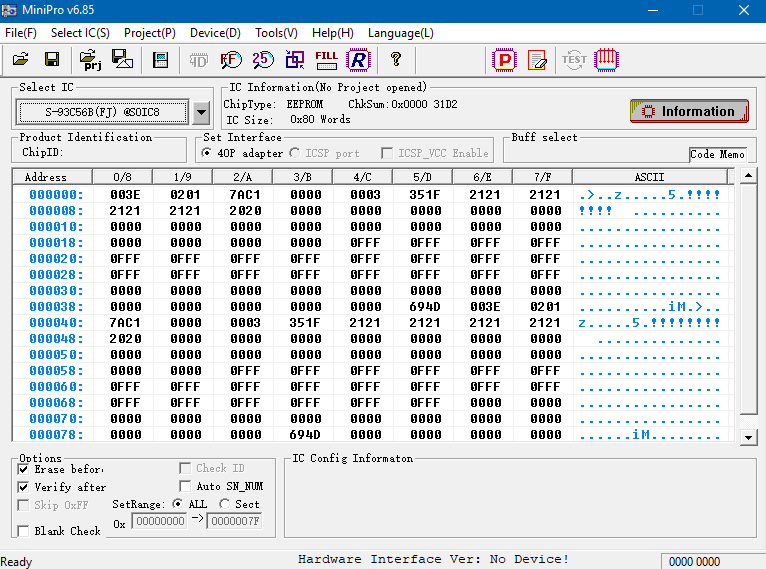
So he had to do some reverse engineering to figure out how the Sonix SN8P2501B microcontroller on the board was controlling the fan, and then wire the Photon directly to the pins on the chip that corresponded with the various physical controls. This allows the Photon to not only “push” the buttons to trigger the different speeds, but also read the controls to see if a human is trying to override the current setting.

For the remote side [Ben] is using a Particle Xenon, which is specifically designed for Internet of Things endpoints and sensor applications. Combined with a TMP36 temperature sensor and 3.7 V 500 mAh battery, this allowed him to easily put together a wireless remote thermometer that will publish the current temperature to the Photon’s mesh network at regular intervals.

This isn’t the first time we’ve seen the Particle Photon used to augment an unassuming piece of hardware. We’ve previously seen one get grafted into a coffee maker, and if you can believe it, somebody even stuck one inside an umbrella to create a mobile weather station.