We’re no stranger to Power Wheels modifications, from relatively simple restorations to complete rebuilds which retain little more than the original plastic body. These plastic vehicles have the benefit of nostalgia to keep the adults interested, and naturally kids will never get tired of their own little car or truck to tear around the neighborhood in. Many toys come and go, but we don’t expect Power Wheel projects to disappear from our tip line anytime soon.
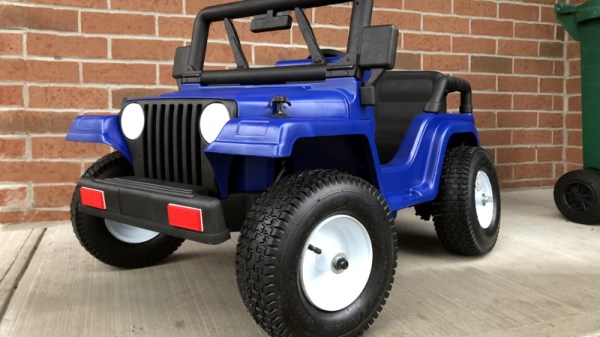
 Today’s project starts with a straightforward Power Wheels restoration story: [myromes] picked up a well-worn Jeep and decided that it needed a fresh coat of paint and some tweaks before handing the keys over to the next generation. But in an interesting spin, he decided to try mounting proper pneumatic tires on it in hopes they might imbue the pint-sized Jeep with some of the abilities of its full scale inspiration. But as it turned out, the project wasn’t quite the Sunday drive he was hoping for.
For one thing, the new wheels were much thicker than the old ones. This meant cutting away some of the plastic where they mounted so he could get the shafts to slide all the way through. At 5/16″, the original Power Wheels shafts were also thinner than what the axle the wheels were designed for. Luckily, [myromes] found that a small piece of 1/2″ PEX water pipe made a perfect bushing. Then it was just a matter of buying new push nuts to lock them in place.
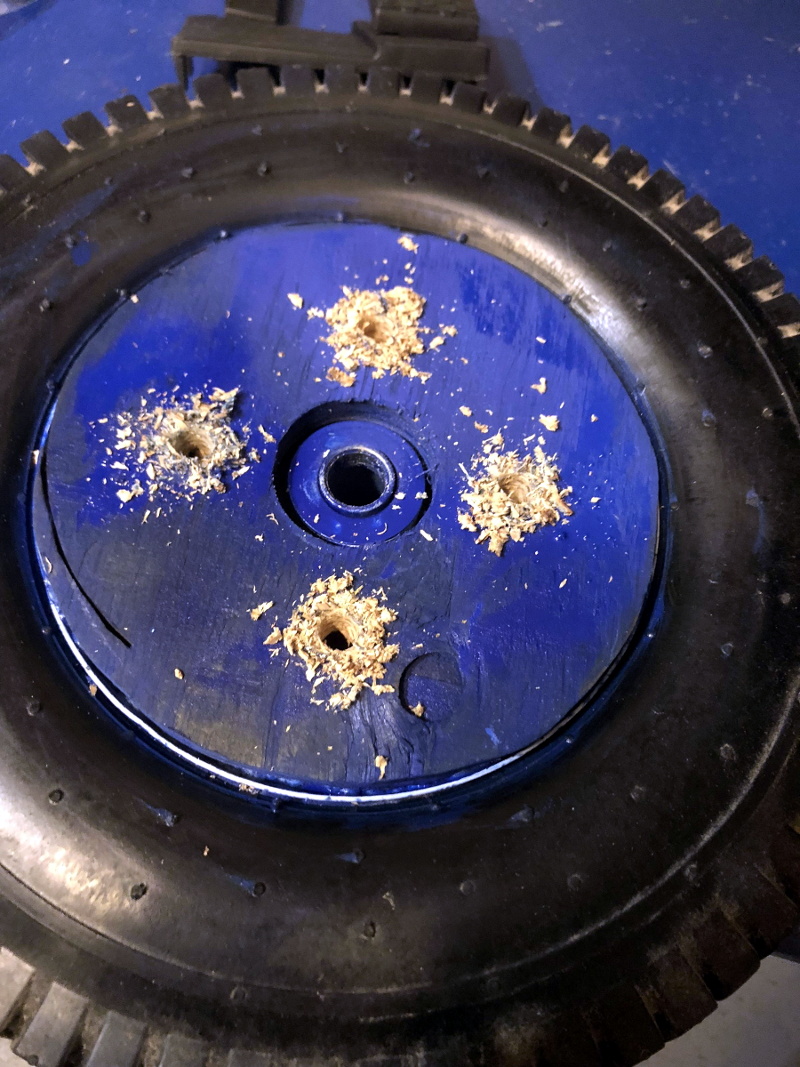
That got the front wheels on, but that was the easy part. The rears had to interface with the Jeep’s motors somehow. To that end, he cut out circles of plywood and used an equal amount of Gorilla Glue and intense pressure to bond them to the new wheels. He then drilled four holes in them which lined up with the original motor mounts so he could bolt them on.
Things were going pretty well until he tried to replace the Jeep’s rear axle with a length of threaded rod from the hardware store. It wasn’t nearly strong enough, and sagged considerably after just a few test rides. He eventually had to place it with a correctly sized piece of cold rolled steel rod to keep the car from bottoming out.
While the new wheels certainly perform better than the original hard-plastic ones, there’s a bit of a downside to this particular modification. The slippy plastic wheels were something of a physical safety to keep the motors and gearboxes from getting beat up to bad; with wheels that have actual grip, the Jeep’s stock gears are probably not long for this world. But [myromes] says he’s got plans for future upgrades to the powertrain, so hopefully the issue will be resolved before the little ones need a tow back home.
For more tales from the Power Wheels garage, you might want to take a look at this fantastic rebuild complete with digital speedometer or just head straight to the big leagues with some seriously upgraded rides.