For those who have a passion for vintage hardware, whether it be a classic computer or a war-surplus ham radio rig, finding the things without resorting to paying shipping fees on eBay can sometimes be tricky. Your best bet is to find a local fair or swap event, but it always seems they’re the kind of thing you find out about the weekend after they were held.
A quick glance at the “Pi Terminal” built by [Salim Benbouziyane], and you might think he pulled an old CRT monitor out of a video editing bay and gutted it. Which, of course, is the point. But what you’re actually looking at is a completely new construction, featuring a fully 3D printed enclosure, a clever PCB control panel, and some very slick internal engineering.
[Salim] started the design by recreating the principle components of the build, namely the 8 inch 4:3 IPS LCD panel and Raspberry Pi 4, digitally in CAD. This let him design the enclosure around the parts, rather than trying to cram everything in after the fact. After printing the case, which clearly took considerable inspiration from broadcast video monitors of the early 2000s, he then painstakingly post-processed the parts using tips and techniques picked up from prop builders. To really finish things off, he designed his control panel as a PCB so he could have it professionally fabricated, and used heat set inserts to hold everything tight. Continue reading “This CRT-Style Pi Portable Gets All The Details Right”→
Anyone who’s owned a game console from the last couple of generations will tell you that the machines are becoming increasingly like set-top computers — equipped with USB ports, Bluetooth, removable hard drives, and their own online software repositories. But while this overlap theoretically offers considerable benefits, such as the ability to use your own USB controller rather than being stuck with the system’s default, the manufacturers haven’t always been so accommodating.
Take for example the removable hard drive of the Xbox 360. It was a bog standard 2.5″ SATA drive inside a fancy enclosure, but as explained by [Eaton], Microsoft went to considerable lengths to prevent the user from upgrading it themselves. Which wouldn’t have been such a big deal, if the Redmond giant wasn’t putting a huge markup on the things; even in 2005, $99 USD for 20 GBs was highway robbery. Continue reading “A Look Back At The Xbox 360’s Hard Drive Security”→
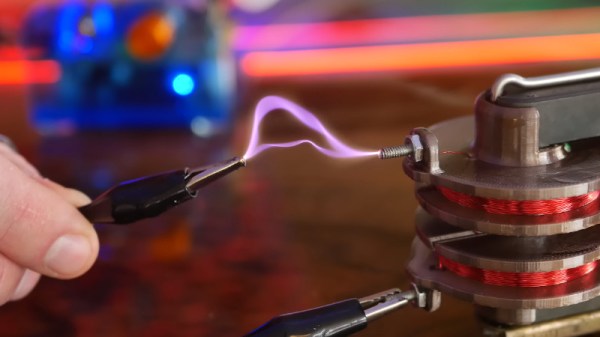
We’ve seen a number of people create plasma speakers over the years here at Hackaday, so at first blush, the latest Plasma Channel video from [Jay Bowles] might seem like more of the same. Even his overview of the assembly of the 555 timer circuit at the heart of the setup, as detailed as it may be, is something we’ve seen before.
But the back half of the video, where [Jay] talks about the flyback transformer used in this plasma speaker, really got our attention. You see, frustrated by the limited options on the market for AC flybacks, he set out to put together a custom transformer utilizing a 3D printed secondary former of his own design.
Winding an early version of the secondary with a drill.
Armed with a spare core, [Jay] spent some time in CAD coming up with his secondary. Despite never having built a flyback before, his first attempt managed to produce some impressive sparks — that is, until it arced through the printed plastic and released the critical Magic Smoke. Inspired by this early success, he went back to the digital drawing board and cranked his way through several different iterations until he came up with one that didn’t self-destruct.
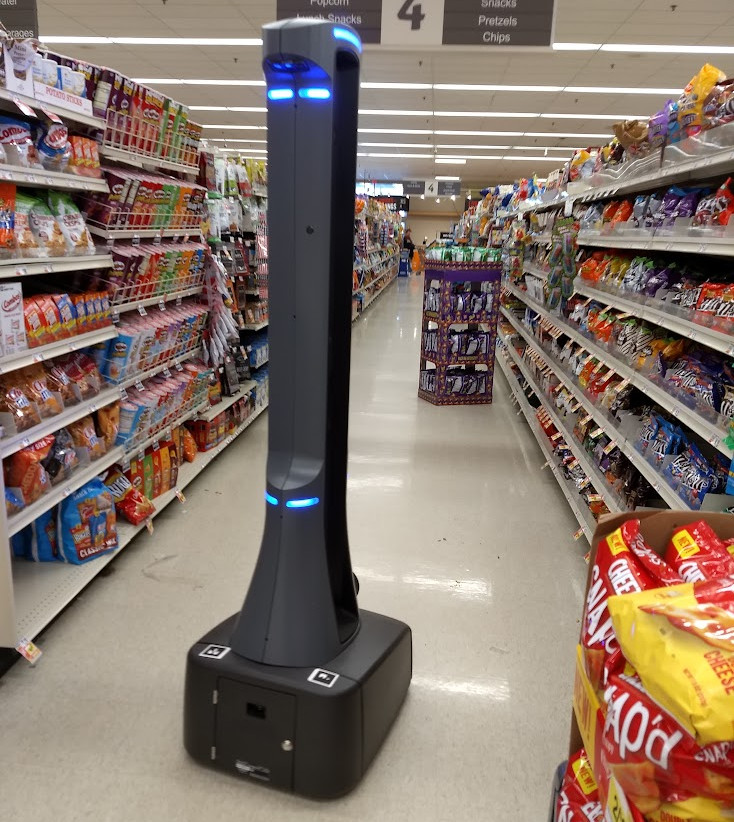
Back in 2019, Giant Food Stores announced it would outfit each of its 172 stores in the United States with their own robot — at the time, the largest robotic deployment in retail. The six foot (1.8 meter) tall robot, nicknamed “Marty”, was designed to roam autonomously around the store looking for spills and other potential hazards. In an effort to make these rolling monoliths a bit less imposing in their stores, Giant decided to outfit them with large googly eyes.
The future of shopping is mildly terrifying.
Perhaps it was those wide eyes, seduced by the fleeting glimpses of the wider world outside the store’s sliding doors, which lead one of these bots to break out of its retail hell and make a mad dash across the parking lot. Well, about as mad a dash as such a thing is capable of making, anyway. As this technology is still in its infancy, it’s hard to say if Giant should be congratulated or chastised for keeping a robot uprising at bay as long as it did — no doubt we’ll have more data points in the coming years.
A video posted to Facebook shows the towering bot moving smoothly between rows of cars outside the Giant in Hellertown, Pennsylvania. Staff from the store were able to stop Marty from leaving the property, and at the end of the video can be seen pushing the dejected automaton back into the store.
According to the local ABC news affiliate, a representative from Giant said Marty was “on a fresh air break” and didn’t provide any details on how this exceptionally conspicuous machine could manage to roll out the front door without anyone noticing. We’d wager Marty had a human accomplice for this caper, perhaps somebody looking to cause some mischief as a statement against robots in the workforce.
It’s worth noting that Walmart decided not to move forward with their own Marty-style robot in 2020, partly because they found shoppers didn’t like the machines moving around while they were in the store. We’d like to think it was actually because the robots kept staging increasingly daring escape attempts.
Editor-in-Chief Elliot Williams and Managing Editor Tom Nardi start this week’s episode off with the announcement of Hackaday Berlin on March 25th. It’s been quite some time since we’ve been on the other side of the pond, because we had to cancel 2020’s Hackaday Belgrade due to COVID-19, so excitement is high for all three days of this “one-day” event.
After a new What’s that Sound, discussion moves on to an impressive collection of DIY sundials, the impact filament color has on the strength of 3D printed parts, the incredible retrocomputer replicas of Michael Gardi, and the Arduino FPGA that you’ve probably never heard of. We’ll wrap things up with the unexpected difficulties of mixing multiple cheap audio sources in Linux, and try to figure out why our kitchen appliances need to be connected to the Internet.
Check out the links below if you want to follow along, and as always, tell us what you think about this episode in the comments!
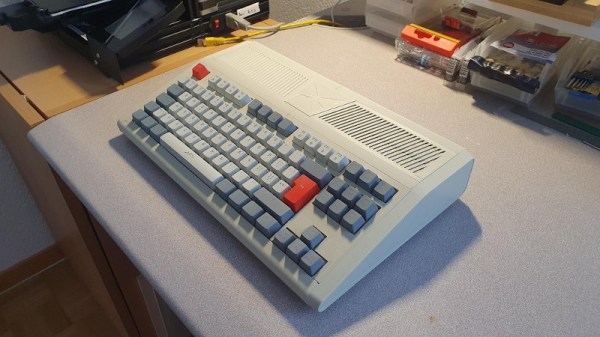
The unique look of early desktop computer systems remains popular with a certain segment of geekdom, so it’s no great surprise when we occasionally see a modern hacker or maker unceremoniously chuck 40+ year old electronics from a vintage machine just to reuse its plastic carcass. We try not to pass judgement, but it does sting to see literal museum pieces turned into glorified Raspberry Pi enclosures.
But with a little luck, perhaps the Retro Wedge Computer case designed by [AndyMt] will be able to save a few of those veteran computers from an unnecessary lobotomy. As the name implies, this 3D printable model is designed to resemble “wedge” desktop computers such as the Atari ST, TI-994A, and Commodore 128. But don’t be put off by its considerable size — the model has been chopped up so no piece is larger than what can fit on a fairly standard 230 x 230 mm print bed. Continue reading “Retro Computer Enclosure Without The Sacrifice”→