Looking to keep an eye on the temperature inside his wood-fired pizza oven, [Giovanni Bernardo] decided to skip the commercial offerings and build his own high-temperature thermometer using a type-K thermocouple. The end result is a no-nonsense handheld unit with a surprisingly low part count that, at least in theory, can read temperatures as high as 1023.75°C. Though we hope he’ll be pulling the pizza out long before that.
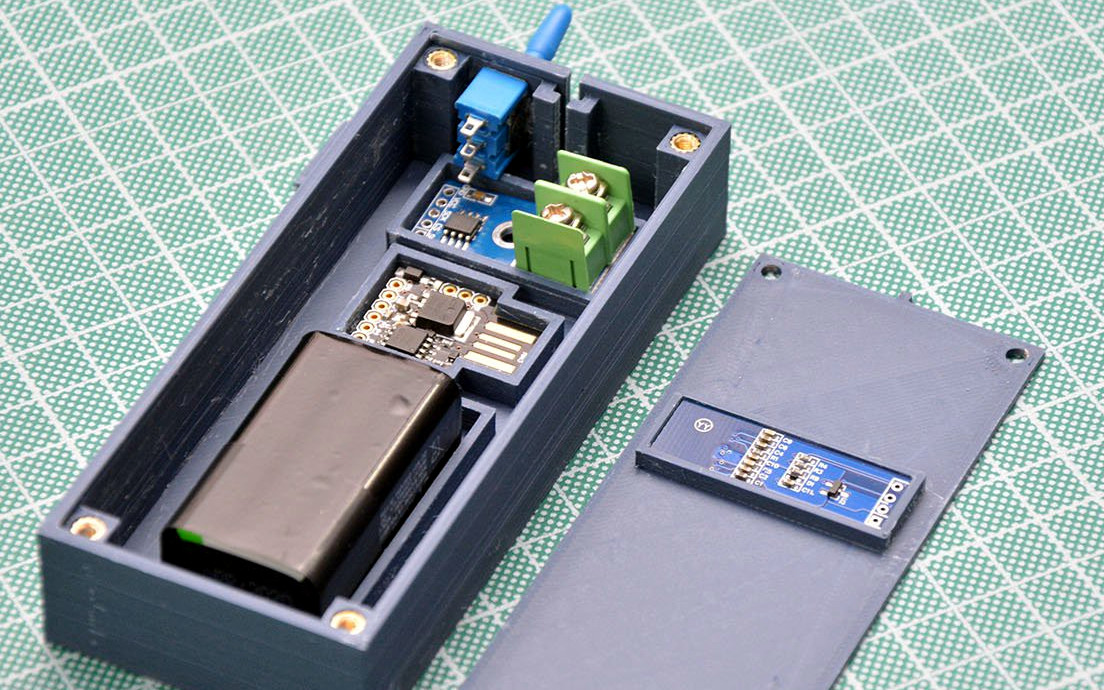 Inside the 3D printed case we find just a handful of components. The 0.91″ OLED display mounted in the front panel is wired to a Digispark ATtiny85 development board, which in turn is connected to a MAX6675 breakout board. This takes the input from the thermocouple probe and converts it into a digital signal that can be read over SPI with an Arduino library from Adafruit. Rather than going through the added complication of adding a rechargeable pack, [Giovanni] is running this thermometer from a standard 9 V battery thanks to the 5 V regulator built into the Digispark.
We especially appreciate the attention to detail [Giovanni] put into his case design. Each component is nestled into a perfectly formed pocket in the bottom of the box, and he’s even gone through the trouble of using heat-set inserts for the front panel screw holes. It would have been quicker and easier to just model up a basic box and hot glue his components in place, but he took the long way around and we respect that.
This project is another example of an interesting principle we’ve observed over the years. Put simply, if somebody is going through this much trouble to check an object’s temperature, there’s a higher than average chance they intend on eating it at some point.