Improving Raspberry Pi Disk Performance

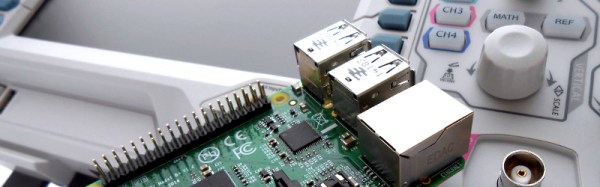
Usually, you think of solid state storage as faster than a rotating hard drive. However, in the case of the Raspberry Pi, the solid state “disk drive” is a memory card that uses a serial interface. So while a 7200 RPM SATA drive might get speeds in excess of 100MB/s, the Pi’s performance is significantly less.

[Rusher] uses the Gluster distributed file system and Docker on his Raspberry Pi. He measured write performance to be a sluggish 1MB/s (and the root file system was clocking in at just over 40MB/s).

There are an endless number of settings you could tweak, but [Rusher] heuristically picked a few he thought would have an impact. After some experimentation, he managed 5MB/s on Gluster and increased the normal file system to 46 MB/s.

Continue reading “Improving Raspberry Pi Disk Performance”

Review: Digilent Analog Discovery 2

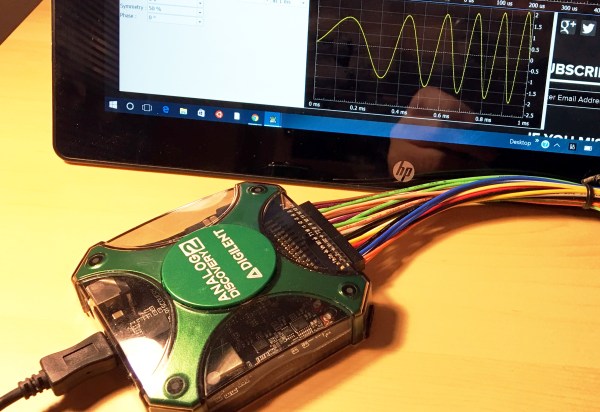
I recently opened the mailbox to find a little device about the size of White Castle burger. It was an “Analog Discovery 2” from Digilent. It is hard to categorize exactly what it is. On the face of it, it is a USB scope and logic analyzer. But it is also a waveform generator, a DC power supply, a pattern generator, and a network analyzer.

I’ve looked at devices like this before. Some are better than others, but usually all the pieces don’t work well at the same time. That is, you can use the scope or you can use the signal generator. The ones based on microcontrollers often get worse as you add channels even. The Analog Discovery 2 is built around an FPGA which, if done right, should get around many of the problems associated with other small instrumentation devices.

I’d read good things about the Discovery 2, so I was anxious to put it through its paces. I will say it is an impressive piece of gear. There are a few things that I was less happy with, though, and I’ll try to give you a fair read on what I found both good and bad.

Continue reading “Review: Digilent Analog Discovery 2”

FORTRAN For The Web

There’s an old saying: “I don’t know what programming language scientists and engineers will use in the 22nd century, but I know it will be called FORTRAN.” FORTRAN was among the first real programming languages and, along with LISP, one of the oldest still in common use. If you are one of those that still loves FORTRAN, you no longer have to be left out of the Web development craze thanks to Fortran.io.

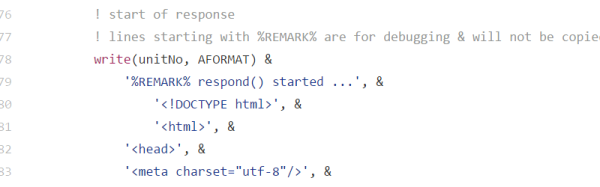
Naturally, the Fortran.io site is served by — what else — FORTRAN. The system allows for Jade templates, SQLite databases, and other features aimed at serving up web pages. The code is hosted on GitHub, and you can find several examples there, as well.

If you’ve ever wanted to do formatted I/O to a web page, here’s your chance. Come to think of it, why not? We’ve seen servers in BASIC and even in Linux shell script. Of course, today’s FORTRAN isn’t the one we learned back in the 1970’s (we assume if you didn’t learn about FORTRAN in the 1970’s, you quit reading this post a while back… prove us wrong and show us your FORTRAN projects).

Liar’s 3D Printing: Multiple Colors With One Extruder

Good 3D printers now have multiple hot ends. You ought to be able to print in different colors or print support material. However, a lot of us don’t have multiple hot ends. Turns out, you don’t have to have multiple hot ends to print in multiple colors. To accomplish that you need a lot of patience and the willingness to tell bald-faced lies. Don’t worry, though, you’ll only be lying to some computer hardware and software, so that doesn’t count.

You may have seen people talk about putting a pause between layers to switch from one color to another. That works, but it limits your options. For example, if you want to put some colored text on a different colored background, you have to either have the text poke out, or it has to be “under” the background. It can’t be flush if you only have a single extruder and hot end. My method is a lot more trouble, but it can generate good results.

Keep in mind, with hobby-grade printers, multiple color printing has a lot of problems even if you do have multiple extruders. This isn’t a panacea. But you can get results on par with a similar printer that has multiple heads.

Bottom Line Up Front

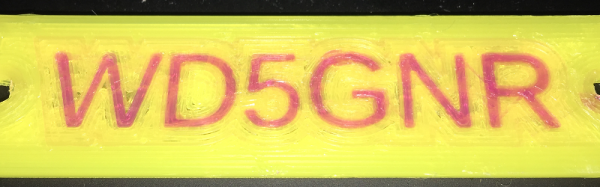
Here are a few pictures of test prints that use this technique. A Monoprice Mini printer with the stock extruder and hot end created them using different PLA filament. On the left is a test cube, with a color spot in the middle of the layers (as well as some spots on the top surface you can’t see). To the right is a plate with my call sign in a contrasting color. It is hard to tell in the picture, of course, but there is one surface. The text is at the same height as the yellow surface.

I didn’t spend a lot of time making these prints since I was more focused on perfecting the methodology. The layer heights aren’t very fine, the infill is sparse, and the print speed was fast. However, you could invest time into making better-looking prints. You can also use the usual techniques that you use with a “real” multi-extrusion printer (such as priming towers, ooze shields, etc.).

Continue reading “Liar’s 3D Printing: Multiple Colors With One Extruder”

Mark 8 2016 Style

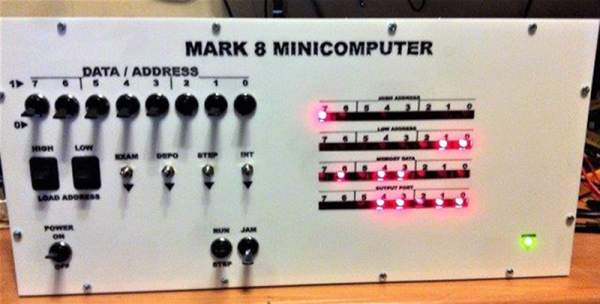
In the mid-1970’s there were several U.S.-based hobby electronics magazines, including Popular Electronics and Radio Electronics. Most people know that in 1975, Popular Electronics ran articles about the Altair 8800 and launched the personal computer industry. But they weren’t the first. That honor goes to Radio Electronics, that ran articles about the Mark 8 — based on the Intel 8008 — in 1974. There are a few reasons, the Altair did better in the marketplace. The Mark 8 wasn’t actually a kit. You could buy the PC boards, but you had to get the rest of the parts yourself. You also had to buy the plans. There wasn’t enough information in the articles to duplicate the build and — according to people who tried, maybe not enough information even in the plans.

[Henk Verbeek] wanted his own Mark 8 so he set about building one. Of course, coming up with an 8008 and some of the other chips these days is quite a challenge (and not cheap). He developed his own PCBs (and has some extra if anyone is looking to duplicate his accomplishment). There’s also a video, you can watch below.

Continue reading “Mark 8 2016 Style”

Interactive ESP8266 Development With PunyForth

Forth is one of those interesting languages that has a cult-like following. If you’ve never looked into it, its strength is that it is dead simple to put on most CPUs, yet it is very powerful and productive. There are two main principles that make this possible. First, parsing is easy because any sequence of non-space characters makes up a legitimate Forth word. So while words like “double” and “solve” are legal Forth words, so is “#$#” if that’s what you want to define.

The other thing that makes Forth both simple and powerful is that it is stack-based. If you are used to a slide rule or an HP calculator, it is very natural to think of “5+2*3” as “5 2 3 * +” but it is also very simple for the computer to interpret.

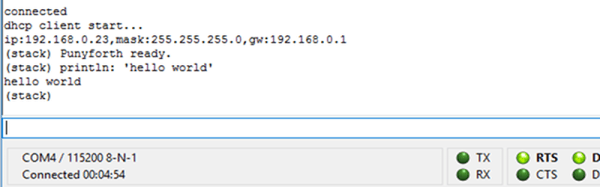
[Zeroflag] created PunyForth–a Forth-like language for the ESP8266. You can also run PunyForth for cross development purposes on Linux (including the Raspberry Pi). The system isn’t quite proper Forth, but it is close enough that if you know Forth, you’ll have no trouble.

Continue reading “Interactive ESP8266 Development With PunyForth”

B Battery Takes A 9V Cell

Old American radios (and we mean really old ones) took several kinds of batteries. The A battery powered the filaments (generally 1.5V at a high current draw). The B battery powered the plate (much lower current, but a higher voltage–typically 90V). In Britain these were the LT (low tension) and HT (high tension) batteries. If you want to rebuild and operate old radios, you have to come up with a way to generate that B voltage.

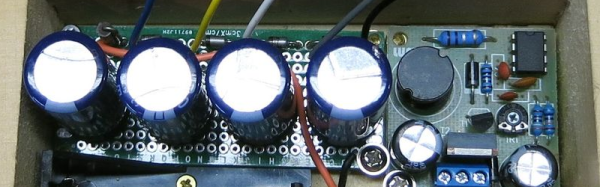
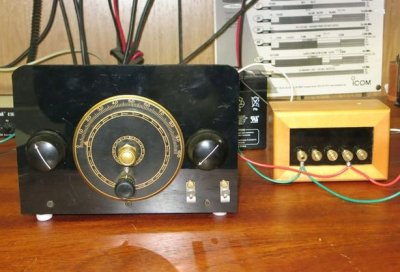
Most people opt to use an AC supply. You can daisy-chain a bunch of 9V batteries, but that really ruins the asthetics of the radio. [VA3NGC] had a better idea: he built a reproduction B battery from a wooden box, some brass hardware, a nixie tube power supply, and a 9V battery (which remains hidden). There’s also a handful of zener diodes, resistors, and capacitors to allow different taps depending on the voltage required.

b-battery-in-useThe project looks great. The wooden box apparently was a recycle item and the brass hardware makes it look like it belongs with the old radios it powers. This is a good example of how there’s more to vintage restoration than just the electronics. Sure, the function is important, but to really enjoy the old gear, the presentation is important, too.



Not all tube radios took 90V B+, but since this battery has taps, that isn’t a problem. The old Radio Shack P-Box kit took 22.5V. Of course, if you are going to build your own battery, maybe you ought to build your own triodes, too.