How To 3D Print Your Identical Twin

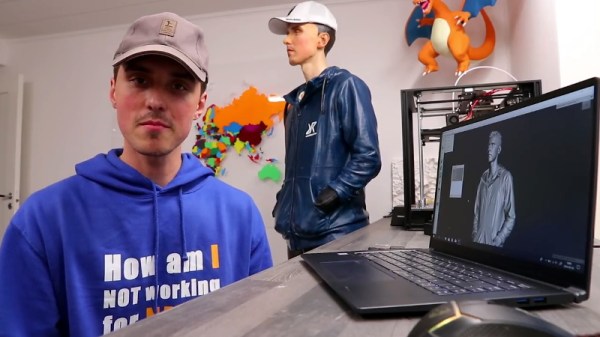
It’s possible to have an enjoyable weekend touring a city with a stolen cardboard cutout from some advertising display or other. However, it’s 2019, and 3D printing means you can go so much further. [Simon] of RCLifeOn went so far as to print a lifesized body double of himself, and it’s only slightly creepy! (Video, embedded below.)

The model was sourced from a 3D scan [Simon] had done with commercial hardware. An Optimus P1 industrial-grade 3D printer was used to print the parts, with total printing time being around 200 hours. Adhesive was used to join the various segments together, and the assembly was then sanded and primed, ready for paint.

Unwilling to tackle the task alone, [Simon] enlisted a professional painter to help put the finishing touches on the piece. The end result is impressive, particularly from a distance. [Simon 2.0] was then sent out to the city centre, aiming to raise money from bewildered passers by.

We suspect the market for custom body doubles will only increase as the technology to create them becomes more widespread. If you’ve tackled a similar project, be sure to let us know. Video after the break.

Continue reading “How To 3D Print Your Identical Twin” →

Echo And Reverb In A Pretty Little Box

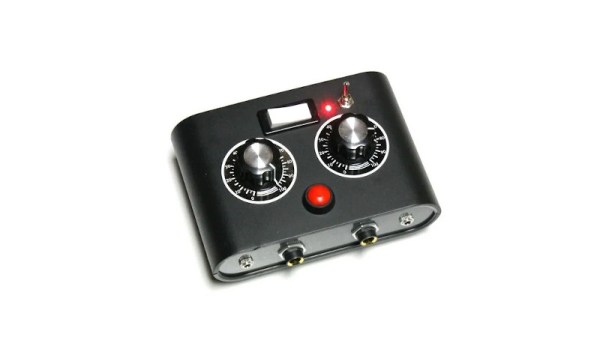
These days, if there’s a chip worth using, there will be a cheap pre-built module on eBay to make using it even easier. It’s a great time saver, and projects that used to take a couple of weekends can now be completed in a rainy afternoon. [lonesoulsurfer] knows how it is, and took advantage of this very approach to build this tidy echo & reverb effects box.

The build starts with a PT2399 echo/delay line module sourced of eBay, a part that we’ve learned much about thanks to the hard work of others. A resistor is cut off the board, enabling echo as well as reverb functionality. It’s laced up in a box with a couple of pots and a switch to control the effect, and hooked up with 6.5mm audio jacks to enable it to be easily used with guitars, synths, or karaoke machines.

It’s a fun build, and one that could serve as as a useful component in a larger setup. Adding a 3PDT switch could make it more useful as a guitar pedal, or it could be integrated into a Eurorack module, too. We’d particularly love to see the results possible from stuffing five of the modules in a single box and routing them into each other in new and exciting ways. If you pull that off, drop us a line.

Replica Marshmello Helmet Is A Tidy Halloween Build

As the saying goes – you don’t need a stylized, bedazzled helmet to have a successful career in EDM, but it helps. Marshmello is the latest in a long line of musicians to sport bespoke headgear, and [MikeTheSuperDad] undertook the construction of a replica for Halloween.

The build starts with a piece of concrete form tube as the base of the helmet. This is combined with 3D printed components to create a grid in which to place WS2812B LED strings. These are controlled by an Arduino Pro Mini, which is responsible for handling the animations. Further 3D printed parts are used as templates to cut out the characteristic eyes and mouth, as well as to cover the top. Plastic sheeting is then used over the top of everything to diffuse the LEDs and provide the final look, with black mesh behind the eyes and mouth making them properly stand out.

Marshmello should be lauded for creating a helmet with a distinctive visual style, while remaining easy to replicate, unlike popular Daft Punk builds of years past. Building a replica could serve as good practice before starting out on your own unique build. Video after the break.

Continue reading “Replica Marshmello Helmet Is A Tidy Halloween Build” →

Icosahedron Glows With The Best Of Them

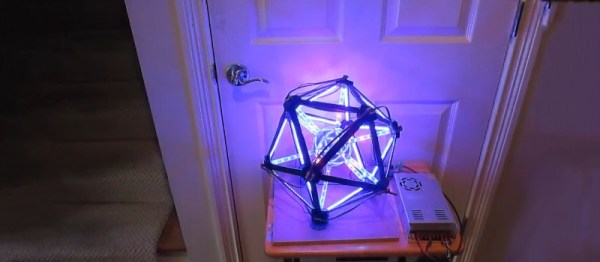
Glowables come in all shapes and sizes, and we’re always keen to see the multitude of different ways hackers find to put great masses of LEDs to good use. [cabrera.101] wanted to get in on the action, and whipped up a rather flashy icosahedron.

The build uses high-density 144-LED-per-meter strips for the edges, with 60-LED-per-meter strips used for the tubes that connect to the stainless steel ball in the centre. An Arduino Mega controls the Neopixel strips, with the wiring carefully planned out to ensure all LEDs have adequate power and signal to operate correctly. Not one to skimp on the juice, [cabrera.101] outfitted the rig with a 5V, 60A power supply – something that would have seemed ridiculous in 1992, but barely raises an eyebrow today.

It’s a build that would make a perfect whatchamacallit for a science fiction film. The reflections of the edge lights on the central sphere are particularly scintilliating. If you’re new to the realm of glowables, it’s easy to start – there are plenty of tools to help, too. Video after the break.

Continue reading “Icosahedron Glows With The Best Of Them” →

Thea Flowers – Creating A Sega-Inspired Hardware Synthesizer From The Ground Up

For those who grew up with video games, the legendary sounds of consoles past are an instant nostalgia hit. [Thea Flowers] first got her hands on a gamepad playing Sonic the Hedgehog, so the sounds of the Sega Genesis hold a special place in her heart. Decades later, this inspired the creation of Genesynth, a hardware synth inspired by the classic console. The journey of developing this hardware formed the basis of [Thea]’s enlightening Supercon talk.

[Thea’s] first begins by exploring why the Genesis sound is so unique. The Sega console slotted neatly into a time period where the company sought to do something more than simple subtractive synthesis, but before it was possible to use full-waveform audio at an affordable price point. In collaboration with Yamaha, the YM2612 FM synthesis chip was built, a cost-reduced sound engine similar to that in the famous DX7 synthesizer of the 1980s. This gave the Genesis abilities far beyond the basic bleeps and bloops of other consoles at the time, and [Thea] decided it simply had to be built into a dedicated hardware synth.

Continue reading “Thea Flowers – Creating A Sega-Inspired Hardware Synthesizer From The Ground Up” →

Cardboard Computer Replica Is Cheap And Easy To Make

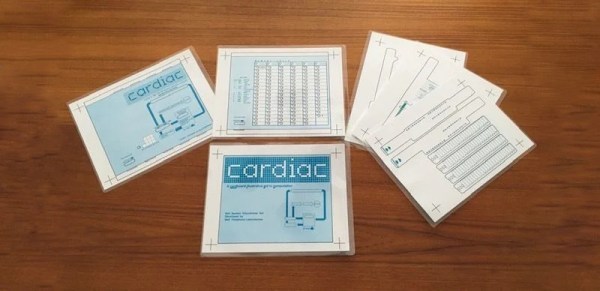
Replicating 1960s-era computer hardware can be a daunting task. Components can be hard to find, schematics thin on the ground, and software near-unobtainable. Of course, not every computer from the decade consisted of expensive high-end electronics – CARDIAC was built out of common cardboard, and making your own is a cinch!

CARDIAC stood for Cardboard Illustrative Aid To Computation. Consisting of a series of sliding cardboard parts, it acted as a basic guide to the principles of computation. Through the use of a pencil and the associated guidebook, students could run simple programs to learn how to program computers at the barebones level.

Finding the paper-based computational learning tool highly valuable in their youth, [megardi] wanted to bring it back for a new audience. Thankfully, there are plenty of resources on the web that made it easy to whip up art files to reprint the device. [megardi] then also wrote up the instructions on how to accurately reproduce a CARDIAC, with helpful tips on how to best put it together. For a quick test, any old paper will do, while using 110 g cardstock and a laminator makes a sturdier build that can be used with dry-erase markers.

CARDIAC remains an excellent tool for teaching the basics of Von Neumann architecture computing. We’ve discussed similar teaching tools before, too – from the days when “real” computers were too expensive to let students anywhere near them. How times change!

Creating Lookalike Valves With Resin Casting

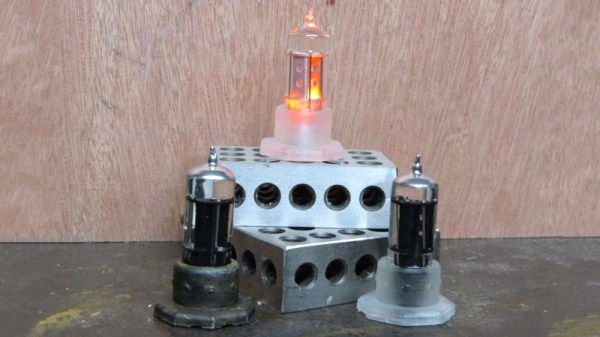
Valves (tubes) certainly have a die hard fan base in the electronic community, praised for their warm sound, desirable distortion characteristics and attractive aesthetic. However, sometimes you just want the look of a valve for a prop or a toy, without actually needing the functionality. For those cases, this project from [Ajaxjones] might be just the ticket.

The build consists of taking an existing valve, combining it with a 3D printed base, and using this to create a silicone mould. 3D printed parts and dressmaker’s pins are then used to create the internal parts of the valve, and are inserted into the mould. Clear resin is then degassed, and poured into the mould to create the part. Once cured, the part is removed and the base painted to complete the look. An LED is then installed into a void in the base to give the piece a warm glow as you’d expect.

It’s a simple tutorial to producing high-quality clear plastic parts, and one that should prove useful to many prop builders and cosplayers alike. If you’re wanting to take your resin game to the next level, consider trying some overmolded parts. Video after the break.

Continue reading “Creating Lookalike Valves With Resin Casting” →