
Building A Laser Head With High Speed, High Resolution

A test exposure on cyanotype paper shows off the prototype’s resolution, around 100 microns.

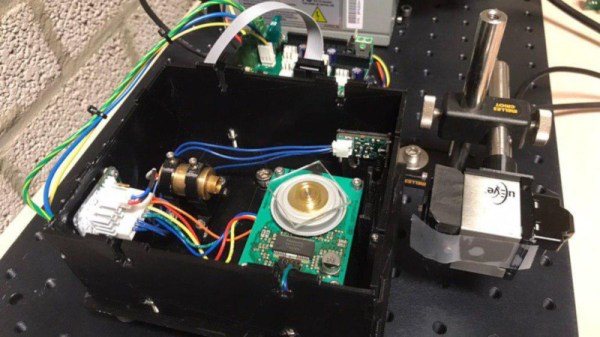
Typically, when it comes to scanning a laser, it’s done with galvos or a rotating mirror assembly. However, these methods can be slow and cumbersome, or restricted due to existing patents. [Rick] aimed to find an alternative solution with the Hexastorm project, using a rotating prism to build a high speed, high resolution laser head.

The project currently uses a Beaglebone for the brains, with a polygon motor sourced from a photocopier used to rotate the prism at over 20,000 rpm. The project aims to be a proof of concept for rotating prism technology, which can then be adapted to specific tasks. With the promise of high speed and high resolution, the system could be used in fields as diverse as PCB manufacture, 3D resin printing, and even virtual reality displays. [Rick] explores these potential markets in a pitch deck, comparing to existing solutions in the marketplace.

If you’re interested in high performance optical systems, [Rick]’s work makes compelling reading. It’s not the first time we’ve explored cutting edge laser hacks, either. Video after the break. Continue reading “Building A Laser Head With High Speed, High Resolution” →
Vintage Transistor Radio Gets Internet Transplant

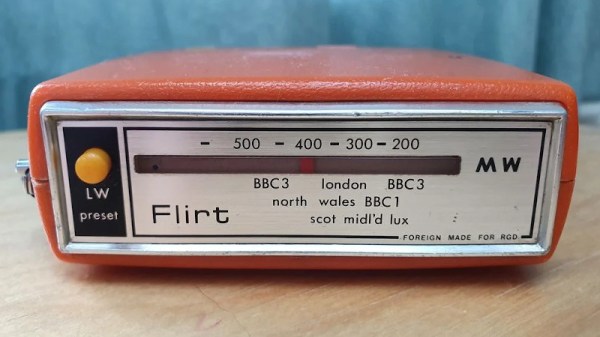
The invention of the transistor revolutionized radio, allowing receivers to be made far more compact and portable than ever before. In the middle of the 20th century, the devices exploded in popularity, and pocket transistor radios took the market by storm. [MisterM] had fond memories of such times, and when he found a 1970s Flirt radio at a car boot sale, it led to a cute little build.

The radio was stripped of its original hardware, with [MisterM] preferring internet radio to the terrestrial variety. In its place, a Raspberry Pi Zero was installed. This was fitted with a cavalcade of off-the-shelf modules to make it fit for pumping out the tunes. A Speaker PHAT was used for audio, while an Adafruit Micro Lipo board handled battery charging and a Pimoroni Lipo Shim served as the power supply. All this was bundled up inside the original casing.

The radio’s controls are a neat hack. The original volume and tuning dials were removed, sliced up, and glued onto two lever microswitches. This allows them to act as buttons instead. A new power switch was installed behind the original, and the Speaker PHAT’s LEDs were placed behind the tuning dial to act as a rudimentary display.

It’s a tidy build that repurposes an attractive vintage artefact into a device of the internet age, while remaining externally the same. [MisterM] has form in this space, with his vintage radio console build and video doorbell being particular highlights. Video after the break.

Continue reading “Vintage Transistor Radio Gets Internet Transplant” →

Build Yourself A Set Of Glowing Wings

Humans didn’t come with wings from the factory, and most efforts to fit them after the fact have been at least as far as flight is concerned, largely fruitless. That doesn’t mean you can’t cut a devastatingly sharp aesthetic though, and [Natalina’s] fiber optic wings are a great way to do just that. 

The wings are a leathercraft project, consisting of a harness worn around the torso. This serves as the mounting point for the fiber optics, as well as the RGB Critter flashlight used to drive the lightshow. Leather parts are lasercut to the right shape, making it easy to create the delicate feather shapes in the design. The pieces are then dyed appropriately and sewn together into the final shape. Bundles of optical fibers are then wound through the harness, sprouting from either shoulder of the wearer. EVA foam is used to help create the right shape for the wings, allowing the different layers to remain separated to create more visual depth.


It’s a build that looks absolutely striking at night, and unlike some other wing-based cosplays, doesn’t have as many drawbacks as far as crowds and transportation. It would make a killer look if you’re going as a Hacker Angel for Halloween this.

Makers certainly know how to craft some cutting-edge wearables. Got your own sweet build? Throw it at the tips line!

How To Make An Electric Scooter Chain Sprocket With Nothing But Hand Tools

Sometimes, mechanical parts can be supremely expensive, or totally unavailable. In those cases, there’s just one option — make it yourself. It was this very situation in which I found myself. My electric scooter had been ever so slightly bested by a faster competitor, and I needed redemption. A gearing change would do the trick, but alas, the chain sprocket I needed simply did not exist from the usual online classifieds.

Thus, I grabbed the only tools I had, busied myself with my task. This is a build that should be replicable by anyone comfortable using a printer, power drill, and rotary tool. Let’s get to work!

Continue reading “How To Make An Electric Scooter Chain Sprocket With Nothing But Hand Tools” →

Storm Cloud Lamp Brings The Weather Inside

The humble lamp is a common build for a hacker looking to express themselves creatively. Often, nature can serve as an inspiration, as was the case for [Michael Pick]’s Storm Cloud. (Video, embedded below.)

Electronically, the build is straightforward, consisting of an Arduino Uno, an MP3 shield, and a string of WS2801 LEDs. These are driven slightly differently than the more-common WS2812B type, but Adafruit libraries make it easy for even the beginner. There’s also an RF keyfob fitted for remote control of the device, and a voice synth that serves as a user interface.

The video also covers the construction of the body of the lamp. Cardboard forms are created, then covered in tape to create a rough 3D ovaloid shape. This mold is then fiberglassed to create two shells, which are later joined together with bolts. This allows the LEDs and electronics to be neatly mounted inside. Spray adhesive is then used to affix what appears to be cotton wool or polyfill stuffing to the outside to create the cloud effect.

The final result is rather aesthetically pleasing. There’s the usual soft-glowing rainbows as you’d expect, but the real highlight is storm mode, which causes flickers of lighting to scatter across the surface of the cloud. The accompanying sound effects from the MP3 shield help add to the drama.

We’ve seen other takes on a cloud lamp before, too. Video after the break.

Continue reading “Storm Cloud Lamp Brings The Weather Inside” →

Balance Box Game Requires A Steady Hand

In the distant past, engineers used exotic devices to measure orientation, such as large mechanical gyros and mercury tilt switches. These are all still useful methods, but for many applications MEMS motions devices have become the gold standard. When [g199] set out to build their Balance Box game, it was no exception.

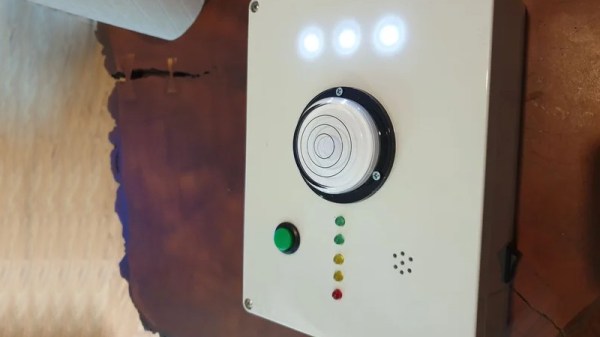
The game consists of a plastic box, upon which a spirit level is fitted, along with a series of LEDs. The aim of the game is to keep the box level while carrying it to a set goal. Inside, an Arduino Uno monitors the output of a MPU 6050, a combined accelerometer and gyroscope chip. If the Arduino detects the box is tilting, it warns the user with the LEDs. Tilt it too far, and a life is lost. When all three lives are gone, the game is over.

It’s a cheap and simple build that would have been inordinately more expensive only 10 to 20 years ago. It goes to show the applications enabled by ubiquitous cheap electronics like MEMS sensors. The technology has other fun applications, too – for example the Stecchino game, or this giant balance board joystick. We’re certainly lucky to have such powerful technology at our fingertips!

Lane Keeping RC Car Uses OpenCV

Automakers continue to promise that fully autonomous cars are around the corner, but we’re still not quite there yet. However, there are a broad range of driver assist technologies that have come to market in recent years, with lane keeping assist being one of them. [raja_961] decided to implement this technology on an RC car, using a Raspberry Pi.

A regular off-the-shelf RC car is used as the base of the platform, outfitted with two drive motors and a third motor used for the steering. Unfortunately, the car can only turn either full-left or full-right only, limiting the finesse of the steering. Despite this, the work continued. A Raspberry Pi 3 was fitted out with a motor controller and camera, and hooked up to the chassis. With everything laced up, a Python script is used along with OpenCV to run the lane-keeping algorithm.

[raja_961] does a great job of explaining the lane keeping methodology. Rather than simply invoking a library and calling it good, instead the Instructable breaks down each stage of how the algorithm works. Incoming images are converted to the HSL color system, before a series of operations is used to pick out the apparent slope of the lane lines. This is then used with a PID algorithm to guide the steering of the car.

It’s a comprehensive explanation of a basic lane-keeping algorithm, and a great place to start if you’re interested in learning about the technology. There’s plenty going on in the world of self-driving RC cars, you just need to know where to look! Video after the break.

Continue reading “Lane Keeping RC Car Uses OpenCV” →