Build Your Own Wave Tank

Wave tanks are cool, but it’s likely you don’t have one sitting on your coffee table at home. They’re more likely something you’ve seen in a documentary about oil tankers or icebergs. That need no longer be the case – you can build yourself a wave generator at home!

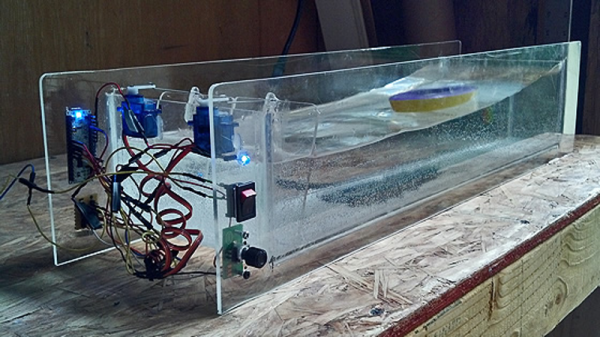
This build comes to use from [TVMiller] who started by creating a small tank out of acrylic sheet. Servo-actuated paddles are then placed in the tank to generate the periodic motion in the water. Two servos are controlled by an Arduino, allowing a variety of simple and more complex waves to be created in the tank. [TVMiller] has graciously provided the code for the project on Hackaday.io. We’d love to see more detail behind the tank build itself, too – like how the edges were sealed, and how the paddles are hinged.

A wave machine might not be the first thing that comes to mind when doing science at home, but with today’s hardware, it’s remarkable how simple it is to create one. Bonus points if you scale this up to the pool in your backyard – make sure to hit the tip line when you do.
The Bane Of Aftermarket Car Alarms

The humble car alarm has been around almost as long as the car itself, first being developed by an unknown prisoner in Denver, circa 1913. To the security-conscious motorist, they make a lot of sense. The noise of a car alarm draws attention which is the last thing a would-be thief wants, and the in-built immobilizers generally stop the car being moved at all without a time-consuming workaround. Both are a great deterrent to theft.

It may then surprise you to know that I, dear readers, consider the aftermarket car alarm to be one of the most heinous devices ever fitted to the modern automobile. Combining the unholy trifecta of being poorly designed, cheaply made, and fitted by only the most untalented or uncaring people to wield a soldering iron, they are a blight that I myself refuse to accept.

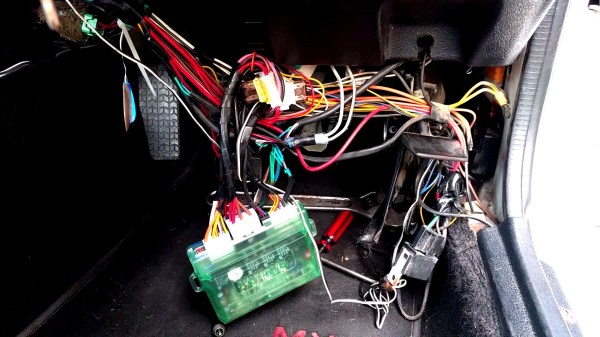
It was my very own Mazda that suffered at the hands of a car alarm system. Two days after purchasing the car, the keyfob died, and thus the car would no longer start. My other car was already out of action due to bent valves, and I needed to get to work, so I figured as a competent hacker, I’d be able to quickly disable it.

Continue reading “The Bane Of Aftermarket Car Alarms” →

RetroModem For The Commodore 64

Retrocomputers are fun, but ultimately limited in capability compared to modern hardware. One popular pursuit to rectify this is the connection of early home computers to the Internet. To that end, [que] built the Retromodem for the Commodore 64.

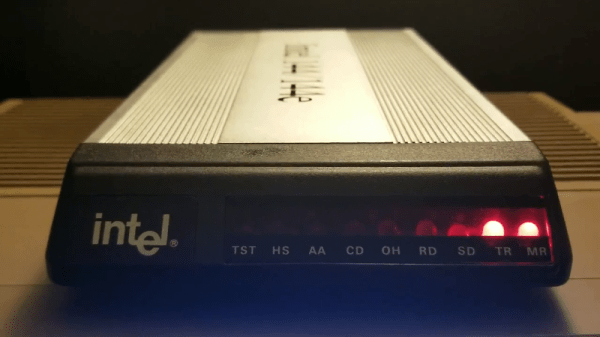
The build starts with a case from an Intel 14.4 modem. A little fast for the Commodore 64 era, but anachronism is charming when done tastefully. Inside is an Arduino with an ethernet module to handle the heavy lifting of carrying packets to the outside world.  [que] took the time to wire up status LEDs for the proper vintage look, which really adds something to the project. They switch on and off to indicate the various settings on the modem – it’s great to see in the video below the break the “HS” LED light up when the baud rate is changed to a higher speed.

The project implements most of the Hayes command set, so you can interface with it over a serial terminal just like it’s 1983. [que] doesn’t go into too many details of how it’s all put together, but for the experienced code warrior it’s a project that could be whipped up in a weekend or two. For a more modern take, perhaps you’d like to hook your C64 up over Wifi instead?

Continue reading “RetroModem For The Commodore 64” →

Running The SNES Classic Mini Emulator On The Raspberry Pi

Unless you’ve been living under a rock, you’d be familiar with Nintendo’s hugely popular Classic Mini consoles. Starting with the NES, and now followed with the SNES, the consoles ship in a cute, miniature enclosure and emulate Nintendo classics using the horsepower of modern ARM chips. These consoles use an emulator that has been created especially for the purpose by Nintendo, in house – and [Morris] [krom] wanted to see if he could take the emulator on the SNES Classic Mini and run it on the Raspberry Pi.

Yes, there are already SNES emulators on the Raspberry Pi. But anyone interested in the nuts and bolts of emulation can see the clear interest in the tricks and techniques Nintendo are using to achieve the feat. In particular, Nintendo engineers have the benefit of access to internal documentation that can make the job a lot easier, particularly when dealing with edge cases.

[krom] has been kind enough to share the full instructions necessary to recreate this feat. One stumbling block was the difference in hardware between the Raspberry Pi and the SNES Classic Mini – the Pi using a Broadcom GPU instead of the SNES’s Mali hardware. However, a workaround was simple enough – swapping out some libraries was all that was required. It also gives some interesting insight – it looks like the SNES Classic Mini relies on the SDL libraries to run.

While emulation of the SNES has been a largely solved problem for quite some time, it’s great to see more work going on in the field. In particular, the official Nintendo emulation is reported to be particularly adept at running games that rely on the SuperFX chip.

For another take on SNES emulation, try out your old Mario games on the HoloLens.

Thanks [Morris] for the tip!

Becdot Teaches With Touch

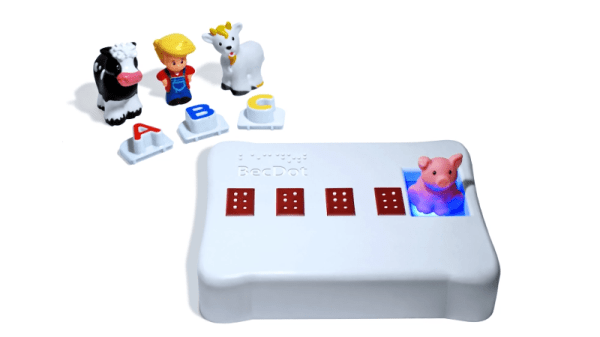
Braille is a tactile system of communication, used the world over by those with vision impairment. Like any form of language or writing, it can be difficult to teach and learn. To help solve this, [memoriesforbecca] has developed Becdot as a teaching tool to help children learn Braille.

The device is built around four Braille cells, which were custom-designed for the project. The key was to create a device which could recreate tactile Braille characters at low cost, to enable the device to be cheap enough to be used a children’s toy. The Braille cells are combined with an NFC tag reader. Small objects are given NFC tags which are programmed into the Becdot. When the object is placed onto the reader, the Braille cells spell out the name of the object. Objects can be tagged and the system programmed with a smartphone, so new objects can be added by the end user.

It’s a great way to teach Braille, and an impressive build that keeps costs down low. Details are a little thin on the ground, and we’d love to see more detail on how the actuators on the Braille cells work. We’ve seen similar projects before, like this Hackaday prize entry. Share your theories in the comments below.

Custom Lightbulb Firmware

The Internet of Things is developing at a rapid pace, as hobbyists and companies rush to develop the latest and greatest home automation gear. One area of particular interest to some is lighting – yes, even the humble lightbulb now comes with a brain and is ripe for the hacking.

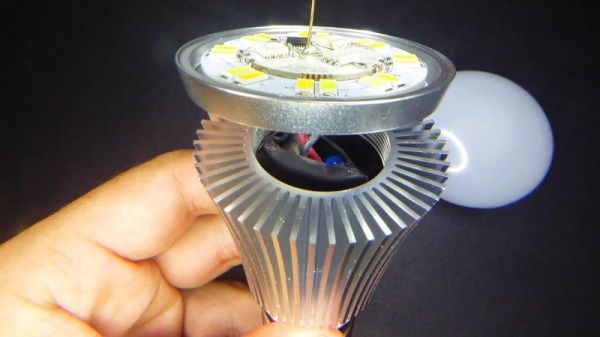
[Tinkerman] starts by doing a full disassembly of the Sonoff B1 lightbulb. It’s a popular device, and available for less than $20 on eBay. Rated at 6 watts, the bulb has a heatsink that is seemingly far larger than necessary. Inside is the usual AC/DC converter, LED driver and an ESP8285 running the show. While this is a slightly different part to the usual ESP8266, it can be programmed in the same way by selecting the correct programming mode.

This is where it gets interesting – [Tinkerman] flashes the device with a custom firmware known as ESPurna. This firmware enables greater control over the function of the bulb, from colour choice, to speaking to the bulb over MQTT.

[Tinkerman] does a great job of walking through the exact steps needed to disassemble and reprogram the bulb, and touches upon the added flexibility given by the custom firmware. We love to see projects like this one, that give greater control over IoT devices and enable users to better integrate them with other systems.

Trouble Flashing Your ESP8266? Meet DIO And QIO

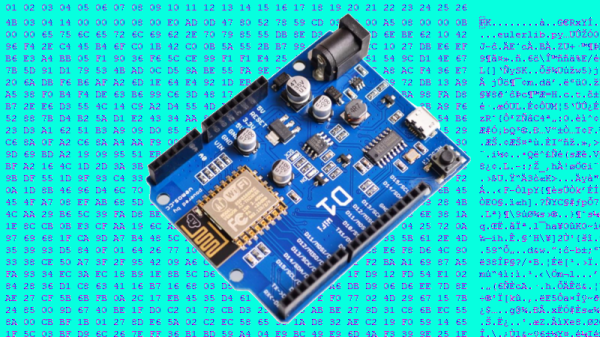
[Pete] was building a hot tub controller, using a WEMOS board based on the venerable ESP8266. After assembly, the board was plugged into USB and [Pete] hit the flash button. No dice. Investigation with some terminal software indicated a checksum error.

Assuming the board was dead, [Pete] grabbed another — and suffered the same problem.  The WEMOS boards wouldn’t program, but other boards had no issues. Sensing that something may be amiss, further research was in order. A forum post turned up discussing different programming modes for the ESP8266.

It turns out that there are different types of flash used with the ESP8266, and the correct programming mode must be selected for a given hardware setup. These modes are known as DIO and QIO, meaning “dual IO” and “quad IO” respectively. This refers to the number of IO line used to talk to the flash memory. There are also further modes, known as DOUT and QOUT. It’s important to identify the modes supported by the flash chip on board, by looking at the datasheet. Obviously this can be difficult on some pre-built modules, so experimentation is the key here.

With the wrong mode selected, writes to the flash will fail, and reading back will turn up a checksum error. It’s a simple matter of changing a line in the make file and trying different modes, to see which one works. This forum post has a more in-depth coverage of the issue. 

By choosing different flash memory parts and selecting the DIO or DOUT modes, it’s actually possible to free up more GPIO pins as well. This knowledge is handy when optimizing ESP8266 designs for memory speed or maximum IO flexibility. It’s a good lesson that it always pays to look at the datasheet to get the best out of your parts.