Pumpkin Piano Promises A Gourd Time

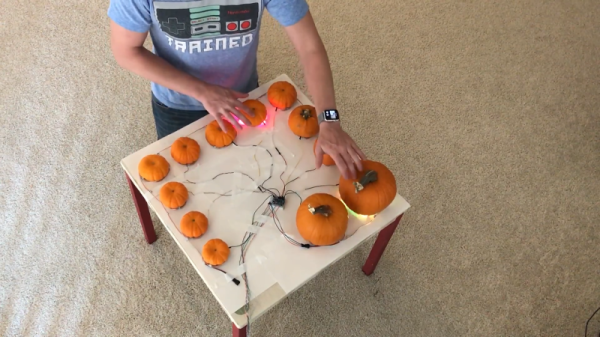
Fall – it’s that time of year that brings falling leaves, Hallowe’en, and a pumpkin version of everything that you hold dear. In this case, it’s not a latte – it’s [Robert Vorthman]’s Pumpkin Piano.

[Robert] took a straightforward approach to the build, pressing a Raspberry Pi into service as the backbone of the operation. This is combined with an Adafruit breakout board for the MPR121, which is a chip that provides 12 capacitive touch-sensitive inputs. These are connected to the bountiful produce which make up the piano keys in this fun holiday hack. [Robert] uses some Python code that talks to fluidsynth, a software synthesizer that uses Soundfont files to create different sounds. It’s all wrapped up with some Neopixels that flash when each vegetable is triggered.

The build would make a great party piece for just about any fall gathering, and [Robert] has done a great job of rolling up all the hardware and software required in the write-up. For another take on a vegetable-based orchestra, check out last year’s Harpsi-gourd.

How To Bend PVC The Nice Way

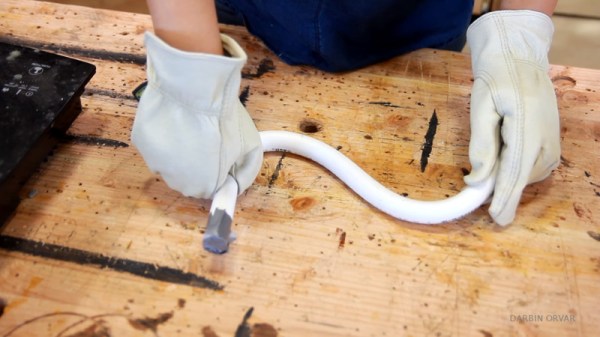
PVC pipe is a valuable material to the backyard hacker. It’s cheap, readily available, and comes in a range of different sizes. However, what do you do if you need to bend it? The typical approach would be to grab a heat gun or blowtorch, warm it up, and go from there. These methods can get messy however, with kinks and melted surfaces spoiling the final result. Now [Linn] has released a video with a method that delivers impressively neat results.

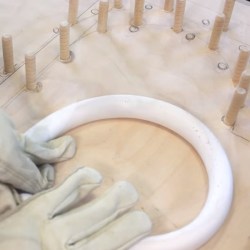
A bending jig can help create repeatable results.

The method is simple, using that classic hacker staple — duct tape. The end of the pipe is taped off, and the pipe filled with sand. With the correct amount measured out, the sand is heated on a cooktop, then poured back into the pipe. After giving the heat some time to soften the plastic, the pipe can then be manipulated into the desired shape.

[Linn] does a great job of explaining the process in a clear and concise manner, and shares tips on how to use a bending jig to guide the final shape. Results are best with smaller pipes that are easier to heat through, but larger sections can be manipulated with patience.

We can’t wait to see what [Linn] builds with this new technique. The possibilities could be further expanded by combining with these PVC fittings designed just for building stuff.

[Thanks to George for the tip!]

Reconstructing A Blurry QR Code

QR Codes are a two-dimensional type of matrix barcode that are used for a variety of uses. They’re one way of turning a long piece of string data into an easily machine-readable format. For this reason, they can be used to store private keys for encryption and crypto-currency purposes. [Roger Ver] attempted to use a QR code containing a private key to give away some cryptocurrency on TV, but the code was blurred out by the broadcaster. Not ones to give up easily, [Michael] and [Clément] decided to see if they could reconstruct it anyway. 

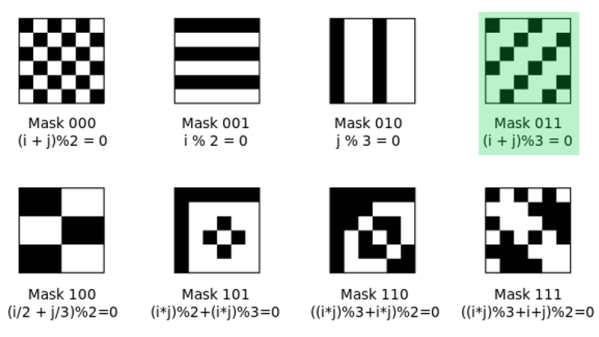
The work begins, as so many cryptographic exploits do, with the collection of as much of the plaintext key as possible. By stepping through the footage frame by frame, small pieces of the unobscured QR code were found, as well as some of the private key itself. By combining this with enhanced images of the blurred code, the team were able to put together less than one third of the QR code. The team had other tricks up their sleeve though – they knew the QR contained a private key of a particular format, and were able to figure out the QR code was 41×41 pixels.

By using this data along with a careful study of the QR code format, the team were able to put together some code in Python to brute force the key. After 838849 trials, the key was found, and the team were able to claim the prize. It’s a great example of cryptographic analysis – and so is this story on hacking your own password.

[Thanks to Esko for the tip!]

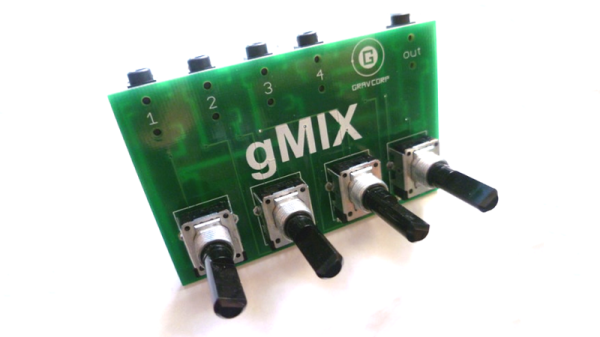
A Passive Mixer’s Adventure Through Product Development

The year was 2014, and KORG’s volca line of pint-sized synthesizers were the latest craze in the music world. Cheap synths and drum machines were suddenly a reality, all in a backpack-friendly form factor. Now practically anyone could become an electronic music sensation!

I attended a jam with friends from my record label, and as was the style at the time, we all showed up with our latest and greatest gear. There was the microKORG, a MiniNova, and a couple of guitars, but all attention was on the volcas, which were just so much fun to pick up and play with.

There was just one problem. Like any game-changing low-cost hardware, sacrifices had been made. The volcas used 3.5mm jacks for audio and sync pulses, and the initial lineup came with a bassline, lead, and drum synth. Syncing was easy, by daisy chaining cables between the boxes, but if you wanted to record or mix, you’d generally need to stack adapters to get your signals in a more typical 6.5mm TS format used by other music hardware.

After mucking around, I did some research on what other people were doing. Most were suffering just like we were, trying to patch these little machines into full-sized mixing desks. It seemed like overkill — when you just want to muck around, it’s a bit much to drag out a 24 channel powered mixer. I wanted a way to hook up 3 of these machines to a single set of headphones and just groove out.

To solve this problem, we needed a mixer to match the philosophy of the volcas; simple, accessible, and compact. It didn’t need to be gold-plated or capable of amazing sonic feats, it just had to take a few 3.5mm audio sources, and mix them down for a pair of headphones.

I’d heard of people using headphone splitters with mixed results, and it got me thinking about passive mixing. Suddenly it all seemed so clear — I could probably get away with a bunch of potentiometers and some passives and call it a day! With a friend desperate to get their hands on a solution, I decided to mock up a prototype and took it round to the studio to try out.

Continue reading “A Passive Mixer’s Adventure Through Product Development” →

Are Microwave Guns For Real?

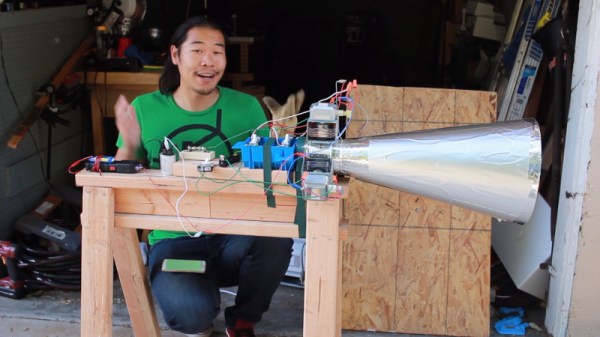
Almost exactly one year ago, [Kreosan] published a video detailing an EM “weapon” built out of three magnetrons, some batteries, and a taser. It all seemed a bit too good to be true, so [Allen] decided to try and replicate the results for himself.

[Kreosan]’s original video was impressive, showing everything from home stereos to a humble moped exploding when in the presence of their powerful device. However, many of those watching the video doubted the footage. Most criticism centered around the nature of the power supply to the magnetron falling short of the usual 700-1000W seen in a microwave oven.

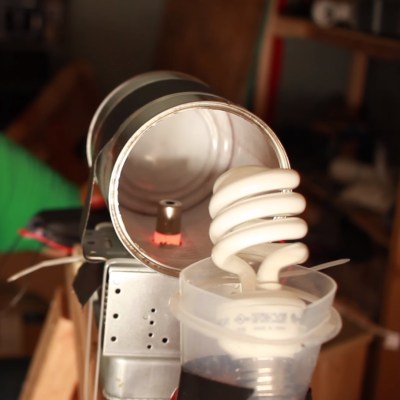
Initial testing with a single magnetron. This setup could light the bulb at a distance of a few centimeters.

[Allen] starts by experimenting with a single magnetron, successfully using it to light a compact fluorescent bulb at a range of a few centimeters. Scaling up to the full triple magnetron setup with a cardboard and foil feedhorn, [Allen] is, at best, able to crash a calculator at a distance of a few feet.

The microwaves cause no explosions, and the device doesn’t seem to have anywhere near the 50-foot range claimed by [Kreosan] for their device. [Allen] puts forth the theory that the explosions seen in the original footage are far more likely to be from small firecrackers rather than any electronic components dying from microwaves.

Overall it’s a solid attempt to recreate someone else’s work to verify the results, a cornerstone of science. We did bristle somewhat at the valiant 18650 being described as a “vape battery”, however. For more microwave goodness, check out this attempt to recreate the TSA’s body scanners.

3D Printed Tyres Let You Drive On Water

[Jesus] apparently walked on water, without any tools at all. But when you’ve got a 3D printer handy, it makes sense to use it. [Simon] decided to use his to 3D print some tyres for his R/C car – with awesome results.

[Simon] started this project with a goal of driving on water. Initial experiments were promising – the first design of paddle tyres gave great traction in the sand and were capable of climbing some impressive slopes. However, once aimed at the water, the car quickly sank below the surface.

Returning to the drawing board armed with the advice of commenters, [Simon] made some changes. The paddle tyres were reprinted with larger paddles, and a more powerful R/C car selected as the test bed. On the second attempt, the car deftly skipped along the surface and was remarkably controllable as well! [Simon] has provided the files so you can make your own at home.

It’s a great example of a practical use for a 3D printer. Parts can readily be made for all manner of RC purposes, such as making your own servo adapters.

Recreating The Mythbusters Rocket Chevy – At Scale

If you tuned into the first ever episode of Mythbusters way back when, you’ll remember a certain rocket-powered Chevy Impala. [David Windestal] decided to recreate this – at 1:10 scale.

The car in question is a Hobbyking Desert Fox RC car – normally a four-wheel drive truck which ships ready-to-run, making it a great way to get a project started quickly. Rocket power is provided by the same type of motor used in the Swedish Rocket Knives we’ve covered previously.

Initial testing proves unsuccessful – the car simply tumbles out of control when the rocket is fired. It takes a beating, losing a wheel in the process. Following on from this, a decision is made to cook up a slower burning rocket motor and switch to an asphalt surface for testing. This is much more succesful and the car begins to see some properly high speeds, nearly peeling the tyres off the rim in the process!

It’s a fun concept that could likely be replicated with off-the-shelf rocket motors, too. Throw us your ideas for better rocket powered transports in the comments below.

[Thanks to Heinrich for the tip!]
Continue reading “Recreating The Mythbusters Rocket Chevy – At Scale” →