How To Get Your Diffraction Grating 3D Prints Right The First Time

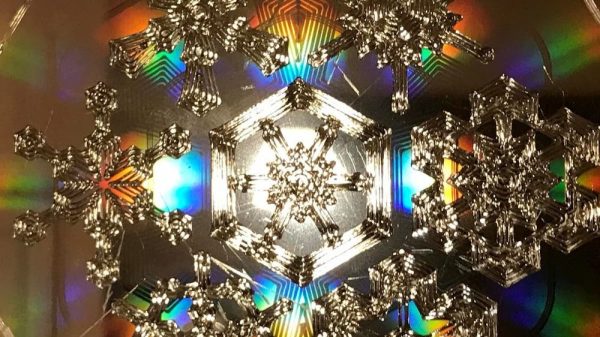
Diffraction gratings are beautiful things, bending transmitted and reflected light and splitting it into its component wavelengths to create attractive iridescent rainbow patterns. It’s the same effect you see on the bottom of a CD!

You can 3D print a functional diffraction grating, too, with the right techniques, as it turns out! The average 3D printer can’t recreate the tiny-scaled patterns of a diffraction grating directly; a typical diffraction grating may have up to 1000 lines per mm. Instead, by 3D printing onto an existing diffraction grating, the print can pick up the texture on its base layer. It’s a great way to add iridescence and shine to a print.

We’ve seen similar work before, but the guide from [All3DP] goes into greater detail on how to get the effect to work just right. Getting the bed as close to perfectly level is key here, as is the first layer height. This is because the first layer of plastic has to meld perfectly with the diffraction grating to pick up the pattern. Too high and the grooves won’t transfer to the plastic, and too low, and it’s likely you’ll just melt the grating itself. Setting the Z-offset appropriately can help here.

Choosing the right bed temperature is also important to ensure the molten plastic is able to flow into the grooves of the grating. Again, the temperature at which the diffraction grating itself can survive is important to take into account; going above 90 degrees can be risky here. The guide also shows two methods of achieving the goal: one can either use an off-the-shelf grating, or one can prepare a no-longer-wanted CD into a suitable print surface.

Naturally, removing the print must be done delicately, lest one disturb the delicate structures key to generating the iridescent effect. [All3DP] recommends using a freezer to help separate the parts from the grating surface. It also bears noting that the print won’t survive excessive handling, as the grating structures will get damaged by physical touch.

It’s a great in-depth guide on how to get diffraction grating prints right. Meanwhile, consider diving deeper into the world of 3D printed optics!


Iridescent Rainbow Chocolate, Just Add Diffraction Grating!

Chocolate plus diffraction grating equals rainbow chocolate

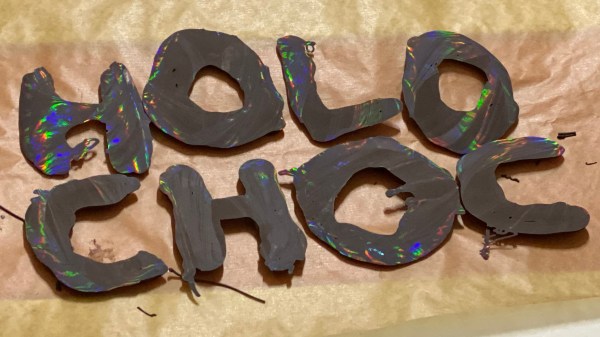
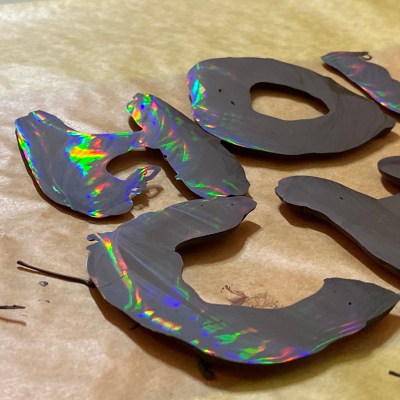
Here’s a great picture from [Jelly & Marshmallows] that shows off the wild effects of melted chocolate poured onto a diffraction grating. A diffraction grating is a kind of optical component whose micro-features act to disperse and scatter light. Diffraction gratings are available as thin plastic film with one side that is chock full of microscopic ridges, and the way light interacts with these ridges results in an iridescent, rainbow effect not unlike that seen on a CD or laserdisc.

It turns out that these micro-ridges can act as a mold, and pouring chocolate over a diffraction grating yields holo-chocolate. These photos from [Jelly & Marshmallows] show this effect off very nicely, but as cool as it is, we do notice that some of the letters seem a wee bit hit-or-miss in how well they picked up the diffraction grating pattern.

Fortunately, we know just what to suggest to take things to the next level. If you want to know more about how exactly this effect can be reliably accomplished, you’ll want to check out our earlier coverage of such delicious optics, which goes into all the nitty-gritty detail one could ever want about getting the best results with either melted sugar, or dark chocolate.

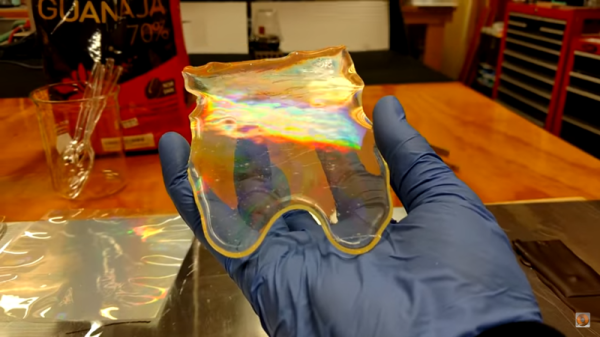
Delicious Optics, A Chocolate Diffraction Grating

Diffraction gratings are curious things. Score a series of equally spaced tiny lines in a surface, and it will cause reflected or transmitted light to bend and separate into its component wavelengths. This ability gives them all manner of important applications in the field of optics, but they’re also fun to play with. [Tech Ingredients] has done the hard work to find out how to make them out of candy!

The video starts with a basic discussion on the principles of diffraction gratings. The basis of the work is a commonly available diffraction grating, readily available online. It’s a plastic sheet with thousands of microscopic ridges scored into the surface. The overarching method to create a candy version of this is simple — coat the ridged surface in liquid chocolate or sugar syrup, to transfer the impression on to the candy surface when it solidifies. However, the video goes further, explaining every step required to produce a successful end result. The attention to detail is on the level of an industrial process, and shows a mastery of both science and candy processing techniques. If you’ve ever wondered how to properly crystallize chocolate, this video has the knowledge you need.

It’s not often we see candy optics, but we like it — and if you fail, you can always eat your mistakes and try again. If you’re wondering what you can do with a diffraction grating, check out this DIY USB spectrometer.

Optical Tweezers Investigate Tiny Particles

No matter how small you make a pair of tweezers, there will always be things that tweezers aren’t great at handling. Among those are various fluids, and especially aerosolized droplets, which can’t be easily picked apart and examined by a blunt tool like tweezers. For that you’ll want to reach for a specialized tool like this laser-based tool which can illuminate and manipulate tiny droplets and other particles.

[Janis]’s optical tweezers use both a 170 milliwatt laser from a DVD burner and a second, more powerful half-watt blue laser. Using these lasers a mist of fine particles, in this case glycerol, can be investigated for particle size among other physical characteristics. First, he looks for a location in a test tube where movement of the particles from convective heating the chimney effect is minimized. Once a favorable location is found, a specific particle can be trapped by the laser and will exhibit diffraction rings, or a scattering of the laser light in a specific way which can provide more information about the trapped particle.

Admittedly this is a niche tool that might not get a lot of attention outside of certain interests but for those working with proteins, individual molecules, measuring and studying cells, or, like this project, investigating colloidal particles it can be indispensable. It’s also interesting how one can be built largely from used optical drives, like this laser engraver that uses more than just the laser, or even this scanning laser microscope.

Continue reading “Optical Tweezers Investigate Tiny Particles”

Small, Quiet Air Compressor Puts 3D-Printed Parts To Best Use

When the only tool you’ve got is a hammer, every problem starts to look like a nail. Similarly, while a 3D printer is a fantastic tool to have, it can make you think it’s possible to build all the things with printed parts. Knowing when to print ’em and when to machine ’em is important, a lesson that [Diffraction Limited] has taken to heart with this semi-printed silent air compressor.

The key to this compressor’s quiet operation is a combination of its small overall size. its relatively low output, and its strategic use of plastic components, which tend to dampen vibrations. The body of the compressor and the piston arms are the largest 3D-printed parts; the design calls for keeping printed parts in compression for longer life, while the parts of the load path in tension travel through fasteners and other non-printed parts. The piston design is interesting — rather than being attached to connecting rods via wrist pins, the machined Delrin pistons are solidly attached to the piston arms. This means they have to swivel within the cylinders, which are made from short pieces of metal tubing, with piston seals designed to move up and down in grooves on the pistons to allow air to move past them. The valve bodies atop each cylinder are salvaged from another compressor.

When powered by a NEMA23-frame BLDC motor via a belt drive, the compressor is remarkably quiet; not quite silent perhaps, but still impressively smooth, and capable of 150 PSI at low speeds. And as a bonus, the split crankcase makes it easy to open up and service, or just show off how it works. We’ve seen a variety of 3D-printed compressors, from screw-type to Wankel, but this one really takes the prize for fit and finish. Continue reading “Small, Quiet Air Compressor Puts 3D-Printed Parts To Best Use”

Building A Cable-Driven Delta Printer

Most of us have played with a Cartesian-style 3D printer. Maybe you’ve even built a rigid delta. In this case, [Diffraction Limited] decided to a little further away from the norm with a cable-based delta design.

This delta design uses direct cable drives to control the end effector, with preloading rods effectively decoupling the preload from the drive force. Thus, the motors only have to provide enough power to move the end effector around without fighting the tension in the cables. The end effector is nice and light, because the motors remain stationary. With lightly-loaded motors and a lightweight effector, rapid accelerations are possible for faster printing. The video does a great job of explaining how the winch-based actuation system works to move the mechanism quickly and accurately. It’s a pleasure to watch the delta robot bouncing around at high speed as it executes a print.

The video notes that it was a successful build, though difficult to calibrate. The strings also wore out regularly. The truth of the matter is, delta printers are just more fun to watch at work than their less-controversial Cartesian cousins. Video after the break.

Continue reading “Building A Cable-Driven Delta Printer”

The Chocolate Must Flow This Holiday Season

After a long December of hand-coating chocolates for relatives last year, [Chaz] decided that enough was enough and built a chocolate enrobing machine to do the dirty work for him. As a side project, he built a rotary tumbler to chocolate-coat things like wasabi peas, which we assume are designated for [Chaz]’s enemies.

This build started with an off-the-shelf chocolate fountain for which [Chaz] designed and printed a new nozzle in PLA. He also knocked off the flutes that make it fountain on the band saw and removed the rest of the material on the lathe.

The conveying bit comes from a conveyor toaster oven that [Chaz] had lying around — he removed the conveyor and hooked it up to a motor from his collection using a slightly modified flex coupler.

With the chocolate enrober complete, [Chaz] moved on building to the rotary tumbler, which is made from two thrift store pans hammered together at the edges and connects up to the front of a KitchenAid mixer. The final verdict was that this did not work as well as the enrober, but it wasn’t a complete bust — wasabi peas (and most of the kitchen) got coated in chocolate.

While we’re not sure we’d use that PLA chocolate pump more than once, we sure would like to enrobe some things in chocolate, and this seems like a good way to get it done. Check out the build video after the break.

Chocolate is good for more than coating everything in sight. Speaking of sight, check out these chocolate optics.

Continue reading “The Chocolate Must Flow This Holiday Season”