[Tom Stanton] is a fan of things like rubber band planes, and has built many of his own air-powered models over the years. Now, he’s built a model powered by a supercapacitor for a thoroughly modern twist on stored-energy flying toys.
It’s not a wholly original idea; [Tom] was inspired by a toy he bought off-the-shelf. His idea, though, was to make one that could be hand-cranked to charge it to make it more like the rubber-band planes of old. He thus built his own geared generator for the job using a big pile of magnets and 3D printed components. It’s capable of putting out around 17 volts when cranked at a reasonable speed. Hooked up to the toy plane, his hand-crank generator was able to fully charge the plane in just a few turns.
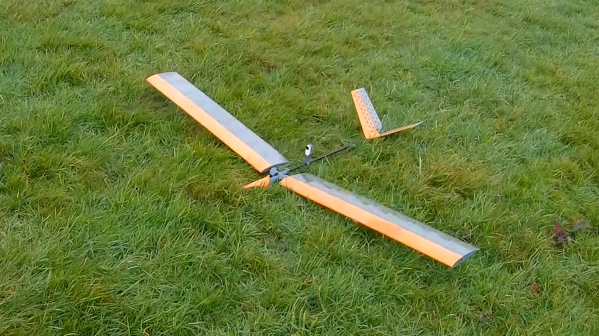
His generator was really overkill for the small toy, though. Thus, he elected to build himself a much larger supercapacitor-powered model. He wired up a pack of six supercapacitors in series, designed for roughly 18 volts. The pack was given balance leads to ensure that no individual capacitor was charged beyond its 3.0 V rating. The pack was placed inside a nice aerodynamic printed fuselage. The plane was then given a brushless motor and prop, speed controller, servos, and an RC receiver. Indeed, far from a simple throwable model, it’s a fully flyable RC plane.
The plane is quite a capable flyer with plenty of power, but a fairly short run time of just under two minutes. Though, with that said, it can be recharged in just about that same amount of time thanks to its supercapacitor power supply. [Tom] reckons it should be capable of a 1:1 crank time to flight time ratio in ideal conditions.
Supercapacitors are super cool, but we don’t see enough of them. They’ve popped up here and there, and obviously have many important applications, but we’re not sure they’ve had a real killer app in the consumer space. XV Racers were killer fun, though. Continue reading “Building A Rad Super Capacitor RC Plane” →