Hackaday Prize Entry: A Better DIY CT Scanner

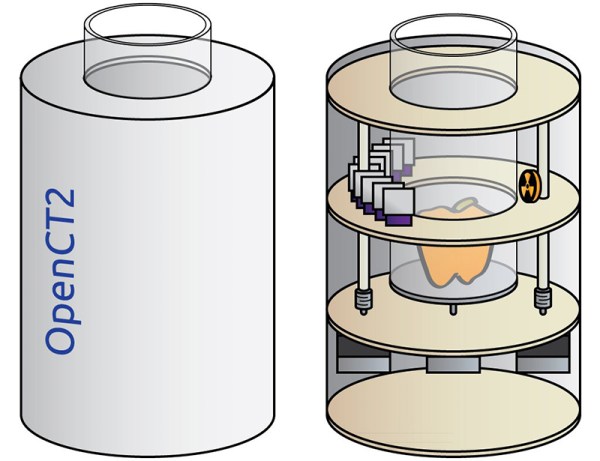
If you’re entering something in The Hackaday Prize this year, [Peter Jansen] is a guy you need to watch out for. Last year, he won 4th place with the Open Source Science Tricorder, and this year he’s entering a homebrew MRI machine. Both are incredible examples of what can be built with just enough tools to fit on a workbench, but even these builds don’t cover everything [Peter] has built. A few years ago, [Peter] built a desktop CT scanner. The CT scanner worked, but not very well; the machine takes nine hours to acquire a single slice of a bell pepper. At that rate, any vegetable or fruit would begin to decompose before a full scan could be completed.

This didn’t stop a deluge of emails from radiology professors and biomedical folk from hitting [Peter]’s inbox. There are a lot of people who are waiting for back alley CT scans, but the CT scanner, right now, just isn’t up to the task. The solution is iteration, and in the radiology department of hackaday.io, [Peter] is starting a new project: an improved desktop CT scanner.

The previous version of this CT scanner used a barium check source – the hottest radioisotope source that’s available without a license – and a photodiode detector found in the Radiation Watch to scan small objects. This source is not matched to the detector, there’s surely data buried below the noise floor, but somehow it works.

For this revision of a desktop CT scanner, [Peter] is looking at his options to improve scanning speed. He’s come up with three techniques that should allow him to take faster, higher resolution scans. The first is decreasing the scanning volume: the closer a detector is to the source, the higher the number of counts. The second is multiple detectors, followed up by better detectors than what’s found in the Radiation Watch.

The solution [Peter] came up with still uses the barium check source, but replaces the large photodiode with multiple PIN photodiodes. There will be a dozen or so sensors in the CT scanner, all based on a Maxim app note, and the mechanical design of this CT scanner greatly simplifies the build.

Compared to the Stargate-like confabulation of [Peter]’s first CT scanner, the new one is dead simple, and should be much faster, too. Whether those radiology professors and biomed folk will be heading out to [Dr. Jansen]’s back alley CT scan shop is another question entirely, but it’s still an amazing example of what can be done with a laser cutter and an order from Mouser.


The 2015 Hackaday Prize is sponsored by:

Hackaday Prize Entry: A $100 CT Scanner

What do you do when you’re dad’s a veterinarian, dumped an old x-ray machine in your garage, and you’re looking for an entry for The Hackaday Prize? Build a CT scanner, of course. At least that’s [movax]’s story.

[movax]’s dad included a few other goodies with the x-ray machine in the garage. There were film cassettes that included scintillators. By pointing a camera at these x-ray to visible light converting sheets, [movax] can take digital pictures with x-rays. From there, it’s just building a device to spin around an object and a lot – a lot – of math.

Interestinly, this is not the first time a DIY CT scanner has graced the pages of Hackaday. [Peter Jansen] built a machine from a radiation check source, a CMOS image sensor, and a beautiful arrangement of laser cut plywood. This did not use a proper x-ray tube; instead, [Peter] was using the strongest legally available check source (barium 133). The scan time for vegetables and fruit was still measured in days or hours, and he moved on to build an MRI machine.

With a real source of x-rays, [movax]’s machine will do much better than anything the barium-based build could muster, and with the right code and image analysis, this could be used as a real, useful CT scanner.


The 2015 Hackaday Prize is sponsored by:

Linear Book Scanner Does It With Arduino

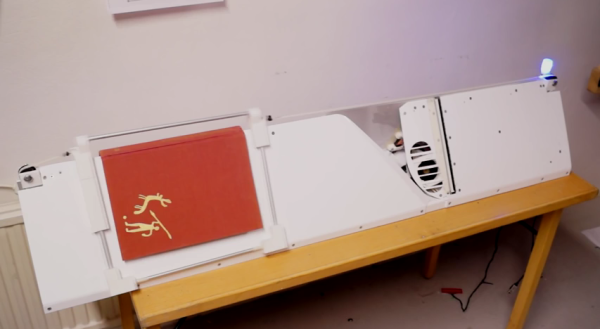
About two and half years ago, the Google Books team open-sourced the plans for their book scanning rig, and there was much rejoicing. As [Dany Qumsiyeh] explained in the Google Tech talk we linked to at the time, the scanner uses a vacuum to lift the next page from the stack and turn it, saving hours of human labor and, admittedly, putting books in a little bit of danger.

[Chris] tipped us off about a different take on the linear book scanner created by [Forssa1] that uses server fan to turn the pages. [Forssa1]’s rig is built from laser-cut acrylic and employs two handheld scanners driven by an Arduino Mega. We don’t have a great deal of information about this build, but you can check it out after the break.

UPDATE: [Forssa1] checked in with us and sent a link to more build photos of his book scanner.

Continue reading “Linear Book Scanner Does It With Arduino”

Larson Scanner Namesake [Glen Larson] Passes Away

[Glen A. Larson] passed away on Friday at the age of 77. He may be most widely recognized for being a producer of the original Battlestar Galactica, Magnum, P.I. and Knight Rider television series’. But for us his association with a row of LEDs which illuminates in a back and forth pattern will always be his legacy.

When we heard about his passing we figured that we would hear about his invention of the Larson Scanner but that was not the case. A bit of research turned up a pretty interesting Wikipedia bio page. He has origins in a music group call The Four Preps and actually composed or collaborated on a number of television theme songs among other notable accomplishments. But nothing about electronics. Did this man of many hats actually invent the hardware for the Larson Scanner used as the Cylon Eye and on the front of K.I.T.T., or does it simply share his name?

Evil Mad Scientist Labs claims to have coined the term Larson Scanner. [Lenore Edman] confirmed to us that EMSL did indeed start the term which is used to name their electronics kit and directed us to [Andrew Probert] who lists effects for the TV series on his portfolio. We’ve reached out to him for more information but had not heard back at the time of publishing. We’ll update this post as details emerge. In the mean time, if you have any insight please leave it below including the source of the information.

If you are not aware, a Larson Scanner is so interesting because the pattern calls for a fading trail of LEDs. It is not simply a fully illuminated pixel moving back and forth but includes dimmed pixels after the brightest one has passed. This is an excellent programming challenge for those just getting into embedded development.

Those interested in learning more about [Gary] may find this lengthy video interview of interest. Otherwise it’s time for the collection of links to past Larson Scanner projects which we’ve covered.

[Thanks Bruce]

A 3D(ollar) Scanner

Once you have a 3D printer, making copies of objects like a futuristic Xerox machine is the name of the game. There are, of course, 3D scanners available for hundreds of dollars, but [Joshua] wanted something a bit cheaper. He built his own 3D scanner for exactly $2.73 in parts, salvaging the rest from the parts bin at his local hackerspace.

[Josh]’s scanner is pretty much just a lazy suzan (that’s where he spent the money), with a stepper motor drive. A beam of laser light shines on whatever object is placed on the lazy suzan, and a USB webcam feeds the data to a computer. The build is heavily influenced from this Instructables build, but [Josh] has a few tricks up his sleeve: this is the only laser/camera 3D scanner that can solve a point cloud with the camera in any vertical position. This potentially means algorithmic calibration, and having the copied and printed object come out the same size as the original. You can check out that code on the git.

Future improvements to [Josh]’s 3D scanner include the ability to output point clouds and STLs, meaning anyone can go straight from scanning an object to slicing it for a 3D printer. That’s a lot of interesting software features for something that was basically pulled out of the trash.

Fingerprint Scanner Both Simplifies And Complicates Opening Garage Door

Fringer Print Scanner Garage Door Opener

Opening a garage door by hand is a lot of work and a hassle, hence the advent of the garage door opener. Nowadays, some people may even say just pushing the button of a remote control requires too much effort. [nodcah] is one of those people so he came up with a fingerprint scanner that controls a pre-installed garage door opener. All kidding aside, it is a cool project that lets you into your garaage, keeps unknown people out and doesn’t require you to remember to carry a key or remote.

In the center of this project is an ATmega328 that runs a custom Arduino code. This ATmega328 is responsible for controlling a 16 character, 2 line LCD screen as well as communicate with an off the shelf fingerprint scanner from Sparkfun. The fingerprint scanner has a built in CPU, can store up to 20 fingerprints and does all its own processing of fingerprint scans. It then communicates to the ATmega328 with simple commands over serial Tx and Rx lines.

The ATmega328, LCD and fingerprint scanner are all mounted outside the garage in a 3D printed enclosure. If the wires for the internal-garage open/close button were just run straight into this outdoor module, anyone could open it up, short the wires and get into the garage. To prevent this, if the ATmega328 gets the ‘OK’ from the fingerprint scanner, then it sends a signal to an ATtiny85 that is inside the garage. If the ATtiny85 receives the correct signal, it will then actuate the garage door opener by shorting the open/close button contacts. This prevents anyone from sneaking into the garage.

[nodcah] did a great service to the community by making all of the part list, schematics, instructions and Arduino code available so anyone can easily put this project together.

Continue reading “Fingerprint Scanner Both Simplifies And Complicates Opening Garage Door”

The Race Is On To Build A Raspi Kinect 3D Scanner

pinect

The old gen 1 Kinect has seen a fair bit of use in the field of making 3D scans out of real world scenes. Now that Xbox 360 Kinects are winding up at yard sales and your local Goodwill, you might even have a chance to pick one up for pocket change. Until now, though, scanning objects in 3D has only been practical in a studio or workshop setting; for a mobile, portable scanner, you’d need to lug around a computer, a power supply, and it’s not really something you can fit in a back pack.

Now, finally, that may be changing. [xxorde] can now get depth data from a Kinect sensor with a Raspberry Pi. And with just about every other ARM board out there as well. It’s a kernel driver that’s small, fast, and does just one thing: turns the Kinect into a webcam that displays depth data.

Of course, a portabalized Kinect 3D scanner has been done before, but that was with an absurdly expensive Gumstix board. With a Raspi or BeagleBone Black, this driver has the beginnings of a very cheap 3D scanner that would be much more useful than the current commercial or DIY desktop scanners.