[Robert Murray-Smith] starts out showing us some clay formations that house bees. He couldn’t take any of that clay home, but that’s no problem — clay is plentiful, and apparently, you can make a battery with it. Well, perhaps not really a battery. Adding water to zeolite — a clay often used as a filter material — generates heat, and where there’s heat, there can be electricity.
[Robert] uses a salvaged Peltier device, as you find in small electric refrigerators. These solid-state heat pumps usually convert electricity into a temperature differential, but in this case, it is used as a thermocouple, generating electricity from a temperature difference.
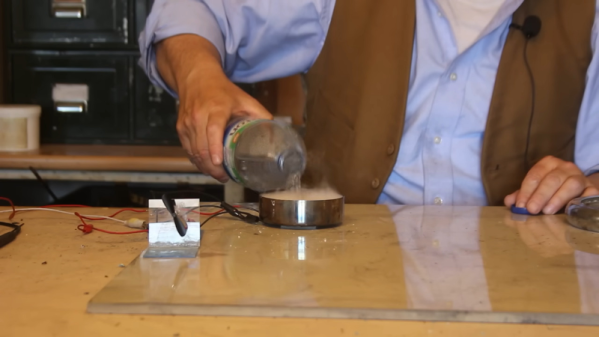
The clay used is a very fine aluminosilicate crystal known as zeolite 13X. Once it comes into contact with plain ordinary water, it immediately starts to boil. It’s a neat experiment, and with the Peltier underneath the metal container holding the clay, enough power is produced to spin a small motor. Of course this won’t power anything large, but on the other hand, plenty of things these days don’t take much power. This technique would work with any exothermic reaction of course, but there’s something compelling about the shelf-stability of water and clay.
Beats a potato, we suppose. Batteries don’t have to be difficult to make. It is only hard to make really good ones.
Continue reading “Clay Makes For DIY Power Source, Just Add Water”