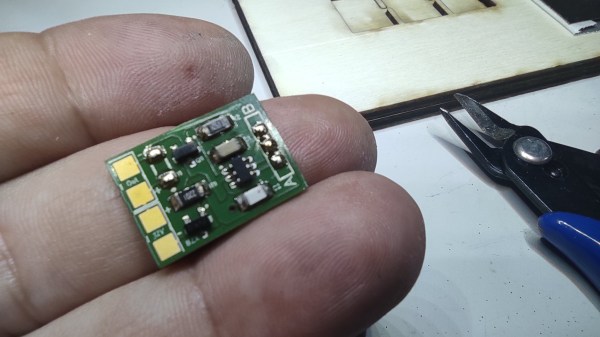
Electronics components are steadily moving away from through hole parts to using surface mount technology (SMT) exclusively. While the small size of the SMT components can be intimidating, with a little practice, soldering can come pretty naturally. To help folks get over their fear of soldering small parts, [Alpenglow Industries] have created a charming board to practice SMT soldering skills on.
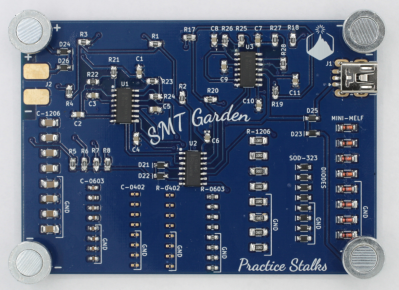
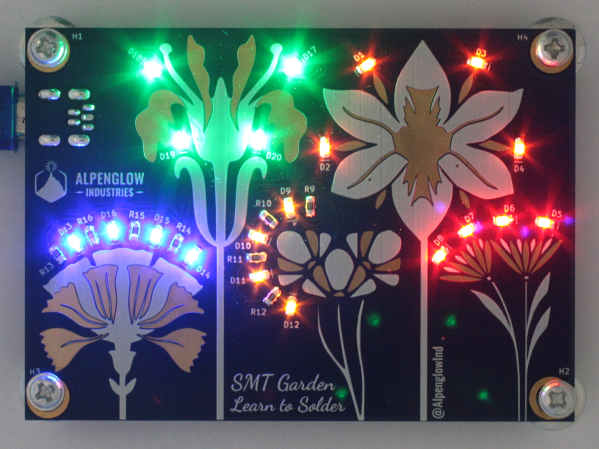
[Alpenglow Industries] board, called the “SMT Garden”, combines a variety of SMT sizes ranging from 0402 to 1206 with beautiful PCB artwork to highlight the variety of LEDs on board. [Alpenglow Industries] provides detailed instructions on the various aspects of SMT soldering including what the terminology is and providing various techniques to help in soldering. The boards have practice “stalks” of surface mount component pads, so that folks can practice on columns of similarly sized SMT components to perfect their technique. The training stalks themselves aren’t functional but are there to provide practice for when folks feel comfortable soldering the LEDs, 555 timer and inverter chips to make the board functional.
[Alpenglow Industries] have provided all the KiCAD project files, gerbers and schematics available online. SMT soldering is more accessible than ever and when you can even use your phone as a microscope, it’s a good excuse to try it out, if you haven’t already.


 [Rob] has been focusing on day-to-day usability first and foremost, with pleasantly clicky encoders, impeccable performance of its watch duty, unparalleled expandability, and comfortable wrist fit — it provides a feeling no commercial wearable could bring.