The human body and sharp objects don’t get along very well, especially when they are being wielded with ill-intent. Since antiquity there have been various forms of armor designed to protect the wearer, but thankfully these days random sword fights don’t often break out on the street. Still, [SCREEN TESTED] wanted to test the viability of 3D printed chain mail — if not for actual combat, at least for re-enactment purposes.
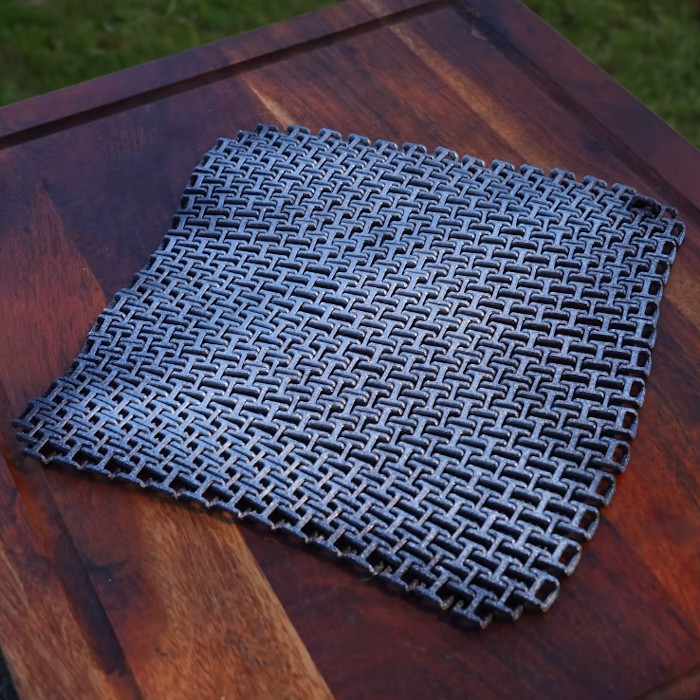
He uses tough PLA to crank out a bed worth of what looks like [ZeroAlligator]’s PipeLink Chainmail Fabric, which just so happens to be the trending result on Bambu’s MakerWorld currently. The video shows several types of mail on the printer, but the test dummy only gets the one H-type pattern, which is a pity — there’s a whole realm of tests waiting to be done on different mail patterns and filament types.
 In any case, the mail holds up fairly well to puncture from scissors and screwdrivers — with a heavy sweater or proper gambeson (a quilted cloth underlayer commonly worn with armor) on underneath, it looks like it could actually protect you. To slashing blows, PLA holds up astoundingly well, barely marked even by slashes from an actual sword. As for projectiles, well, everyone knows that to an arrow, chain mail is made of holes, and this PLA-based armor is no different (as you can see at 8:30 in the video below).
If you want to be really safe when the world goes Mad Max, you’d probably want actual chain mail, perhaps from stainless steel. On the other hand, if someone tries to mug you on the way home from a con, cosplay armor might actually keep you safer than one might first suspect. It’s not great armor, but it’s a great result for homemade plastic armor.
Of course you’d still be better off with Stepahnie Kwolek’s great invention, Kevlar.
Continue reading “3D Printed Mail Is A Modern Solution To An Ancient Problem” →