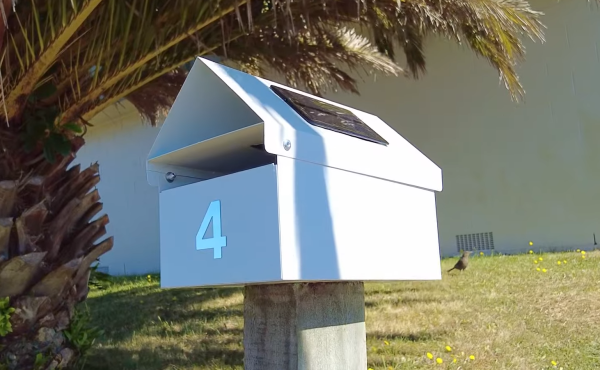
A mailbox with a solar cell on top

IoT-Enabled Mailbox Lets You Check Your Mail Without Leaving Your House

Whether you live in an apartment downtown or in a detached house in the suburbs, if your mailbox is not built into your home you’ll have to go outside to see if anything’s there. But how do you prevent that dreadful feeling of disappointment when you find your mailbox empty? Well, we’re living in 2022, so today your mailbox is just another Thing to connect to the Internet of Things. And that’s exactly what [fhuable] did when he made a solar powered IoT mailbox.

The basic idea was to equip a mailbox with a camera and have it send over pictures of its contents. An ESP32-Cam module could do just that: with a 1600 x 1200 camera sensor, a 160 MHz CPU and an integrated WiFi adapter, [fhuable] just needed to write an Arduino sketch to have it take a picture every few hours and upload it to an FTP server.
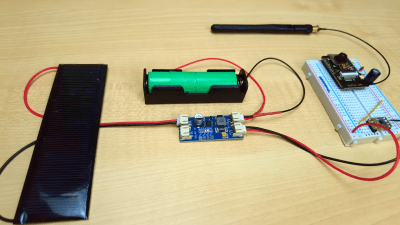
A pile of components making up an IoT Mailbox
The components inside: a solar cell, battery, power controller, LDO and ESP32-Cam module with WiFi antenna

But since running a long cable all the way from the house was not an attractive option, the whole module had to be completely wireless. [fhuable] decided to power it using a single 18650 lithium ion cell, which gets topped up continuously thanks to a 1.5 W solar panel mounted on the roof of the mailbox. The other parts are housed in a 3D-printed enclosure that’s completely sealed to keep out moisture.

The enclosure had to be made from a material that does not degrade in direct sunlight, which is why [fhuable] decided to try ASA filament; this should be very resistant against UV rays, but proved tricky to process. It warped so much during cooling that the only way to get a solid piece out of the printer was to enclose the entire machine in a cardboard box to keep it warm inside.

The end result was worth it though: a neat little extension on the back of the mailbox that should keep sending photos of its insides for as long as the Sun keeps shining. The camera should also give a good indication as to the contents of the mailbox, allowing the user to ignore any junk mail; this is a useful improvement over previous IoT-enabled mailboxes that use proximity sensors, microswitches or optical sensors.

Continue reading “IoT-Enabled Mailbox Lets You Check Your Mail Without Leaving Your House”

Remoticon 2021 // Joey Castillo Teaches Old LCDs New Tricks

Segmented liquid crystal displays are considered quite an old and archaic display technology these days. They’re perhaps most familiar to us from their use in calculators and watches, where they still find regular application. [Joey Castillo] decided that he could get more out of these displays with a little tinkering, and rocked up to Remoticon 2021 to share his findings.

[Joey’s] talk is a great way to learn the skills needed to reverse engineer a typical segment LCD.
[Joey] got his start hacking on these displays via his Sensor Watch project –  a board swap for the venerable Casio F-91W wristwatch, with the project now available on CrowdSupply. It kits out the 33-year-old watch design with a modern, low-power ARM Cortex M0+ microcontroller running at 32 MHz that completely revolutionizes what the watch can do. Most importantly, however, it repurposes the watches original segmented monochrome LCD.

Segment LCDs are usually small monochrome devices made out of glass, that have the benefit of using very little power in their operation. They come with a fixed layout, which cannot be changed – so they’re often designed specifically for a given purpose. A calculator will have segments laid out to display numbers, often in the usual 7-segment fashion, while a watch may add dedicated segments for displaying things like “AM,” “PM,” or “ALARM.” Continue reading “Remoticon 2021 // Joey Castillo Teaches Old LCDs New Tricks”

How To Get Your Diffraction Grating 3D Prints Right The First Time

Diffraction gratings are beautiful things, bending transmitted and reflected light and splitting it into its component wavelengths to create attractive iridescent rainbow patterns. It’s the same effect you see on the bottom of a CD!

You can 3D print a functional diffraction grating, too, with the right techniques, as it turns out! The average 3D printer can’t recreate the tiny-scaled patterns of a diffraction grating directly; a typical diffraction grating may have up to 1000 lines per mm. Instead, by 3D printing onto an existing diffraction grating, the print can pick up the texture on its base layer. It’s a great way to add iridescence and shine to a print.

We’ve seen similar work before, but the guide from [All3DP] goes into greater detail on how to get the effect to work just right. Getting the bed as close to perfectly level is key here, as is the first layer height. This is because the first layer of plastic has to meld perfectly with the diffraction grating to pick up the pattern. Too high and the grooves won’t transfer to the plastic, and too low, and it’s likely you’ll just melt the grating itself. Setting the Z-offset appropriately can help here.

Choosing the right bed temperature is also important to ensure the molten plastic is able to flow into the grooves of the grating. Again, the temperature at which the diffraction grating itself can survive is important to take into account; going above 90 degrees can be risky here. The guide also shows two methods of achieving the goal: one can either use an off-the-shelf grating, or one can prepare a no-longer-wanted CD into a suitable print surface.

Naturally, removing the print must be done delicately, lest one disturb the delicate structures key to generating the iridescent effect. [All3DP] recommends using a freezer to help separate the parts from the grating surface. It also bears noting that the print won’t survive excessive handling, as the grating structures will get damaged by physical touch.

It’s a great in-depth guide on how to get diffraction grating prints right. Meanwhile, consider diving deeper into the world of 3D printed optics!


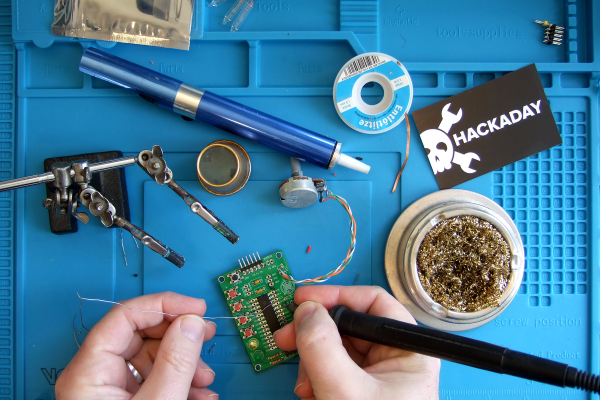
Ask Hackaday: What’s Your Worst Soldering Job?

Soldering! It’s the primary method for attaching one component to another in the world of electronics. Whether you’re free-forming a circuit, attaching connectors to cables, or populating a PCB, you’ll eventually find yourself doing some soldering, whether by hand, reflow, or maybe even a fancy wave soldering machine.

It’s a fundamental skill that nevertheless remains one of the biggest hurdles for newcomers to overcome when diving into the electronics hobby. Difficult jobs with tiny components or with large heat sinks can up the challenge for even well-practiced hands. Thus, today we ask the question: What’s your worst soldering job?
Continue reading “Ask Hackaday: What’s Your Worst Soldering Job?”

Don’t Miss The VCF Indoor Swap Meet This Weekend

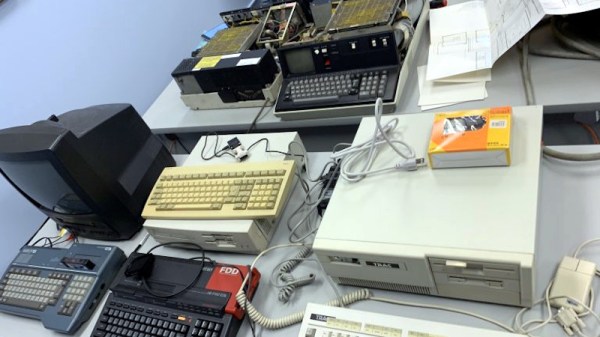
We don’t need to tell you that these last couple of years have been a real drag for in-person events. But at long last, after a bit of a false start last summer, it seems like we can finally start peeking our heads out and getting back to doing the things we love. So why not celebrate by taking part in that most sacred of geek pastimes: poring through boxes of dusty old gear in search of some electronic treasure?

On Saturday the Vintage Computer Federation (VCF) is holding an indoor swap meet at the InfoAge Science and History Museum in New Jersey, and everyone’s invited. Vintage computers will naturally be the main attraction, but if their previous events are any indication, you should expect the tables to be filled with a healthy mix of general electronics, classic games, and amateur radio gear as well. The doors open up at 8 AM sharp and it’s free to get in, so we’d suggest showing up early for the best selection.

A little less than a year ago we visited the previous VCF swap meet, which back then had to be held outdoors due to COVID-19 concerns, and were blown away by the selection of weird and wonderful hardware up for grabs. From arcade cabinets to luggable PCs and 3D printers, there was a little something for everyone, and all at rock-bottom prices. The only real gripe we had was the lack of on-site food and beverage, which according to the VCF website, has been addressed this time around. No word on whether or not there’s an ATM handy though, so you might want to stop and get some cash before heading to the relatively remote Camp Evans site.

After the swap meet wraps up at 2 PM, be sure to check out the Vintage Computer Federation’s permanent collection at InfoAge, as well as all the incredible exhibits and mini-museums the site has to offer. If nothing else, we strongly recommend you take the walk down the road to the TLM-18 Space Telemetry Antenna that Princeton University currently operates as Linux-powered software defined radio telescope.

The fine folks of the VCF are also hard at work putting together their annual East Coast Vintage Computer Festival, which will take place at InfoAge on April 22nd to the 24th, so mark your calendars.

An “unbusy” USB-C Port Doubles-up For JTAG Programming

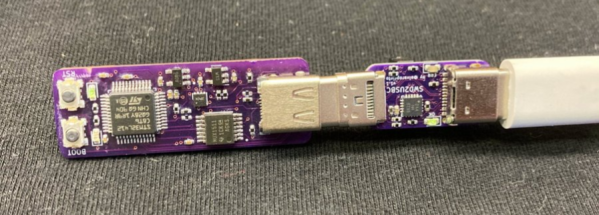
Board space is a premium on small circuit board designs, and [Alvaro] knows it. So instead of adding a separate programming port, he’s found a niche USB-C feature that lets him use the port that he’s already added both for its primary application and for programming the target microcontroller over JTAG. The result is that he no longer needs to worry about spending precious board space for a tiny programming port; the USB-C port timeshares for both!

In a Twitter thread (Unrolled Link), [Alvaro] walks us through his discovery and progress towards an encapsulated solution. It turns out that the USB-C spec supports a “Debug-Accessory Mode” specification, where some pins are allowed to be repurposed if pins CC1 and CC2 are pulled up to Logic-1. Under these circumstances, the pin functions are released, and a JTAG programmer can step in to borrow them. To expose the port to a programmer, [Alvaro] cooked up a small breakout board with a USB-C plug and separate microcontroller populated on it.

This board also handles a small quirk. Since [Alvaro’s] choice of programming pins aren’t reversible, the USB-C plug will only work one of the two ways it can be plugged in. To keep the user informed, this breakout board sports a red LED for incorrect orientation and a green LED for correct orientation–nifty. While this design quirk sacrifices reversibility, it preserves the USB 2.0 D+ and D- pins while also handling some edge cases with regard to the negotiating for access to the port.

Stick through [Alvaro]’s Twitter thread for progress pics and more details on his rationale behind his pin choices. Who knows? With more eyes on the USB-C feature, maybe we’ll see this sort of programming interface become the norm?

[Alvaro] is no stranger to Hackaday. In fact, take a tour back to our very first Supercon to see him chat about shooting lasers at moving targets to score points on a DEFCON challenge in the past

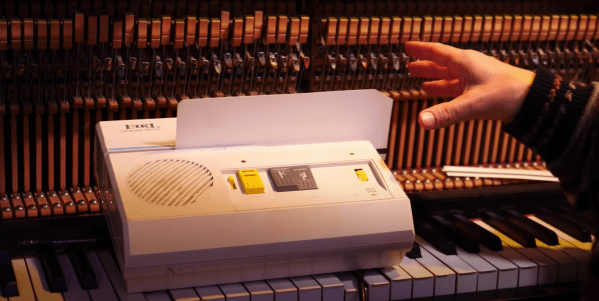
an EIKI machine playing back a card

Finding Lo-fi In All The Strange Places

If you haven’t heard any lo-fi music yet, it stands for low-fidelity music. Lofi music today is characterized by audio imperfections such as cable noise or tape hiss. To get a pleasantly warm imperfect sound, many artists turn to vintage equipment. [HAINBACH] found an excellent instrument, the obsolete classroom tool known as magnetic card audio recorders.

The basic mechanism of the device is that it reads and writes to the two tracks on the quarter-inch tape fed through it. One track is meant for the teacher and one track is meant for the student. Originally designed to assist language learners, we can see why it would be an ideal source of good lo-fi samples. The microphone and speaker need to be high quality to hear the nuances of the example sentence. [HAINBACH] also admires the general tone and timbre of the device as opposed to just using a cassette recorder.

The tape in question is glued to little plastic cards. With some modification, you can run the card backward, create a loop, or stitch sections together. With multiple machines, you can run the card from one machine directly into another. They were made by several companies and can be found relatively cheap on online auction houses. While we can’t credit [HAINBACH] for coming up with the idea as it was featured in the movie Baby Driver, it’s still an example of an awesome hack.

Magnetic tape has long been a fascination of musical instruments. This Crudman, which is a modern-day interpretation of the much older Mellotron from 1963, is a great example of that.

Video after the break.

Continue reading “Finding Lo-fi In All The Strange Places”