Ah, Google. Very few companies have mastered the art of creating amazing technology and products, and then so effectively abandoning and mishandling them. Case in point, YouTube. Citing “dislike attacks”, which are coordinated down-voting of particular videos, YouTube opted to hide the dislike counter on all videos. It could be pointed out that dislikes still impact the recommendation algorithm the same way they always have, and that creators still see their dislike counts on their own dashboard.
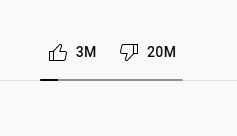
There might be something to the idea that YouTube doesn’t like the notoriety of their Rewind videos leading the dislike count, with 2018 at nearly 20 million. There may even be validity in the theory that corporate partners don’t like visible dislike numbers on their videos. Regardless, YouTube made the change, and people hate it. Their platform, so nothing you can do about it, right?
“Life, uh, uh, finds a way,” to quote my favorite fictional mathematician. Yes, a hacker, one of us, has figured out a workaround. [Dmitrii Selivanov] has put together the “Return YouTube Dislike” browser extension, which does a couple of things. First, it is pulling archived data about videos, taking advantage of the gap in time between the official announcement, and the removal of the dislike API.
But for new videos? That’s where things are harder. If you install the extension, your video likes and dislikes are tracked, and the combined user data is used to extrapolate an estimated dislike count on any given video. [Dimitrii] is also working on a way to allow individual channels to share their stats with the project, to give more official numbers for their videos.
The extension is open source, and the Chrome web store shows over a million users. Linus Tech Tips, along with a bunch of other channels, have covered this, so check out their videos for more.