Internet connections continue to increase in speed, and for a lucky few, it’s possible to get a Gigabit fibre connection at home. However, if you’re intending to use this connection to its fullest, you might find that your off-the-shelf router has become a bit of a bottleneck. [Wes Fenlon] of PC Gamer had this very problem, and found the perfect workaround – building a custom router instead!
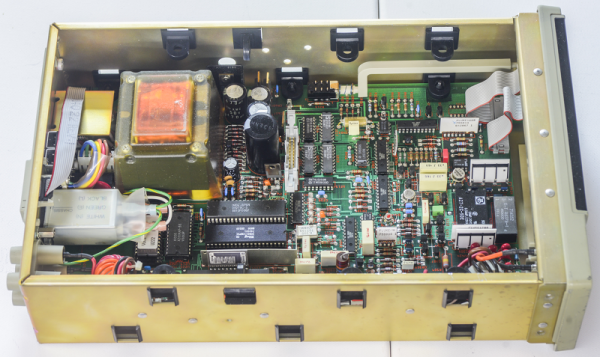
The main problem with commodity routers is a lack of processing power. With networks growing ever faster, the hardware in routers hasn’t kept up with the needs of demanding power users. To solve this, [Wes] grabbed an old PC he had lying around, packing a quad-core i5 CPU and 16 GB of RAM. Fitted with an enterprise-grade 4-port Gigabit LAN card, and running Netgear’s (Sorry commenteers!) Netgate’s pfSense routing software, the old machine has enough power to be complete overkill for the application.
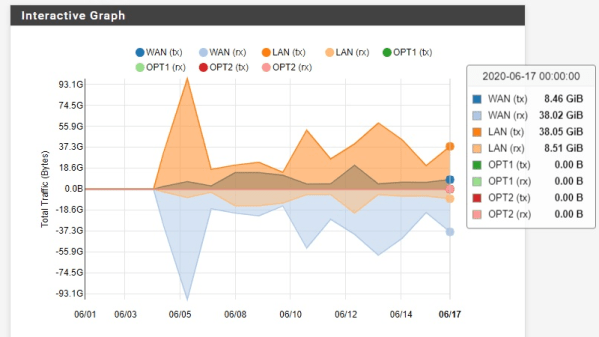
The side benefit of this method is configurability. pfSense has a far more powerful set of options than most common routers. It’s config page also runs far more smoothly, too. There’s also the possibility to run all sorts of useful plugins, like router-level ad blockers and traffic monitoring utilities.
Overall, it’s a great way to repurpose a surplus machine and improve your network performance on the cheap. Others have tried similar builds, too. It has us contemplating the possibilities for our own networks at home!


 In
In 


