Vacuum Forming Key Cap Covers Doesn’t Quite Work Out

Retrocomputing is as much about physical preservation as it is about electronics and computer science. Plastic is an awful material when it comes to decade-long timescales, and the forces of sun, air and water are unrelenting on these materials. [Drygol] has long experimented with techniques to preserve and refresh keycaps, and decided to try some fun vacuum forming techniques for something new. It sadly didn’t go to plan, however.

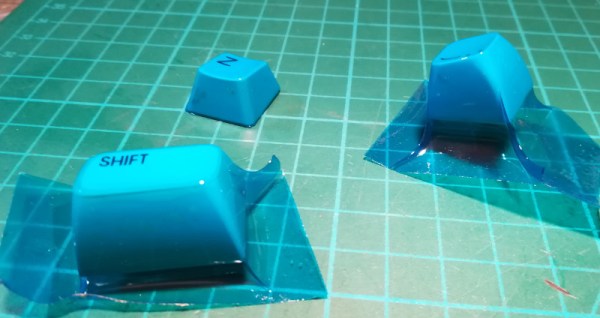
The basic idea was to use a vacuum-forming machine to coat keycaps in a thin layer of translucent plastic, for both aesthetic benefit and to preserve them from falling apart. Initial small-scale tests were promising, creating a key with a tight, form-fitting blue plastic wrap through which the original labels were still visible.

However, scaling up the process proved fraught. Uneven heating of the plastic film and a lack of rigidity in the carriage used to stretch it over the keycaps led to poor results. The final product showed many wrinkles and was distinctly unappealing.

[Drygol] isn’t giving up however, and plans to build a new vacuum table with greater performance. We can imagine this technique being an accessible way to colorize keycaps for a vintage cyberdeck or chiptune rig, without permanently modifying the keys. If you’ve got the inside knowledge on how to make this work, sound off in the comments.

We’ve seen [Drygol]’s work in this space before, too, like this extreme modded Amiga. If you’re executing your own retro repairs, be sure to drop us a line!

MouSTer Brings USB To Retro Computers

Folks who like the take the old Amiga out for the occasional Sunday drive usually do it because they have wistful memories of the simpler times. Back when you could edit documents or view spreadsheets on a machine that had RAM measured in kilobytes instead of gigabytes. But even the most ardent retro computer aficionado usually allows for a bit of modern convenience.

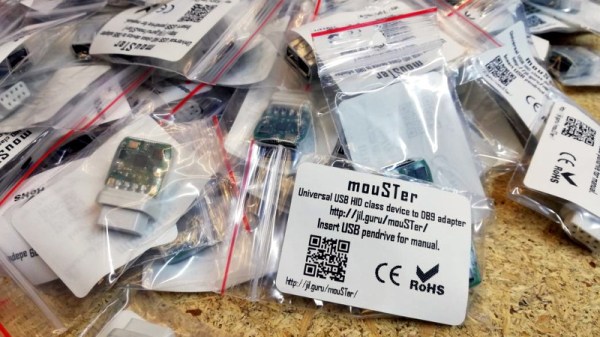
Enter the mouSTer. This tiny device converts a common USB HID mouse into something older computers can understand. It even supports using Sony’s PlayStation 4 controller as a generic game pad. While the firmware is still getting tweaked, the team has confirmed its working on several classic machines and believe it should work on many more. Considering the prices that some of these old peripherals command on the second hand market, using a USB mouse or controller on your vintage computer isn’t just more convenient, but will likely be a lot cheaper.

Confirmed retrocomputing superfan [Drygol] is a member of the team working on mouSTer, and in a recent post to his retrohax blog, he talks a bit about what’s happened since his last update over the summer. He also talks a bit about the challenges they’ve faced to get it into production. Even if you’re not into poking around on vintage computers, there are lessons to be learned here about what it takes to move from a handful of prototypes to something you can actually sell to the public.

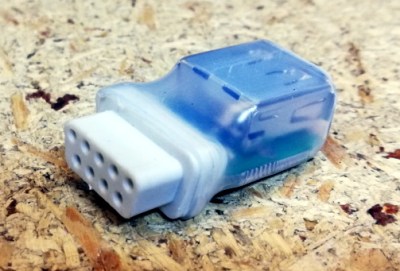
We especially liked the details about the mouSTer enclosure, or lack thereof. Originally [Drygol] says they were going to have the cases injection molded, but despite initial interest from a few companies they talked to, nobody ended up biting because it needed to be done with relatively uncommon low pressure injection. While 3D printing is still an option, the team ended up using clear heatshrink tubing to create a simple conformal protective shell over the electronics. Personally we think it looks great like this, but it sounds like this is only a temporary solution until something a bit more robust can be implemented.

As you might imagine we’ve seen DIY projects that aimed to bring modern input devices to vintage computers like the Atari ST, but the diminutive proportions of the mouSTer and the fact that it’s a turn-key product is sure to appeal to those who want to minimize headaches when working with their classic gear.

Continue reading “MouSTer Brings USB To Retro Computers”

Restoring Commodore’s Unloved Plus/4

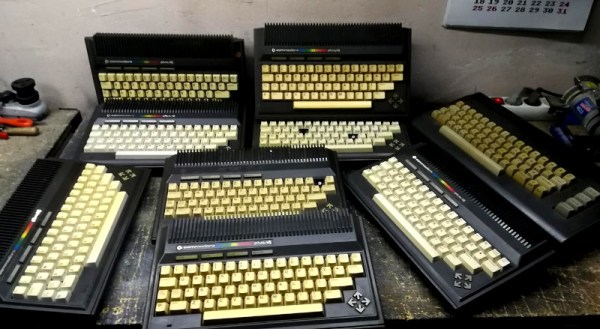
The Commodore Plus/4 was not loved by the marketplace after its launch in 1984. Despite its namesake feature of having productivity programs built in, its lack of compatibility with Commodore 64 software and oddball status meant that it struggled to find acceptance. However, like so many retro computers, it maintains a following to this day. [Drygol] had collected a total of eight neglected units, and set to giving them a full workover.

First on the docket is cleaning, and [Drygol] makes short work of disassembling the computers and removing decades of dirt and dust. Keycaps are treated with Retrobright to restore their original color. The black styling of the case means it gets a simple wash down instead, and then a rub with thin oil to restore the plastic’s original sheen.

[Drygol] steps through various popular hacks for the platform too, from 6510 CPU replacements for the often-failing 7501 and 8501, to SD2IEC card interfaces to replace the much-maligned storage original storage options. Damaged keyboard studs are replaced with hacked-up Amiga parts, while LEDs that are long out of production are swapped out for cut-down modern parts.

The impressive thing is just how much community support there is for an also-ran Commodore that never truly caught the public’s eye. Efforts are ongoing, too, with projects like THED aiming to reproduce some of the custom chips used on the platform.

We’ve featured posts on the engineering that goes into Commodore’s 8-bit computers as well, like this excellent piece from [Bil Herd] on the story of the Commodore 128. Of course, if you’re working your own wonders with retro hardware, you know who to call.

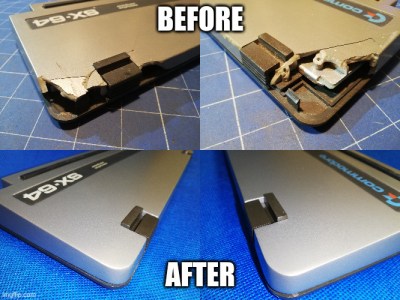
Commodore SX-64 Keyboard Upgraded From Trash To Treasure

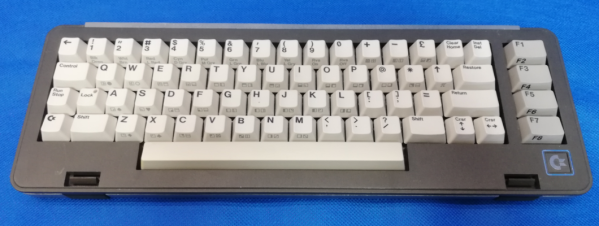
Released in 1984, the Commodore SX-64 Executive Computer was one of the first portable luggable color computers. It cost twice as much as a Commodore 64, had a tiny 5″ diagonal screen, and couldn’t actually support both 5¼” drives as advertised. On the upside, people say it had a slightly better keyboard than its classic cousin.

[Drygol] agreed to restore the keyboard from a friend’s Commodore SX-64 sight-unseen, and boy was this thing in bad shape. Most people would probably consider the condition a shame and write it off as a lost cause, since two of the corners were missing most of their plastic. But [Drygol] isn’t most people. [Drygol] had mad restoration skills to begin with, and this project honed them to a razor’s edge.

Plenty of the other vintage computer restorations [Drygol] has done required plastic welding, which uses heat or a lot of friction to smooth over cracks. Some of those have not stood the test of time, so he’s now in the habit of stabilizing cracks with brass mesh before filling them with fiberglass putty.

The best part is how [Drygol] managed to rebuild the corners using the same methods, soldering the brass mesh at the 90° joins, and reinforcing them with thick copper wire before beginning the painstaking putty/sand/putty process. The use of blank copper clad boards as straight edges and thickness gauges is genius.

There’s a whole lot to learn here, and the adventure beings with something that probably keeps a lot of people from trying stuff like this in the first place: how do you safely remove the badges?

You’re right, plastic welding is awesome. There even used to be a toy plastic welder. But there’s no need to troll the electronic auction bay to give it a try — just use a cheap soldering iron.

Serious Repair Work On The Amiga 600

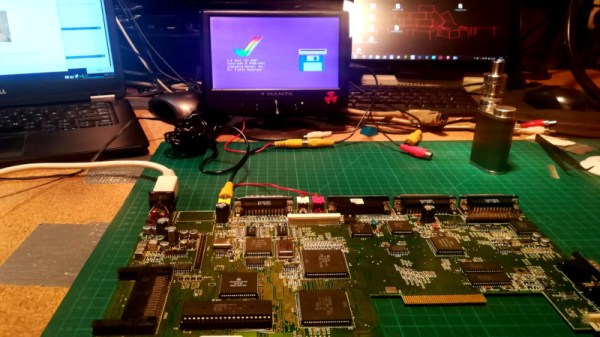
The Amiga will be forever loved for bringing serious multimedia capabilities to the home computer market. However, these machines are now showing their age, and keeping them running can take a bit of work. [Drygol] isn’t one to shy away from the task, however, and set about repairing a few Amiga 600s that came his way.

First up on the docket is replacing the many electrolytic capacitors that tend to leak over the years. They can cause corrosion, destroying traces and other components, as well as failing themselves. [Drygol] is an old hand at this now, whipping out the hot air station and some copper shielding to protect delicate connectors from melting. A simple recap was enough to get one machine up and running, but the other was more recalcitrant. When swapping a dud CPU out, a pad was destroyed on the PCB. This necessitated some careful tracing, followed by a drill hole through the PCB to allow a bodge wire to run the signal from the other side of the board.

There’s also plenty of upgrades to be done; S-Video outputs instead of the crummy old RF modulator, and special interrupt switches that help when cracking games and doing assembly programming. Thanks to a rich aftermarket and vivid community, researching and performing mods is easy thanks to writeups and parts available online.

It’s a great example of the basic techniques one must master to keep old hardware on the boil. Learn to recap, refit, and hunt for problems, and you’ll be well on your way to maintaining your retro fleet for years to come. We’ve seen [Drygol]’s work before too – this vampiric A500 is a particular treat!

Awakening A Dragon From Its Slumber

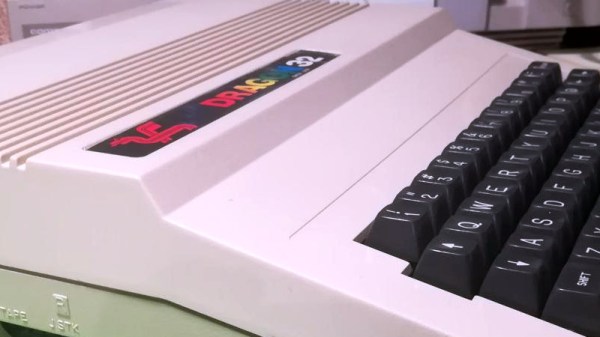
For all the retrocomputing fun and games we encounter in our community, there are a few classic microcomputers that rarely receive any attention. Usually this is because they didn’t sell well and not many have survived, or were simply underwhelming machines that haven’t gathered a huge following today. One that arguably falls within both camps is the Dragon 32, a machine best known in those pre-Raspberry Pi days for being the only home computer manufactured in Wales, and for being nearly compatible with the Tandy Color Computer due to both machines’ designs coming from the same Motorola data sheet. Repeat restorer of retrocomputers, [Drygol], has given a Dragon 32 the full restoration and upgrade treatment, offering us a rare chance to take a look at this computer.

The Dragon arrived with a pile of contemporary books and software, but no power supply. A significant modification was made to the internal PSU board then to allow it to work with an Amiga unit, and the black-on-green Dragon text came up on the TV screen. Recapping and a replacement for a faulty op-amp fixed poor video quality, then it was time for a 64K memory upgrade with some neatly done bodge-wiring. Finally there’s a repair to the very period-looking analogue joystick, and a home-made interface for the more common Atari/Amiga style sticks.

The Dragon may be only a footnote in the history of 8-bit home computing, but with its good expandability and decent quality keyboard it perhaps deserved to reach more homes than it did. This appears to be the first time a Dragon has featured here, though its Tandy CoCo cousin has made it into a few stories.

Restoring A Dead Commodore 128DCR

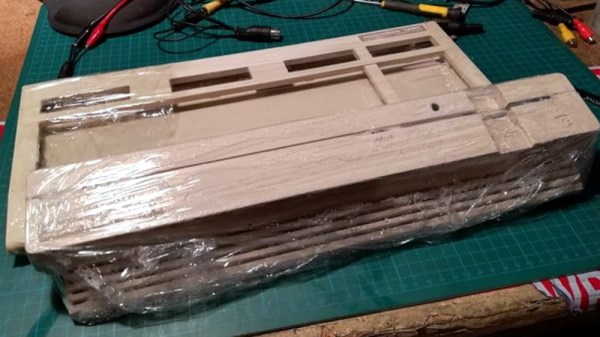
Another day, another retro computer lovingly restored to like-new condition by [Drygol]. This time, the subject of his attention is a Commodore 128DCR that earned every bit of the “For Parts, Not Working” condition it was listed under. From a spider infestation to a cracked power supply PCB, this computer was in quite a state. But in the end he got the three decade old machine back in working condition and even managed to teach it a few new tricks along the way.

Obviously the shattered PSU was the most pressing issue with the Commodore. Interestingly, the machine still had its warranty seal in place on the back, so whatever happened to this PSU seems to have occurred without human intervention.

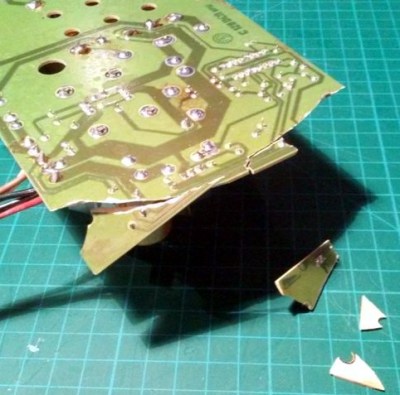
Rather than just replacing the PSU, [Drygol] first pieced the board back together with the help of cyanoacrylate glue, and then coated the top with an epoxy resin to give it some mechanical strength. On the back side the traces were either repaired or replaced entirely with jumper wires where the damage was too severe.

With the PSU repaired and tested, he moved on to cleaning the computer’s main board and whitening all the plastic external components. Even the individual keycaps took a bath to get them looking like new again. This put the computer in about as close to like-new condition as it could get.

But why stop there? He next installed the JiffyDOS modification to improve system performance, and wired in an adapter that lets the computer output a crisp 80 columns over S-Video. It’s safe to say this particular Commodore is in better shape now than it was when it rolled off the assembly line.

While an impressive enough final result, this is still fairly tame for [Drygol]. If you want to see a real challenge, take a look at the insane amount of work that went into recreating this smashed Atari 800XL case.