There’s something enchanting about ancient tools and instruments. The idea that our forebears were able to fashion precision mechanisms with nothing but the simplest hand tools is fascinating. And watching someone recreate the feat, such as by building an astrolabe by hand, can be very appealing too.
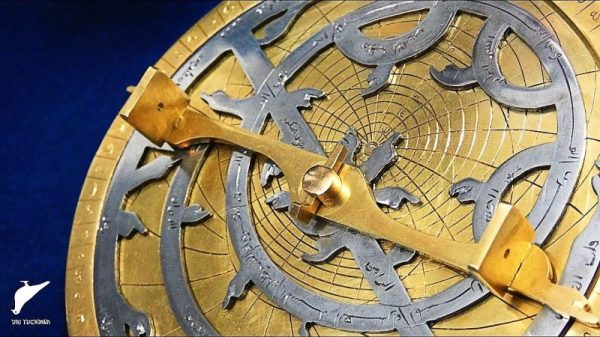
The astrolabe is an ancient astronomical tool of incredible versatility, allowing the user to do everything from calculating when the sun will rise to predicting the positions of dozens of stars in the night sky. That it accomplishes all this with only a few moving parts makes it all the more fascinating. [Uri Tuchman] began the astrolabe build shown in the video below with only a few hand tools. He quickly had his fill of the manual fretsaw work, though, and whipped up a simple scroll saw powered by an old sewing machine foot treadle to speed up his work. The real treat though is the hand engraving, a skill that [Uri] has clearly mastered. We couldn’t help musing that a CNC router could do the same thing so much more quickly, but watching [Uri] do it was so much more satisfying. Everything about the build really makes a statement, from the contrasting brass and steel parts to the choice of complex Arabic script for the markings. [Uri] has another video that goes over astrolabe basics and his design process that’s well worth watching too.
While it’s nowhere near as complicated an instrument, this astrolabe puts us in the mood to watch the entire Clickspring clock build again. And [Chris] is working on his own ancient instrument build at the moment, recreating the Antikythera mechanism. We can’t wait to binge-watch that one too.
Continue reading “Simple Hand Tools Turn Brass And Steel Into An Amazing Astrolabe”