A Retro Handheld Console As They Used To Be Made

Before there were Nintendo Switches, there were Game Boys. And before that there were all the successive generations of Game Boys and other consoles right back to the Game and Watch, and then those handheld Simon and Space Invaders games of the late 1970s. These devices typically packed a 4-bit microcontroller and an array of discrete LEDs, and movements in-game were simply created by alternate LEDs on the game field being flashed.

The TeleBall from [sv2002] is a handheld game in the vein of those early handheld games, in that it features a matrix of LEDs as a screen on which it can display simple games. So far it plays Breakout, and Tennis for Two, which might seem odd were it not for its built-in radio for two-person play with two consoles.

Inside the TeleBall is an Arduino Nano, a Maxim display driver for the LED matrix, and the familiar Nordic Semiconductor RF module. Control is via a potentiometer, and everything sits in a smart 3D-printed case. Everything is open-source, so should you wish to have your own you can head over to the project’s web site and grab all the files. You can watch it in action playing tennis with two consoles in the video below the break.

The original Tennis for Two created in 1958 was an oscilloscope game using an analogue computer, and is credited as the first video game created purely for entertainment purposes. If you’d like to see a recreation of it, we covered one over a decade ago.

Continue reading “A Retro Handheld Console As They Used To Be Made”

Cold Plasma Torch Produces A Cleansing Flame That Never Consumes

It’s basically a lightsaber. Except smaller. And with an invisible blade. And cold to the touch. But other than that, this homebrew cold plasma torch (YouTube, embedded below) is just like the Jedi’s choice in elegant weaponry.

Perhaps we shouldn’t kid [Justin] given how hard he worked on this project – seventeen prototypes before hitting on the version seen in the video below – but he himself notes the underwhelming appearance of the torch without the benefit of long-exposure photography. That doesn’t detract from how cool this build is, pun intended. As [Justin] explains, cold plasma or non-equilibrium plasma is an ionized stream of gas where the electron temperature is much hotter than the temperature of the heavier, more thermally conductive species in the stream. It’s pretty common stuff, seen commercially in everything from mercury vapor lamps to microbial sterilization.

It’s the latter use that piqued [Justin]’s interest and resulted in a solid year of prototyping before dialing in a design using a flyback transformer to delivery the high voltage to a stream of argon flowing inside a capillary tube. The quartz tube acts as a dielectric that keeps electrons from escaping and allows argon to be ionized and wafted gently from the tube before it can reach thermal equilibrium. The result is a faint blue glowing flame that’s barely above room temperature but still has all the reactive properties of a plasma. The video shows all the details of construction and shows the torch in action.

Hats off to [Justin] for sticking with a difficult build and coming through it with an interesting and useful device. We’ve no doubt he’ll put it to good use in his DIY biohacking lab in the coming months.

Continue reading “Cold Plasma Torch Produces A Cleansing Flame That Never Consumes”

A Chrome Extension For Configuring RGB LEDs

Like pretty much all of us, [Andy Schwarz] loves RGB LEDs. Specifically he likes to put them on RC vehicles, such as navigation lights on airplanes or flashers and headlights on cars. He found himself often rewriting very similar Arduino code for each one of these installations, and eventually decided he could save himself (and all the other hackers in the world) some time by creating a customizable Arduino firmware specifically for driving RGB LEDs.

The software side of this project, which he’s calling BitsyLED, actually comes in two parts. The first is the firmware itself, which is designed to control common RGB LEDs such as the WS2812 or members of the NeoPixel family. It can run on an Arduino Pro Mini with no problems, but [Andy] has also designed his own open hardware control board based on the ATtiny84 that you can build yourself. Currently you need a USBASP to program it, but he’s working on a second version which will add USB support.

With your controller of choice running the BitsyLED firmware, you need something to configure it. For that, [Andy] has developed a Chrome extension which offers a very slick user interface for setting up colors and patterns. The tool even allows you to create a visual representation of your LEDs so you can get an idea of what it’s going to look like when all the hardware is powered up.

RGB LEDs such as the WS2812 are some of the most common components we see in projects today, mainly because they’re so easy to physically interface with a microcontroller. But even though it only takes a couple of wires to control a large number of LEDs, you still need to write the code for it all. BitsyLED takes a lot of the hassle out of that last part, and we’re very interested to see what the hacker community makes of it.

Continue reading “A Chrome Extension For Configuring RGB LEDs”

FemtoBeacon Is A Tiny ESP32 Coin-Shaped Dev Board

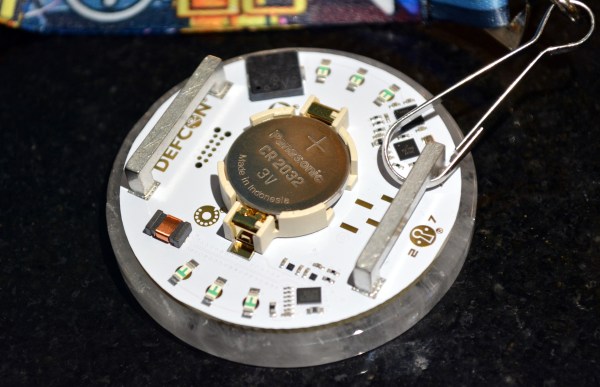
Our single board microcontroller platforms have become smaller over the years, from the relatively large classic Arduino and Beagleboard form factors of a decade ago to the postage stamp sized Feather and ESP boards of today. But just how small can they go? With current components, [Femtoduino] think they’ve cracked it, delivering an ESP32-based board with WiFi and Bluetooth, and an LDO regulator for 5 V operation in a circular footprint that’s only 9 mm in diameter.

There are some compromises from such a paucity of real-estate, of which perhaps the most obvious is a lack of space to make I/O lines available. It has SPI, a UART, and a couple of I/O lines, and aside from an onboard RGB LED that’s it. But SPI is versatile well beyond its number of lines, and even with so little there is much that can be done. Another potential compromise comes from the antenna, a Molex surface-mount component, which is an inevitable consequence of a 9 mm circular board.

There has to come a point at which a microcontroller platform becomes so small as to be unusable, but it’s clear that there is a little further for this envelope to be pushed. We’d love to see what other designers do in response to this board.

Electromechanical YouTube Sub Counter Trades Clicks For Clacks

Acquiring a new YouTube subscriber is a blessed event that deserves far more fanfare than a phone notification. But maybe blinkenlights don’t really do it for you anymore, or you simply prefer to be soothed sonically rather than visually. Well, what could be more satisfying than the crisp clack of an electromechanical 7-segment display? Six of them, of course. These things look great, they sound great, and once they’re set, they don’t need power to stay that way.

These displays switch between black and white by reversing current flow through their electromagnets, so [Zack] turned to the H-bridge in order to use them with DC. One H-bridge for each segment of six displays adds up fast, though. To get around this, [Zack] tied one pole of each electromagnet together for a common signal input, and used the other pole to control each segment individually. Then, he was able to tie all the A segments together, all the B segments, and so on, and only needs 13 H-bridges to do it all.

There was just one thing [Zack] didn’t count on. Once he got the board soldered up and running, the displays started acting funny. The low impedance of the coils was causing them to influence each other over the common path, so he added diode arrays to keep them in line.

[Zack]’s using an ESP32 to get the 411 through the Google API, and four octal serial switches to drive the displays. Even more satisfying than all those clacks is the displays’ operational economy baked into [Zack]’s code—as they count up, any segments common to the first digit and the next digit remain on. Increment your way past the break to check out the build video.

Not focused on numbers, but still want to celebrate each new sub? Try a dancing robot or a Tetris twist.

Continue reading “Electromechanical YouTube Sub Counter Trades Clicks For Clacks”

Putting Some Smarts Into An Electric Car Charger

Many electric cars feature a timer capability that allows the owner to set which hours they want the vehicle to start pulling a charge. This lets the thrifty EV owner take advantage of the fact that the cost of electricity generally goes down late at night when the demand is lower. The Renault Zoe that [Ryan Walmsley] owns has this feature, but not only does it cost him extra to have it enabled, it’s kind of a hassle to use. So being an enterprising hacker, he decided to implement his own timer in the charger itself.

Now controlling high voltages with a lowly microcontroller might sound dangerous, but it’s actually not nearly as tricky as you might think. The charger and the vehicle actually communicate with low-voltage signals to determine things like the charge rate, so it turns out you don’t need to cut into the AC side of things at all. You just need to intercept the control signals between the two devices and modify them accordingly.

Or do you? As [Ryan] eventually realized, he didn’t need to bother learning how the control signals actually worked since he wasn’t trying to do anything tricky like set the charge rate. He just wanted to be able to stop and start the charging according to what time it was. So all he had to do was put the control signal from his car through a relay controlled by a Particle Photon, allowing him to selectively block communication.

The charger also had an optional key lock, which essentially turns the controller off when the contacts are shorted. [Ryan] put a relay on that as well so he could be absolutely sure the charger cuts the juice at the appropriate time. Then it was just a matter of getting the schedule configured with IFTTT. He mentions the system could even be tweaked to automatically control the charger based on the instantaneous cost of electricity provided by the utility company, rather than assuming overnight is always the most economical.

We’ve seen a fair amount of electric car hacking, but with only a few exceptions, the projects always steer clear of modifying the actual chargers themselves. In general hackers feel a lot safer playing around in the world of DC, but as [Ryan] has shown, safely hacking your EV charger is possible if you do your homework.

This Owner Took Control Of Their Proprietary Alarm System

When a tip comes in and the tipster feels they have to reassure us that despite appearances their subject is not facilitating crime, it certainly gets our attention. [Flam2006] has a Brinks home security system which can only be configured using a special device only available to installers, and though they managed to secure one through an eBay sale they went to the trouble of reverse engineering its protocol and writing a software emulator in Python. When an owner hacks their own security system to gain full control of something they own, that’s right up our street.

The communication is via an RS485 serial line, and follows a packetised structure with binary rather than ASCII data. There is an almost plug-and-play system for identifying devices connected to a controller, though it is restricted to those devices which the controller already knows about. There is a video of the official method of programming the controller, as well as one of the software in action. We’ve posted them below the break for your delectation.

The ability to perform these tasks on your own property is an important right that has at times been placed under threat by legislation such as the DMCA. We’ve touched upon it countless times, but probably the most high-profile example that we and the wider media have covered are those stories concerning the parts lockdown on John Deere tractors.

Continue reading “This Owner Took Control Of Their Proprietary Alarm System”