Transmit Your Gaze To This Fiber Optic LED Lamp

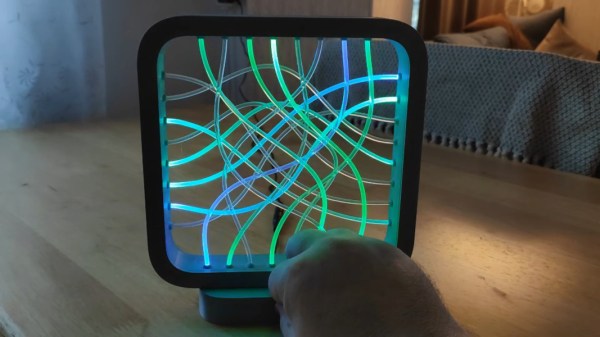
Call us easily amused, but we think it’s pretty amazing what can be done with a microcontroller, some RGB LEDs, and a little bit of plastic. Case in point is [andrei.erdei]’s beautiful and quite approachable fiber optic LED lamp. It’s a desktop-friendly version of a similar piece [andrei] made that is roughly nine times the size of this one and hangs on the wall. The build may be simple, but the product is intricately lovely.

We really like the visual density of this lamp — it’s just the right amount of tubes and strikes a balance between being too sparse and too chaotic. As you might expect, there’s an Arduino and some RGB LED strips involved. But the key to this build is in the 16 pieces of side-glow plastic fiber optic tubing. Side-glow is designed to let light escape along the length of the tube as opposed to end-glow, which is made to minimize light loss from one end to the other like a data pipe. This allows for all sorts of fun effects, and you can watch [andrei.erdei] go slowly and soothingly through the different colors and modes in the demo video after the break. Make sure you watch long enough to see the tubes move like the old Windows 3D pipes screensaver

Already have too many knickknacks and wall hangings? You’re missing out on prime real estate — the ceiling. Check out this fiber optic ceiling installation that reacts to music.

Continue reading “Transmit Your Gaze To This Fiber Optic LED Lamp”

LED Hourglass Moves Like The Real Thing

If you want to waste time in a meaningful way, get yourself an hourglass. It’s simultaneously mesmerizing and terrifying to sit there and watch the seconds slip through the threshold that separates possibility from missed opportunity.

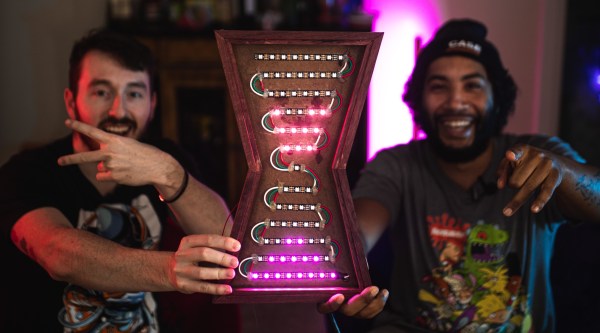
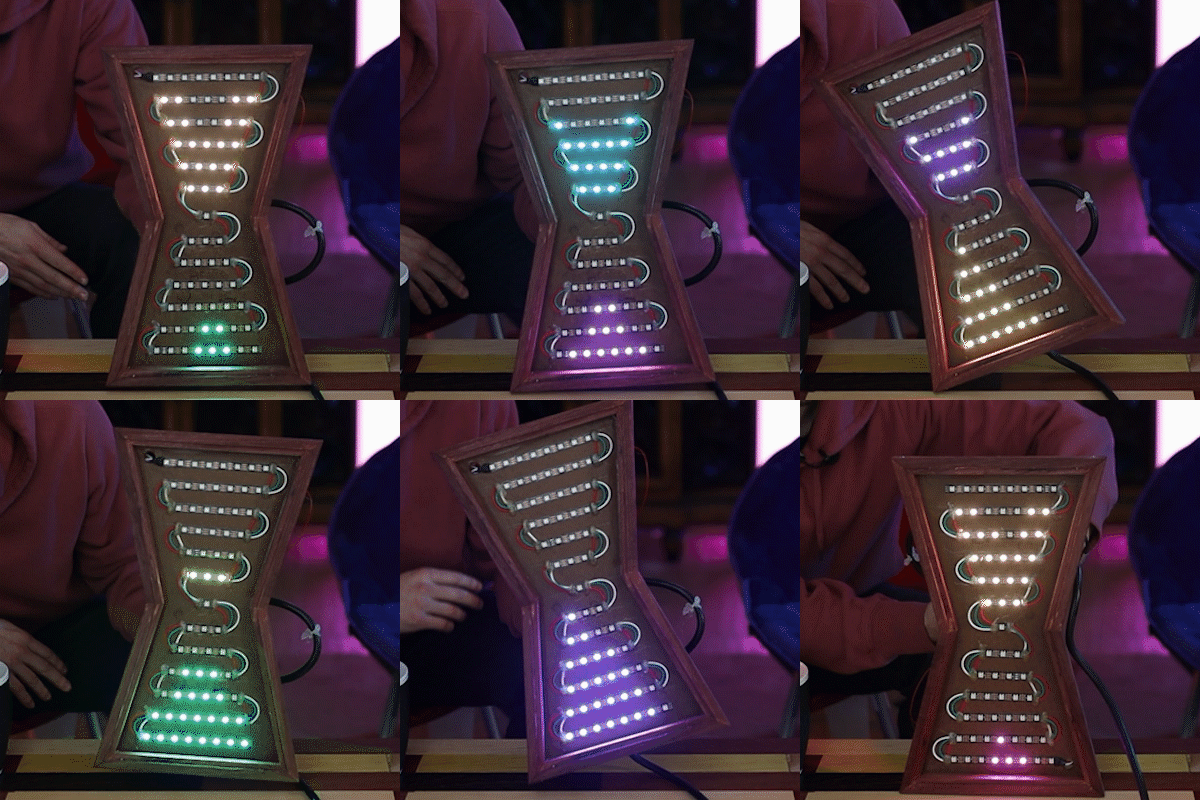
[Ty and Gig]’s LED hourglass is equally beautiful to watch. It doesn’t actually tell time, but that’s perfectly fine by us. What it does do is animate the LEDs to approximate grains of sand in gravity, no matter how the hourglass is tilted.

In either vertical orientation, the sand falls as long as there is some in the top. When the hourglass is horizontal, the LEDs settle just like real sand does. [Ty and Gig] achieved this with a whole lot of code that breaks the animation frames into structure arrays.

By contrast, the hardware part of this build is fairly simple: all that’s needed to replicate this build is some RGB LEDs a beefy power supply to drive them, an accelerometer, and a microcontroller.

[Ty and Gig] were planning to use an ESP8266, but misplaced it and went with an Arduino Mega instead. (You know what they say — buy a replacement and the one you lost will turn up almost immediately.) The beautiful frame is made from leftover purpleheart, a hardwood that turns purple with exposure to air. Check out the build video after the break.

Too lazy to reset your hourglass every hour? Here’s one that flips itself.

Continue reading “LED Hourglass Moves Like The Real Thing”

On-Air Sign Helps Keep Your Broadcasts G-Rated

Like many of us, [Michael] needed a way to let the family know whether pants are required to enter the room — in other words, whenever a videoconference is in progress. Sure he could hang a do not disturb sign, but those are easy to forget. There’s no need to worry about forgetting to change status because this beautiful wall-mounted sign can be controlled with Alexa.

Inside the gorgeous box made from walnut, curly maple, and oak is an ESP32, some RGB LEDs, and three MOSFETs. [Michael] is using the fauxmoESP library to interface the ESP32 with Alexa, which emulates a Phillips Hue bulb for the sake of using a protocol she already knows. [Michael] can change the color and brightness percentage with voice commands.

The sign is set up as four different devices — one default, and one for each color. Since talking to Alexa isn’t always appropriate, [Michael] can also change the color of the LEDs using sliders on a website that’s served up by the ESP. Check out the full build video after the break.

Need something quick and dirty that works just as well? Our own [Bob Baddeley] made a status indicator that’s simple and effective.

Continue reading “On-Air Sign Helps Keep Your Broadcasts G-Rated”

Civil Defense Disco Ball Rocks Ground Zero

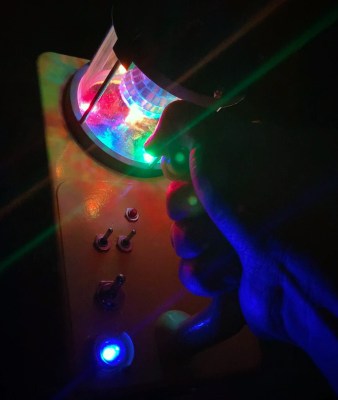
Old Civil Defense survey meters like the V-715 are interesting conversation starters, but of very little practical use today. These devices were intended to be a sort of litmus test that survivors of a nuclear blast could use to determine when it was safe to venture out of their radiation shelter: if the needle on the meter moves, even when it’s on the most sensitive setting, you should probably go back inside. Since [Hamilton Karl] would (hopefully) never need such an indicator, he decided to have a little fun with this Cold War holdover and turn it into a Disco Containment Unit.

Technical details are a little sparse on this one, but we can infer most of it just from the pictures. In place of the original meter [Hamilton] has mounted a tiny mirrored ball inside of a protective cage, which is spun by a geared motor that’s occupying the space that used to be taken up by the ion chamber.

A handful of Adafruit NeoPixel RGB LEDs, an Arduino Nano, and a few switches to control it all round out the functional aspects of the build, and a new disco-themed trefoil replaces the original Civil Defense logo on the side. The project page mentions there’s a piezo buzzer onboard that performs a stirring rendition of “Stayin’ Alive” by the Bee Gees, but alas there’s no video that shows it in action.

Thanks to the rugged construction and built-in handle of these old survey meters, [Hamilton] can now take the party with him wherever he goes. Not that he can really go anywhere with this whole global pandemic hanging over our heads, but at least he’ll be ready when things start trending towards normal. In a way the device’s functionality has now been reversed from how it originally worked, since the meter going wild will now be an indicator that its safe to come out.

While the V-715 isn’t of much use outside of a post-apocalyptic hellscape, the V-700 is actually a proper Geiger counter that’s still useful for surveying or research. An important distinction to remember if you ever get a chance to snap one of them up at a swap meet or flea market. Whenever we can start having those again, anyway.

Dynamic Map Of Italy On A PCB

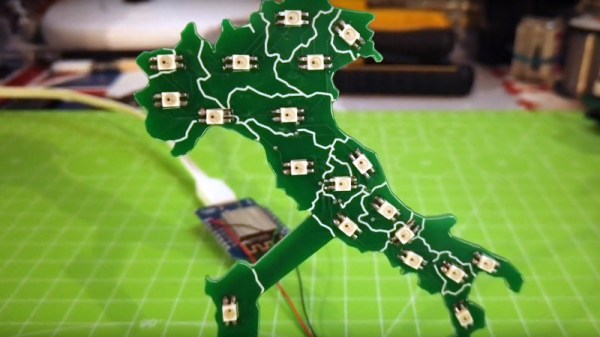
While most PCBs stick to tried-and-true methods of passing electrons through their layers of carefully-etched copper, modern construction methods allow for a large degree of customization of most aspects of these boards. From solder mask to number of layers, and even the shape of the board itself, everything is open for artistic license and experimentation now. [Luca] shows off some of these features with his PCB which acts as a live map of Italy.

The PCB is cut out in the shape of the famous boot, with an LED strategically placed in each of 20 regions in the country. This turns the PCB into a map with the RGB LEDs having the ability to be programmed to show any data that one might want. It’s powered by a Wemos D1 Mini (based on an ESP8266) which makes programming it straightforward. [Luca] has some sample programs which fetch live data from various sources, with it currently gathering daily COVID infection rates reported for each of the 20 regions.

The ability to turn a seemingly boring way to easily attach electronic parts together into a work of art without needing too much specialized equipment is a fantastic development in PCBs. We’ve seen them turned into full-color art installations with all the mask colors available, too, so the possibilities for interesting-looking (as well as interesting-behaving) circuits are really opening up.

Continue reading “Dynamic Map Of Italy On A PCB”

DIY Laser Tag System Comes With All The Bells And Whistles

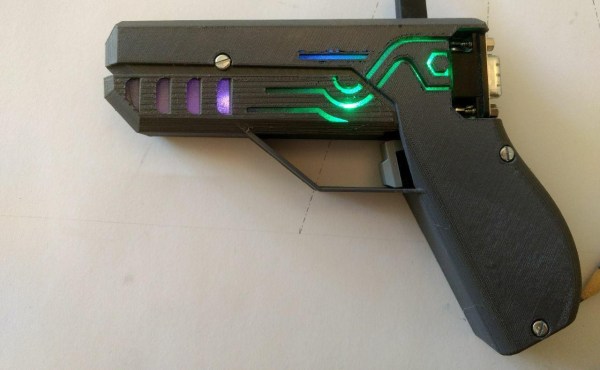
While VR is becoming really immersive, it still can’t compete with a game of good old laser tag to get the blood pumping and spending quality time with friends. [Xasin] has been working on a DIY laser tag system for a while now, and it has grown to include an impressive array of features and customizability.

Named LZRTag, the project started back in 2018 with simple ATmega328 based prototypes on breadboards. It has since evolved to a fully-featured system with ESP32s in the 3D printed pistol communicating with a Raspberry Pi/Linux game server over MQTT. Each pistol also features an accelerometer, I2S audio amp and speaker for game sounds, and WS2812 RGP LEDs for light effects. IR Lasers are used as emitters to target wearable IR receivers with more RGB LEDs wired to the pistol.

A Ruby server on a Linux machine takes care of all the communications, game management, shot validation, and scoring. It can handle up to 255 players and is designed to be extremely customizable for game modes, weapons classes, or any other feature you would like to have. [Xasin] has also created IR beacons to add even more possibilities, such as capture the flag, safe zones, and revive zones.

We really like the flexibility of the system, and it would make an awesome group project for a hackerspace. You could also add a shock module to motivate players a bit more to avoid getting shot. If you want more gun, take a look at the laser tag rifle with a HUD we featured earlier in the year Continue reading “DIY Laser Tag System Comes With All The Bells And Whistles”

Gigantic Working Arduino Uses 1/4″ Cables

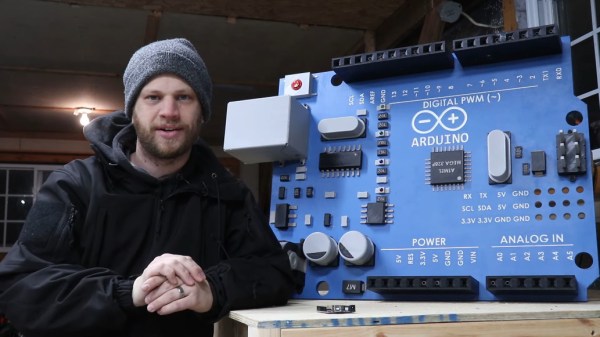
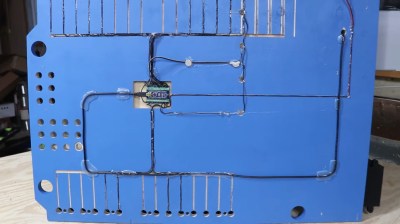
What is it about larger-than-life versions of things that makes them so awesome? We’re not sure exactly, but this giant working Arduino definitely has the ‘it’ factor, whatever that may be. It’s twelve times the size of a regular Uno and has a Nano embedded in the back of it. To give you an idea of the scale, the reset button is an arcade button.

The Arduino Giga’s PCB is made of 3/4″ plywood, and the giant components represent a week and a half of 3D printing. The lettering and pin numbers are all carved on a CNC and filled in with what appears to be caulk. They didn’t get carved out deeply enough the first time around, but [byte sized] came up with a clever way to perfectly re-register the plywood so it carved in exactly the same places.

Although we love everything about this build, our favorite part has to be the way that [byte sized] made the female headers work. Each one has a 1/4″ audio jack embedded inside of it (a task which required a special 3D printed tool), so patch cables are the new jumper cables. [byte sized] put it to the test with some addressable RGB LEDs on his Christmas tree, which you can see in the build video after the break.

You can buy one of those giant working 555 timer kits, but why not just make one yourself?

Continue reading “Gigantic Working Arduino Uses 1/4″ Cables”