Abused Hard Drive Becomes POV Clock

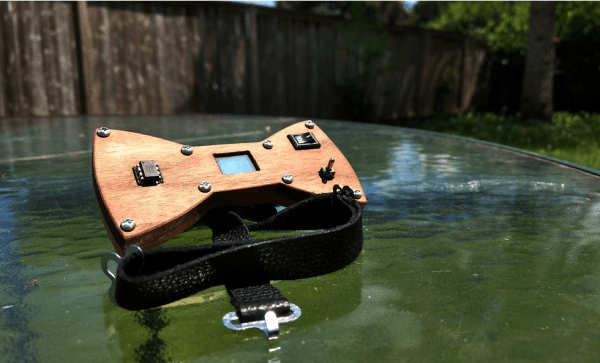
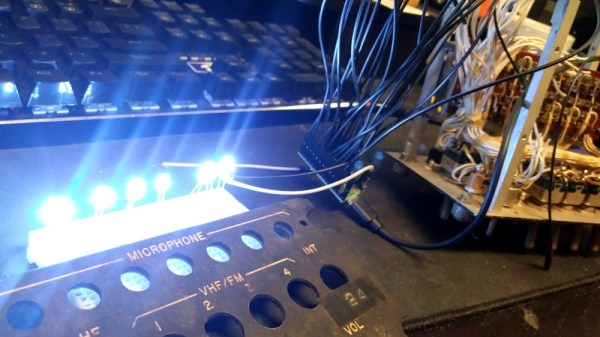
We all know that there’s not much to do with an old hard drive. Once you render the platters unreadable and perhaps harvest those powerful magnets, there’s not much left of interest. Unless, of course, you turn the whole thing into a persistence-of-vision clock.

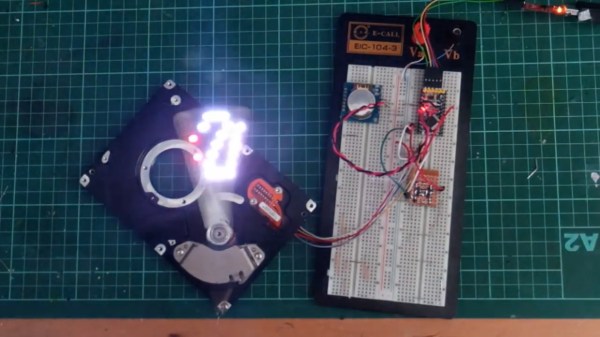
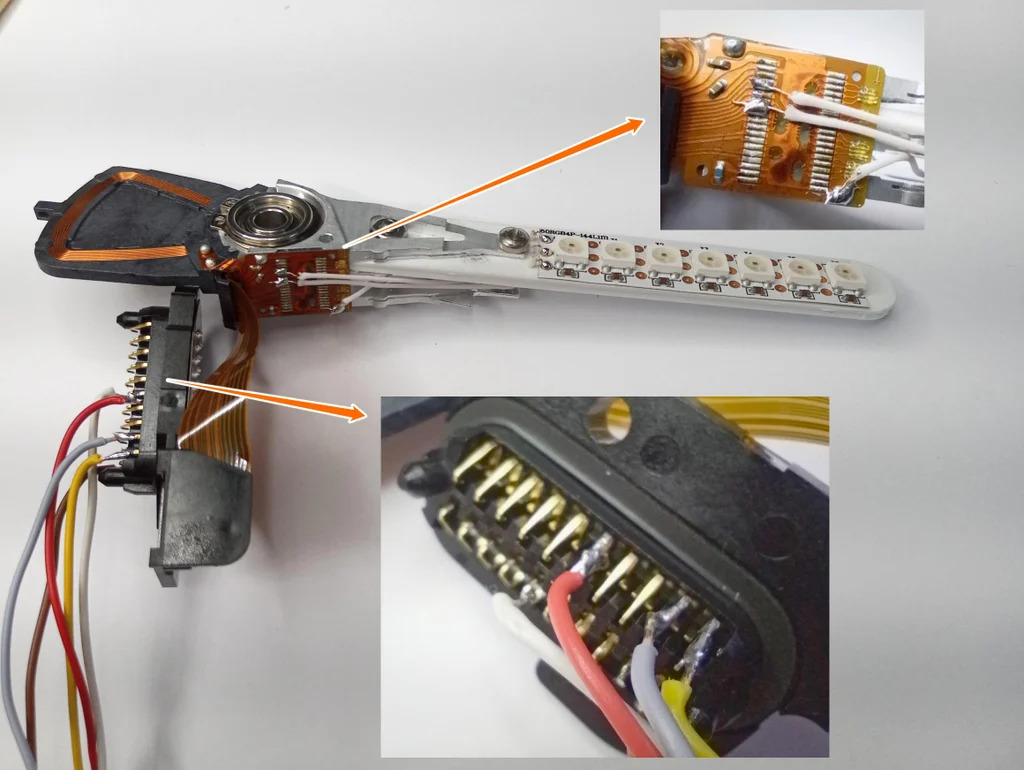
At least that’s what [Leo] did when he created “PendoLux”. The clock itself is pretty simple; like any POV project, it just requires a way to move an array of flashing LEDs back and forth rapidly enough that they can trick the eye into seeing a solid image. [Leo] put the read head mechanism of an old HDD into use for that, after stripping the platters and motor out of it first.

The voice coil and magnet of the head arm are left intact, while a 3D-printed arm carrying seven RGB LEDs replaces the old heads. [Leo] added a small spring to return the arm to a neutral position, and used an Arduino to drive the coil and flash the LEDs. Getting the timing just right was a matter of trial and error; he also needed to eschew the standard LED libraries because of his heavy use of interrupts and used direct addressing instead.

POV clocks may have dropped out of style lately — this hard drive POV clock and a CD-ROM version were posted years ago. But [Leo]’s clock is pretty good looking even for a work in progress, so maybe the style will be making a comeback.

Continue reading “Abused Hard Drive Becomes POV Clock”

Hands-On: Internet Of Batteries Quantum Badge Brings Badgelife Add-Ons The Power And Internet They Crave

Our friends in the Whiskey Pirates crew sent me the unofficial DEF CON badge they built this year. The Internet of Batteries QUANTUM provides power and connectivity to the all-important add-on badges of DC28. The front of the badge is absolutely gorgeous to the point I don’t really want to solder on my add-on headers and disrupt that aesthetic.

The gold-plated copper makes for a uniformed and reflective contrast to the red solder mask which occupies the majority of the front. Here we see the great attention to detail that [TrueControl] includes in his badges. The white stripe of silk screen separating the two colors is covered by some black detailing tape that looks much better than the white.

The antenna of the ESP32 module poking out the underside of the gold cover end of the badge gets its own rectangle of the holographic sticker material, the same as the sheet of stickers that was included in the box. Both decals are small details that make a huge difference to your eye.

The line of nine RGB LEDs have black bezels which goes along with the black stripe motif and underscores the typography of the badge name. These lights are hosted on a daughter board soldered to the underside of the badge with a slot for the LEDs to pass through. They are addressed in a 2×15 matrix that is scanned on the low side by the PSoC5 that drives the badge. This low-res image shows that daughter board before the lithium cell is placed.

Continue reading “Hands-On: Internet Of Batteries Quantum Badge Brings Badgelife Add-Ons The Power And Internet They Crave”

Hands-On: AND!XOR Unofficial DC28 Badge Embraces The Acrylic Stackup

Still hot from the solder party, a new AND!XOR badge just landed on my desk courtesy of the hacking crew that has been living the #badgelife for the past five years. Originally based on the Futurama character Bender, the design has morphed to the point that it’s no longer recognizable as a descendant of that belligerent robot. Instead we have a skeletal midget whose face is half covered by a gear-themed mask.

At first glance, you might not even notice the character design because you’re too distracted by the beautiful composure of the hardware. This year’s badge includes a double stack-up of acrylic on top of a red circuit-board. Anyone who has used acrylic bezels in a badge design can tell you the cost for material and laser cutting time is significant. In this case the overall aesthetic of the badge is based upon the look of the mirrored gold with the art detail laser etched into the back. It’s a unique bling without even turning the power on. Continue reading “Hands-On: AND!XOR Unofficial DC28 Badge Embraces The Acrylic Stackup”

Retro Game Bow Tie

[Greg] loves hacking his bow ties. Back in high school, he added some bright RGB LEDs to the bow tie he wore to prom and even won the male best-dressed award. Recently he decided to try another bow tie hack, this time giving his tie some retro arcade game feels.

He decided to use an ATtiny85 and to experiment doing some more lower-level programming to refresh his skills. He wrote all his libraries from scratch which really helped him learn a lot about the ATtiny in the process. This also helped him make sure his code was as efficient as possible since he had quite a bit of memory constraints using the ATtiny85 (only 512 bytes of RAM).

He designed the body of the bow tie with wood. He fit all the electronics inside the body while allowing the ATtiny to protrude out of the body giving his bow tie some wanted hacker aesthetic. Of course, he needed to access the toggle switch to play the game, so he made a slot for that as well.

Nice addition to the electronics bow tie collection on Hackaday. Really aesthetic design if you ask us. And you know how much we love retro games.

Continue reading “Retro Game Bow Tie”

A Face Mask That’s Functional And Hacker-Certified

[splat238] needed a mask for going out in public, but wanted something that fit his personal style a bit better than the cloth masks everyone else was wearing. So, he upcycled his old airsoft mesh mask using an impressive 104 NeoPixels to create his NeoPixel LED Face Mask.

The NeoPixels are based on the popular WS2812b LEDs. These are individually addressable RGB LEDs with a pretty impressive glow. [splat238] purchased a 144 NeoPixel strip to avoid having to solder each of those 104 NeoPixels one-by-one. He cut the 144-LED strip into smaller segments to help fit the LEDs around the mask. He then soldered the power and data lines together so that he could still control the LEDs as if they were one strip and not the several segments he cut them into. He needed a pretty bulky battery pack to power the whole thing. You can imagine how much power 104 RGB LEDs would need to run. We recommend adding a battery protection circuit next time as these LEDs probably draw a hefty amount of current.

He designed his own controller board featuring an ESP8266 microcontroller. Given its sizable internal memory, the ESP8266 makes it easy to store a variety of LED patterns without worrying about running out of programming space. He’s also hoping to add some WiFi features in later revisions of his mask, so the ESP8266 is a no-brainer. Additionally, his controller board features three pushbuttons that allow him to toggle through different LED patterns on the fly.

Cool project [splat238]! Looking forward to the WiFi version.

Continue reading “A Face Mask That’s Functional And Hacker-Certified”

Hex Matrix Clock Is Spellbinding

Just when we think we’ve seen all possible combinations of 3D printing, microcontrollers, and pretty blinkenlights coming together to form DIY clocks, [Mukesh_Sankhla] goes and builds this geometric beauty. It’s kaleidoscopic, it’s mosaic, and it sorta resembles stained glass, but is way cheaper and easier.

The crucial part of the print does two jobs — it combines a plate full of holes for a string of addressable RGB LEDs with the light-dividing walls that turn the LEDs into triangular pixels. [Mukesh] designed digits for a clock that each use ten triangles. You’d need an ESP8266 to run the clock code, or if you’d rather sit and admire the rainbow light show unabated by the passing of time, just use an Arduino Uno or something similar.

Most of the aesthetic magic here is in the printed pieces and the FastLED library. It has a bunch of really cool animations baked in that look great with this design. Check out the demo video after the break. The audio is really quiet until the very end of the video, so be warned. In our opinion, the audio isn’t necessary to follow along with the build.

The humble clock takes many lovely forms around here, including pop art.

Continue reading “Hex Matrix Clock Is Spellbinding”

Vintage Aircraft Controls Turned USB Button Box

The Gables Engineering G-2789 audio selector panels aren’t good for much outside of the aircraft they were installed in, that is, until [MelkorsGreatestHits] replaced most of the internals with a Teensy 3.2. Now they are multi-functional USB input devices for…well, whatever it is you’d do with a bunch of toggle switches and momentary push buttons hanging off your computer.

Tracing wires from the panel switches.

With the Teensy going its best impression of a USB game controller, the host operating system has access to seven momentary buttons, twelve toggles, and one rotary axis for the volume knob.

Right now [MelkorsGreatestHits] says the code is set up so the computer sees a button press on each state change; in other words, the button assigned to the toggle switch will get “pressed” once when it goes up and again when it’s flicked back down. But of course that could be modified depending on what sort of software you wanted to interface the device with.

As we’ve seen with other pieces of vintage aircraft instrumentation, lighting on the G-2789 was provided by a series of incandescent bulbs that shine through the opaque front panel material. [MelkorsGreatestHits] replaced those lamps with white LEDs, but unfortunately the resulting light was a bit too harsh. As a quick fix, the LEDs received a few coats of yellow and orange paint until the light was more of an amber color. Using RGB LEDs would have been a nice touch, but you work with what you’ve got.

This isn’t the first time that [MelkorsGreatestHits] has turned an old aircraft cockpit module into a USB input device, and we’re certainly interested in seeing what the next project will look like. Though we’re perhaps more interested in finding out where all all these old school airplane parts are coming from…