Hackaday Links Column Banner

Hackaday Links: June 24, 2018

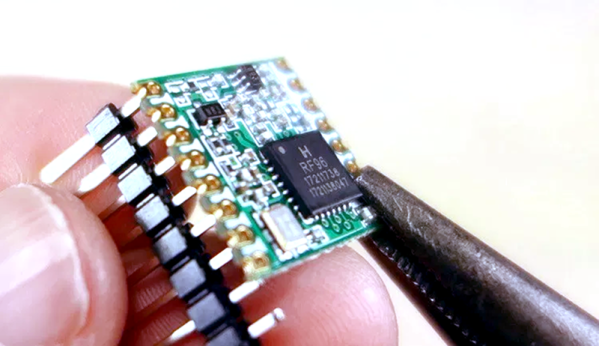
What do you do if you’re laying out a PCB, and you need to jump over a trace, but don’t want to use a via? The usual trick is using a zero Ohm resistor to make a bridge over a PCB trace. Zero Ohm resistors — otherwise known as ‘wire’ — are a handy tool for PCB designers who have backed themselves into a corner and don’t mind putting another reel on the pick and place machine. Here’s a new product from Keystone that is basically wire on a tape and reel. It’s designed to jump traces on a PCB where SMD zero ohm resistors and through-hole jumpers aren’t possible. I suppose you could also use it as a test point. They’re designed for high current applications, but before we get to that, let’s consider how much power is dissipated into a zero ohm resistor.

By the way, as of this writing, Mouser is showing 1,595 for Keystone’s 5100TR PCB jumpers in stock. They come on a reel of 1,000, and a full reel will cost you $280. This is significantly more expensive than any SMD zero ohm resistor, and it means someone bought four hundred of them. The electronic components industry is weird and you will never understand it.

There’s a new product from ODROID, and you want it. The ODROID-GO is a Game Boy and Sega Master System emulator running on an ESP-32, has a fantastic injection molded case, and looks phenomenal.  You can buy it now for $32. Does this sound familiar? Yes, a few months ago, the PocketSprite was released. The PocketSprite is the tiniest Game Boy ever, and a project [Sprite_TM] introduced to the world at the 2016 Hackaday Superconference.

This week, the speaker schedules for two awesome cons were announced. The first is HOPE, at the Hotel Penn on July 20th. Highlights of this year? [Mitch Altman] is talking about DSP, [Chelsea Manning] will be on stage, someone is talking about HAARP (have fun with the conspiracy theorists), and someone is presenting an argument that [Snowden] is an ideological turd. The speaker schedule for DEF CON was also announced. The main takeaway: god bless the CFP board for reigning in all the blockchain talks, the Nintendo Switch was broken wide open this year, but there’s only a talk on the 3DS, and there’s more than enough talks on election hacking, even though that was a success of propaganda instead of balaclava-wearing hackers.

The C.H.I.P. is no more, or at least that’s the rumor we’re running with until we get some official confirmation. When it was introduced, the C.H.I.P. was a Linux system on a chip with complete register documentation. It appears the end of C.H.I.P. is upon us, but have no fear: there’s a community building the PocketC.H.I.P., or the C.H.I.PBeagle. It’s a single board computer based around the OSD3358 from Octavo, the same system found in the PocketBeagle. Source in KiCAD, and people are working on it. Thanks [smerrett79] for the tip.

LoRa With The ESP32

If you are interested in deploying LoRa — the low power long-range wireless technology — you might enjoy [Rui Santos’] project and video about using the ESP32 with the Arduino IDE to implement LoRa. You can see the video below. He uses the RFM95 transceivers with a breakout board, so even if you want to use a different processor, you’ll still find a lot of good information.

In fact, the video is just background on LoRa that doesn’t change regardless of the host computer you are using. Once you have all the parts, getting it to work is fairly simple. There’s a LoRa library by [Sandeep Mistry] that knows how to do most of the work.

Although the project uses an RFM95, it can also work with similar modules such as the RFM96W or RFM98W. There are also ESP32 modules that have compatible transceivers onboard.

This is one of those projects that probably isn’t useful all by itself, but it can really help you get over that hump you always experience when you start using something new. Once you have the demo set up, it should be easy to mutate it into what you really need.

We’ve been talking about LoRa a lot lately. We’ve even seen it commanding drones.

Continue reading “LoRa With The ESP32”

An Artsy And Functional LED Filament Lamp

Some projects end up being more objet d’art than objet d’utile, and we’re fine with that — hacks can be beautiful too. Some hacks manage both, though, like this study in silicon and gallium under glass that serves as a bright and beautiful desk lamp.

There’s no accounting for taste, of course, but we really like the way [commanderkull]’s LED filament lamp turned out, and it’s obvious that a fair amount of work went into it. Five COB filament strips were suspended from a lacy frame made of wire, which also supports the custom boost converter needed to raise the 12-volt input to the 60 volts needed by the filaments. The boost converter is based on the venerable 555 timer chip, which sits in the middle of the frame suspended by its splayed-out legs and support components. The wooden base sports a few big electrolytics and some hand-wound toroidal inductors, as well as the pot for adjusting the lamp’s brightness. The whole thing sits under a glass bell jar, which catches the light from the filaments and plays with it in a most appealing way.

There’s just something about that dead bug building technique that we love. We’ve seen it before — this potentially dangerous single-tube Nixie clock comes to mind — but we’d love to see it done more.

[via r/electronics]

Modular Robotics That Can Make Themselves Into Anything

The greatest challenge of robotics is autonomy. Usually, this means cars that can drive themselves, a robotic vacuum that won’t drive down the stairs, or a rover on Mars that can drive on Mars. This project is nothing like that. Instead of building a robot with a single shape, this robot is made out of several modules that can self-assemble into different structures. It’s an organized fleet of robots, all helping each other, like an ant colony, or our future as Gray Goo.

If the idea of self-assembling modular robots sounds familiar, you’re right. The Dtto won the Grand Prize in the 2016 Hackaday Prize, and it’s a beast of a project. It’s an ouroboros of a robot that can assemble itself into a snake, a wheel, or an arm. It’s weird, but if you want a robot that can do anything, this is the kind of modularity that you need. One step closer to Gray Goo, at least.

Like Dtto, the noMad can transform itself into bridges, arms, snakes, and wheels by assembling each individual piece into one component of a massive structure. It’s something we rarely see, and it’s a difficult computational and engineering problem. Still, the progress the team behind noMad has been making is remarkable, and we can’t wait to see the finished project.

Walking Through MRIs With A Vive

If you were to make a list of the most important technological achievements of the last 100 years, advanced medical imaging would probably have to rank right up near the top. The ability to see inside the body in exquisite detail is nearly miraculous, and in some cases life-saving.

Navigating through the virtual bodies generated by the torrents of data streaming out of something like a magnetic resonance imager (MRI) can be a challenge, though. This intuitive MRI slicer aims to change that and makes 3D walkthroughs of the human body trivially easy. [Shachar “Vice” Weis] doesn’t provide a great deal of detail about the system, but from what we can glean, the controller is based on a tablet and Vive tracker. The Vive is attached to the back of the tablet and detects its position in space. The plane of the tablet is then interpreted as the slicing plane for the 3D reconstruction of the structure undergoing study. The video below shows it exploring a human head scan; the update speed is incredible, with no visible lag. [Vice] says this is version 0.1, so we expect more to come from this. Obvious features would be the ability to zoom in and out with tablet gestures, and a way to spin the 3D model in space to look at the model from other angles.

Interested in how the machine that made those images works? We’ve covered the basics of MRI scanners before. And if you want to go further, you could always build your own.

Continue reading “Walking Through MRIs With A Vive”

E-Dermis: Feeling At Your (Prosthetic) Fingertips

When we lose a limb, the brain is really none the wiser. It continues to send signals out, but since they no longer have a destination, the person is stuck with one-way communication and a phantom-limb feeling. The fact that the brain carries on has always been promising as far as prostheses are concerned, because it means the electrical signals could potentially be used to control new limbs and digits the natural way.

A diagram of the e-dermis via Science Robotics.

It’s also good news for adding a sense of touch to upper-limb prostheses. Researchers at Johns Hopkins university have spent the last year testing out their concept of an e-dermis—a multi-layer approach to expanding the utility of artificial limbs that can detect the curvature and sharpness of objects.

Like real skin, the e-dermis has an outer, epidermal layer and an inner, dermal layer. Both layers use conductive and piezoresistive textiles to transmit information about tangible objects back to the peripheral nerves in the limb. E-dermis does this non-invasively through the skin using transcutaneous electrical nerve stimulation, better known as TENS. Here’s a link to the full article published in Science Robotics.

First, the researchers made a neuromorphic model of all the nerves and receptors that relay signals to the nervous system. To test the e-dermis, they used 3-D printed objects designed to be grasped between thumb and forefinger, and monitored the subject’s brain activity via EEG.

For now, the e-dermis is confined to the fingertips. Ideally, it would cover the entire prosthesis and be able to detect temperature as well as curvature. Stay tuned, because it’s next on their list.

Speaking of tunes, here’s a prosthetic arm that uses a neural network to achieve individual finger control and allows its owner to play the piano again.

Thanks for the tip, [Qes].

Laser Draws Weather Report

Have you ever wished that a laser could tell you the weather? If you have, then [tuckershannon] has you covered. He’s created a machine that uses a laser and some UV sensitive paper to draw the temperature and a weather icon! And that’s not all! It’s connected to the internet, so it can also show the time and print out messages.

Building on [tuckershannon]’s previous work with glow-in-the-dark drawing, the brains inside this machine is a Raspberry Pi Zero. The laser itself is a 5mw, 405nm laser pointer with the button zip-tied down. Two 28BYJ-48 stepper motors are used to orient the laser, one for the rotation and another for the height angle. Each stepper motor is connected to a motor driver board and then wired directly to the Pi.

The base and arm that holds the laser were designed in SolidWorks and then 3d printed. The stepper motors are mounted perpendicular to one another and then the laser pointer mounted at the end. The batteries have been removed from the laser and the terminals are also wired directly to the raspberry pi. The Pi is then connected to Alexa via IFTTT so that it can be controlled by voice from anywhere.

The real beauty of [tucker]’s laser drawing machine is that is will draw out the temperature and weather icon, as well as drawing the time in either digital or analog forms! We’ve seen [tuckershannon]’s work before. The precursors to this project were his clock which uses a robotic arm with a UV LED on it to draw the time and another clock which uses similar robotic arm only with a laser attached. Let’s hope we get to see the rest of [tucker]’s progress!

Continue reading “Laser Draws Weather Report”