How Hot Is Your Faucet? What Color Is The Water?

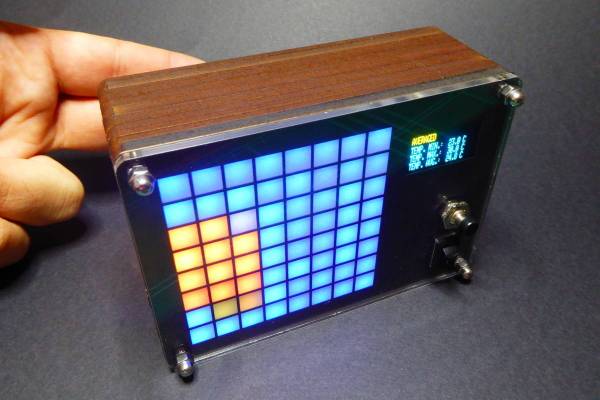
How hot is the water coming out of your tap? Knowing that the water in their apartment gets “crazy hot,” redditor [AEvans28] opted to whip up a visual water temperature display to warn them off when things get a bit spicy.

This neat little device is sequestered away inside an Altoids mint tin — an oft-used, multi-purpose case for makers. Inside sits an ATtiny85 microcontroller  — re-calibrated using an Arduino UNO to a more household temperature scale ranging from dark blue to flashing red — with additional room for a switch, while the 10k ohm NTC thermristor and RGB LED are functionally strapped to the kitchen faucet using electrical tape. The setup is responsive and clearly shows how quickly [AEvans28]’s water heats up.

Continue reading “How Hot Is Your Faucet? What Color Is The Water?”

Tony The Pinball Wizard 3D Prints Full Sized Pinball Machine

[Tony] has designed and 3D printed a full-sized pinball machine and it’s absolutely incredible. And by 3D-printed, we mean 3D-printed! Even the spring for the plunger printed plastic.

The bumper design is particularly interesting. The magic happens with two rings of conductive filament. the bottom one is stationary while the top one is a multi material print with a flexible filament. When the ball runs into the bumper the top filament flexes and the lower rings contact. Awesome. Who wants to copy this over to a joystick or bump sensor for a robot first? Send us a tip!

The whole document can be read as a primer on pinball design. [Tony] starts by describing the history of pinball from the French courts to the modern day. He then works up from the play styles, rules, and common elements to the rationale for his design. It’s fascinating.

Then his guide gets to the technical details. The whole machine was designed in OpenSCAD. It took over 8.5 km of eighty different filaments fed through 1200+ hours of 3D printing time (not including failed prints) to complete. The electronics were hand laid out in a notebook, based around custom boards, parts, and two Arduinos that handle all the solenoids, scoring, and actuators. The theme is based around a favorite bowling alley and other landmarks.

It’s a labor of love for sure, and an inspiring build. You can catch a video of it in operation after the break.

Pi Zero Powered Skateboard

There’s something to be said for whizzing around town on your own automatic personal transport. It’s even better when you’ve built it yourself. That’s just what [The Raspberry Pi Guy] did – built a Wiimote controlled, Raspberry Pi Zero powered skateboard and whizzed around Cambridge to show it off.

It’s a fairly simple build – skateboard, battery, motor and mount, controller, Wiimote and Pi Zero. The Raspberry Pi controls the motor controller which in turn controls the motor speed. The Python code that [The Raspberry Pi Guy] wrote comes in at around a hundred lines and manages the motor controller and the Bluetooth connection to the Wiimote, which is used to control the board’s speed while the user controls the steering. [The Raspberry Pi Guy] says he’s gotten up to 30 km/h on the skateboard, which, given a powerful enough motor and a non-bumpy surface isn’t hard to believe.

It may seem a bit of overkill, running a bit of Python on a Raspberry Pi to run a motor (others have done it with something simpler) but it’s a fun project nonetheless. [The Raspberry Pi Guy] describes where he got the parts to put the skateboard together and has released the Python code on his GitHub page.

Continue reading “Pi Zero Powered Skateboard”

Icehat on a Raspberry Pi Zero

Give Your RPi A Cool FPGA Hat

Need additional, custom IO for your Raspberry Pi? Adding an FPGA is a logical way to expand your IO, and allow for high speed digital interfaces. [Eric Brombaugh]’s Icehat adds a Lattice iCE5LP4K-SG48 FPGA in a package that fits neatly on top of the Raspberry Pi Zero. It also provides a few LEDs and Digilent compatible PMOD connectors for adding peripherals. The FPGA costs about six bucks, so this is one cheap FPGA board.

The FPGA has one time programmable memory, but can also be programmed over SPI. This allows the host Pi to flash the FGPA with the latest bitstream at boot. Sadly, this particular device is not supported by the open source Icestorm toolchain. Instead, you’ll need Lattice’s iCEcube2 design software. Fortunately, this chip is supported by the free license.

Icehat is an open source hardware design, but also includes a software application for flashing a bitstream to the FPGA from the Pi and an example application to get you started. All the relevant sources can be found on Github, and the PCB is available on OSHPark.

While this isn’t the first pairing of a Raspberry Pi and FPGA we’ve seen, it is quite possibly the smallest, and can be built by hand at a low cost.

Dtto Explorer Modular Robot Wins 2016 Hackaday Prize

Dtto, a modular robot designed with search and rescue in mind, has just been named the winner of the 2016 Hackaday Prize. In addition to the prestige of the award, Dtto will receive the grand prize of $150,000 and a residency at the Supplyframe Design Lab in Pasadena, CA.

This year’s Hackaday Prize saw over 1,000 entires during five challenge rounds which asked people to Build Something that Matters. Let’s take a look at the projects that won the top five prizes. They exemplify the five challenge themes: Assistive Technologies, Automation, Citizen Scientist, Anything Goes, and Design Your Concept. dtto-main-image-cropped

Dtto — Explorer Modular Robot

Grand Prize Winner ($150,000 and a residency at the Supplyframe Design Lab): Dtto is modular robot built with 3D printed parts, servo motors, magnets, and readily available electronics. Each module consists of two boxes, rounded on one side, connected by a bar. The modules can join with each other in many different orientations using the attraction of the magnets. Sections can separate themselves using servo motors.

Dtto is groundbreaking in its ability to make modular robots experimentation available to roboticists and hobbiests everywhere by sidestepping what has traditionally been a high-cost undertaking. While it’s easy to dismiss this concept, the multitude of different mechanisms built from modules during testing drives home the power of the system.

imaging-dome-400x300

Affordable Reflectance Transformation Imaging Dome

Second Place ($25,000): Reflectance Transformation Imaging is a method of photographing artifacts multiple times with a fixed camera location but changing lighting locations. When these images are combined into an interface after the fact, it allows for different textures, surface features, and material properties to be observed. Currently there are no commercial version of hardware available for this technique.

laser-cut-optics-bench-400x300

Laser Cut Optics Bench

Third Place ($10,000): An optics bench is a series of jigs used to hold and precisely align elements for optical experiments. Traditionally this meant highly specialized equipment starting in the tens-of-thousands of dollars. But schools, hackerspaces, and individuals don’t need top-of-the-line equipment to begin learning about optics. The project has designed holders for salvaged optics and the ancillary materials to conduct experiments, and even includes a standardized carrying case design.

new-tilt-sensor-400x300

A New High Accuracy Tilt Sensor

Fourth Place ($10,000): This is a reimaging of a Linear Variable Differential Transformer (LVDT). Traditionally, tilt sensors based on LVDTs are built like a small tube with an iron core that can slide from one end to the other as the tube is tilted. This new sensor turns the tube into a hollow ring, and replaces the iron core with ferrofluid (a liquid with the properties of metal). What results is a brand new sensor with properties unavailable in previous tilt sensors.

mechaduino-400x300

Mechaduino

Fifth Place ($5,000). Stepper motors are known for accurate movement, but they are often used as open loop systems and prone to lose track of position either from missed steps or outside interference. Mechaduino adds a high accuracy magnetic encoder to any of several commonly available stepper motors, closing that loop and adding functionality. This includes positional awareness, but goes for beyond to velocity and torque control, and user interaction.