Camera slides can make for interesting dolly shots in your videos, or can spice up an otherwise drab time-lapse sequence. When it came time for one of his own, [Bob] did what any hacker would do and rolled his own motorized camera slide in the wood shop.
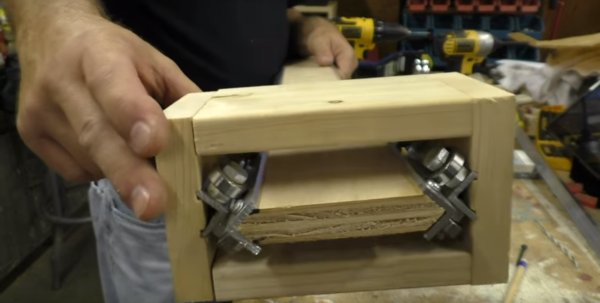
We always like to see work based on a hacker’s own prior art, and [Bob] managed to leverage parts and techniques from his impromptu claw machine build for this slider. The rollers in this project use the same 3/4″ angle aluminum and skateboard bearings as the previous build. The bearings roll on a plywood strip capped with the same angle stock for durability and low friction. The stepper motor bracket and pillow blocks are 3D printed, as are the timing pulleys. [Bob] admits that the whole rig is a little noisy and blames it on the rough quality of the pulley prints. He has plans to replace them with commercially available pulleys, which should help; one further suggestion we have is to code a soft-start algorithm into the ATtiny85 to eliminate that jerkiness you see when he demos the slider in the video below.
There are plenty of ways to move a camera along a single axis, and a surprising number of them use parts from the roller sports. We’ve covered quite a few of them before, like this slide that uses skateboard trucks, or this non-motorized rig built from fence posts and inline skate wheels.


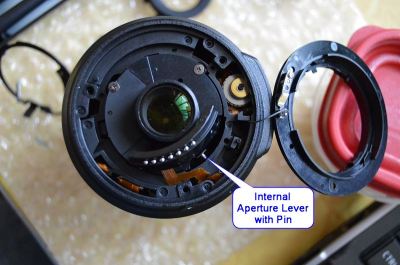 Keeping screws and various parts in order is key when taking apart a lens. [Kratz] used a tip he learned right here on Hackaday: He drew a diagram of the screw positions on a thick piece of paper. He then stuck each screw right into the paper in its proper position.