When challenged with making a game for a kids event using only the parts he already had on hand, [Nathan Gray] had to get creative. What he ended up making is pretty awesome. It’s a Star Wars themed Nerf gun shooting gallery.
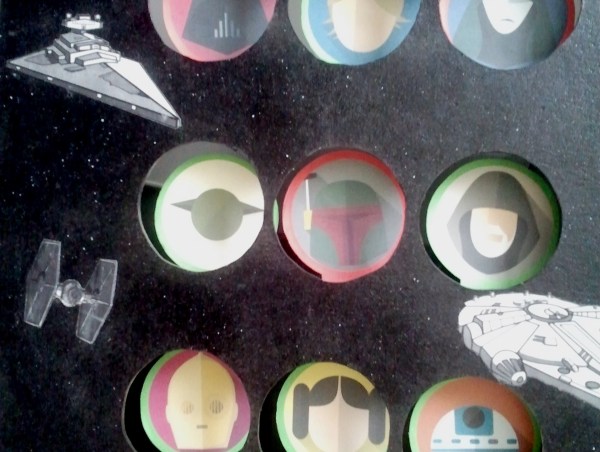
![]() Using a Teensy 2.0, he’s controlling nine RC servo motors attached to two-sided targets which randomize themselves every round — The Empire is bad, the Rebels, good. They’re also color coded red and green in case the images are too hard to see.
Using a Teensy 2.0, he’s controlling nine RC servo motors attached to two-sided targets which randomize themselves every round — The Empire is bad, the Rebels, good. They’re also color coded red and green in case the images are too hard to see.
To keep track of scoring, there are piezo elements which register the impact of a Nerf dart. A cute little command console with a big red start button and score display can be set up in front of the range to let the kids know how they’re doing.