In 2006, Parallax, Inc wasn’t new to the electronics business. They’d been around since 1987. Still, for a relatively small company, jumping into custom chips is a big leap. Parallax didn’t just jump into some cookie cutter ASIC, they made their own parallel multi-core microcontroller. Designed by [Chip Gracey], the Parallax Propeller has 8 cores, called cogs. Cogs are connected to I/O pins and other resources by a hub. The Propeller saw commercial success, and continues to have a loyal following. This week’s Hacklet is about some of the best Propeller projects on Hackaday.io!
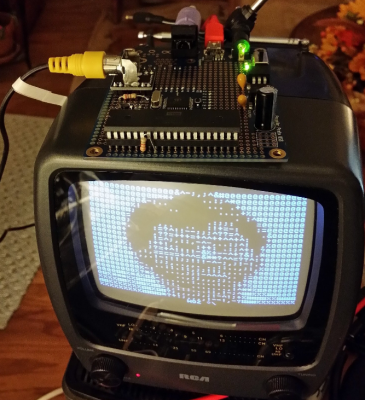 We start with retrocomputing prop star [Jac Goudsmit] and L-Star: Minimal Propeller/6502 Computer. [Jac] loves the classic 6502 processor. Inspired by [Ben Heckendorn’s] recent Apple I build, [Jac] wanted to see if he could replicate an Apple I with minimal parts. He built upon the success of his Software-Defined 6502 Computer project and created L-Star. The whole thing fits on a Propeller proto board with room to spare. The project uses a 6502, with a Propeller handling just about everything else. The system takes input from a PS-2 keyboard, and outputs via composite video, just like the original Apple I. As you can see from the photo, it’s quite capable of displaying Woz in ASCII. [Jac] has expanded the L-Star to support the Ohio Scientific C1P and CompuKit UK101, both early 6502 based computers.
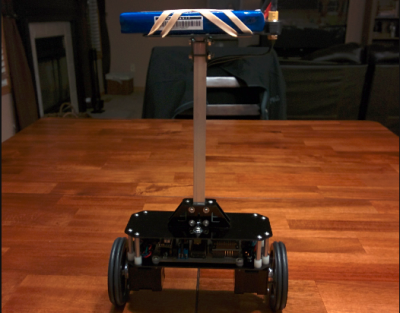 Next up is [Mike H] with B-BOT. B-BOT is a balancing robot. [Mike] used B-BOT to learn about designing with the Propeller and programming in SPIN, the Prop’s built-in interpreted language. While slower than assembler, SPIN was plenty fast enough to solve the classic inverted pendulum problem. B-BOT’s primary sensor is a Pololu AltIMU-10. This module contains a gyro, accelerometer, compass, and altimeter all on one tiny board. Locomotion comes in the form of two stepper motors. Command and control is via X-Bee radio modules. All the parts live on a custom PCB [Mike] milled using his CNC router.
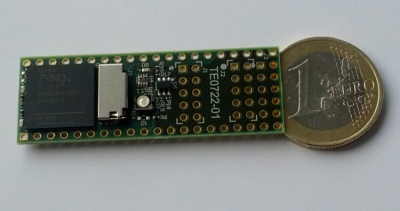 [Antti.lukats] created Soft Propeller, his entry in the 2015 Hackaday Prize. Soft Propeller doesn’t use a hardware Propeller at all. The core of the system is a Xilinx Zynq-7 chip, which contains an FPGA and a Dual Core ARM A9+ processor. Back in 2014, Parallax released the Verilog HDL code for the Propeller core. [Antti] has taken this code and ported it over the Zynq-7. With 256Kb of RAM, 16 MB of Flash and an LED, the entire system fits in a DIP package smaller than a stick of gum.
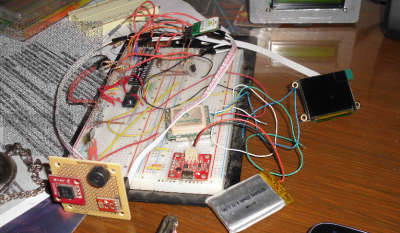 Finally, we have [Christian] with Pipman GPS Watch. There’s just something about the Pip-boy from the Fallout video game series. This Personal Information Processor (PIP) has spawned hundreds of projects from cosplayers and electronics hobbyists alike. [Christian’s] version uses a 4D systems TFT LCD to display those awesome graphics. Input comes through a 5 way navigation switch. A GPS and compass module provide all the navigation data Pipman needs. At the center of it all is a Parallax Propeller programmed in SPIN. [Christian] has a working prototype on his bench. He’s now working on modeling a 3D printed case with Blender.
There are a ton of Propeller projects on Hackaday.io. If you want to see more, check out our Propeller Project list! Did I miss your project? Don’t be shy, just drop me a message on Hackaday.io. That’s it for this week’s Hacklet, As always, see you next week. Same hack time, same hack channel, bringing you the best of Hackaday.io!