Most of us are familiar with the Arduino Uno, a starting place for electronics projects since 2010. But what if the Arduino Uno was released in 1980? You’d probably get something like [ElectroBoy]’s 8051-based Arduino Uno.

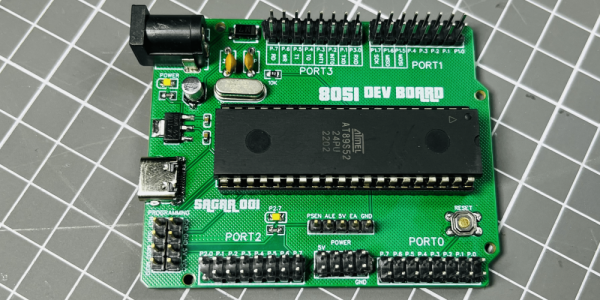
The Arduino Uno-compatible board has an MCS-51 (often called 8051 instead) instead of the usual ATmega328P/ATmega168. Specifically, [ElectroBoy] uses the AT89S52. Like the ATmega microcontrollers, the AT89S52 has an 8-bit CPU with a Harvard architecture and very similar GPIO capabilities. Unlike the ATmega, however, the original MCS-51 has a CISC CPU (as opposed to ATmega being RISC) and a release date about 36 years earlier.
The board itself also has some differences from the original Arduino Uno. First of all, it has a USB type-C port, which is definitely a bonus. Secondly, it’s simpler: No USB-UART (which also means no USB programming), a different pin layout (Arduino shields likely won’t fit) and more I/Os than the ATmegas have. Sure, it’s not as practical as an actual Arduino Uno, but it’s definitely cool for our retrocomputing nerds.