Repairing The Questionable £25,000 Tom Evans Audiophile Pre-Amp

One of the power supply boards in the Tom Evans Mastergroove SR MkIII preamplifier. (Credit: Mend it Mark, YouTube)

It’s not much of a secret that in the world of ‘audiophile gear’ there is a lot of snake oil and deception, including many products that are at best of questionable value. The Tom Evans Mastergroove SR mkIII preamplifier is one example of this, as [Mark] from the Mend it Mark YouTube channel found in a recent video when he got one to repair which the manufacturer claimed ‘could not be fixed’. This marvel of audio engineering provides amplification for record players, for the low-low price of only twenty-five thousand quid, or about 29.000 US bucks. So what’s inside one of these expensive marvels?

Claiming to be a high-end unit, with only ten units produced per year, you’d expect a gold-plated PCB with excellent noise isolation. The unit does come with an absolutely massive external power supply that dwarfs the preamplifier itself, but the real surprise came after opening up the unit itself to take a peek at the damage, some of which was caused by transport.

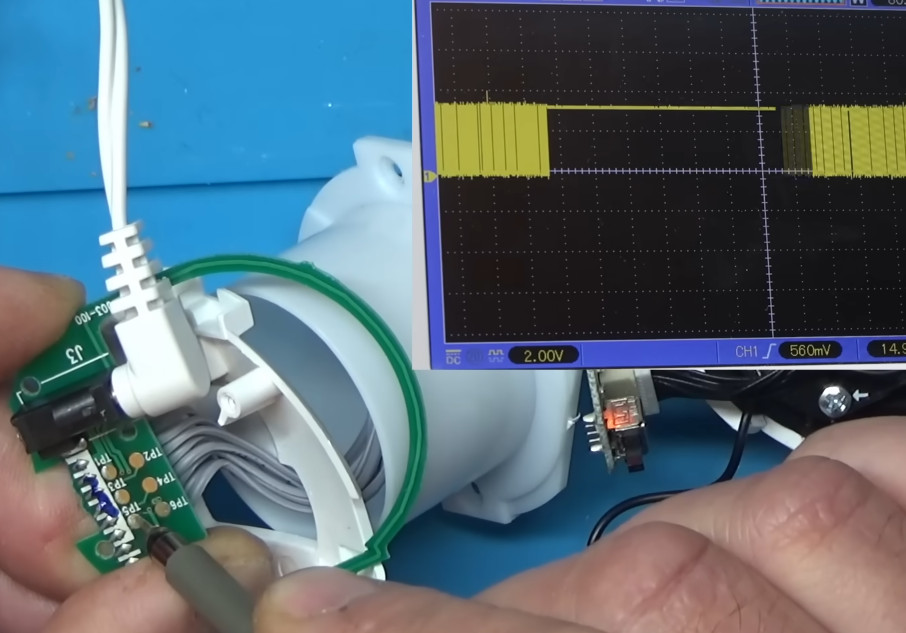
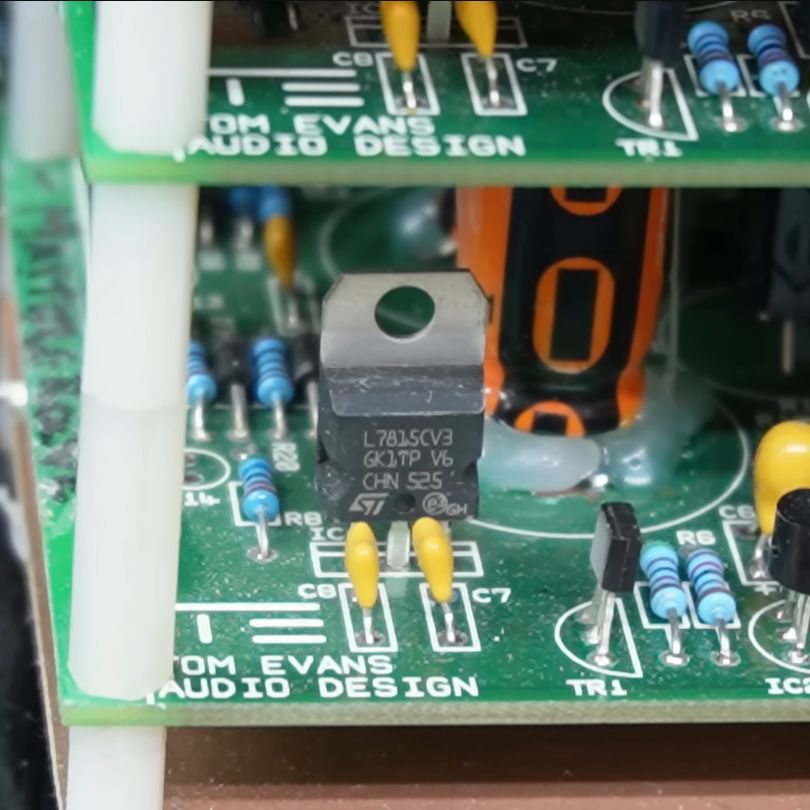
As it turns out, the inside of the preamplifier consists out of four stacks of rather cheap, home-made looking boards with what looks like improvised RF shielding in the form of bare PCBs and filed-off markings on many parts. In between the rat’s nest of wiring running everywhere, [Mark] had to trace the broken channel’s wiring, creating a full repair manual in the process. Along the way one of the opamp boards was found to be defective, courtesy of a single shorted tantalum capacitor.

With the tantalum capacitor replaced, [Mark] had repaired the unit, but even though the preamplifier isn’t terribly designed, the illusion of its price tag has been shattered worse than the contents of a parcel kicked across the parking lot by the Royal Mail.

Thanks to [Jim] for the tip.

Continue reading “Repairing The Questionable £25,000 Tom Evans Audiophile Pre-Amp”

A stack of Activation Locked MacBooks destined for the shredder in refurbisher [John Bumstead]’s workshop.

Apple IOS 18’s New Repair Assistant: Easier Parts Pairing Yet With Many Limitations

Over the years, Apple has gone all-in on parts pairing. Virtually every component in an iPhone and iPad has a unique ID that’s kept in a big database over at Apple, which limits replacement parts to only those which have their pairing with the host system officially sanctified by Apple. With iOS 18 there seems to be somewhat of a change in how difficult getting a pairing approved, in the form of Apple’s new Repair Assistant. According to early responses by [iFixit] and in a video by [Hugh Jeffreys] the experience is ‘promising but flawed’.

As noted in the official Apple support page, the Repair Assistant is limited to the iPhone 15+, iPad Pro (M4) and iPad Air (M2), which still leaves many devices unable to make use of this feature. For the lucky few, however, this theoretically means that you can forego having to contact Apple directly to approve new parts. Instead the assistant will boot into its own environment, perform the pairing and calibration and allow you to go on your merry way with (theoretically) all functionality fully accessible.

Continue reading “Apple IOS 18’s New Repair Assistant: Easier Parts Pairing Yet With Many Limitations”

Simple PCB Repairs Keep Old Vehicle Out Of The Crusher

For those of us devoted to keeping an older vehicle on the road, the struggle is real. We know that at some point, a part will go bad and we’ll learn that it’s no longer available from the dealer or in the aftermarket, at least at a reasonable cost. We might get lucky and find a replacement at the boneyard, but if not — well, it was nice knowing ya, faithful chariot.

It doesn’t have to be that way, though, at least if the wonky part is one of the many computer modules found in most cars made in the last few decades. Sometimes they can be repaired, as with this engine control module from a Ford F350 pickup. Admittedly, [jeffescortlx] got pretty lucky with this module, which with its trio of obviously defective electrolytics practically diagnosed itself. He also had the advantage of the module’s mid-90s technology, which still relied heavily on through-hole parts, making the repair easier.

Unfortunately, his luck stopped there, as the caps had released the schmoo and corroded quite a few traces on the PCB. Complicating the repair was the conformal coating on everything, a common problem on any electronics used in rough environments. It took a bit of probing and poking to locate all the open traces, which included a mystery trace far away from any of the leaky caps. Magnet wire was used to repair the damaged traces, the caps were replaced with new ones, and everything got a fresh coat of brush-on conformal coating.

Simple though they may be, we really enjoy these successful vehicle module repairs because they give us hope that when the day eventually comes, we’ll stand a chance of being able to perform some repair heroics. And it’s nice to know that something as simple as fixing a dead dashboard cluster can keep a car out of the crusher.

Continue reading “Simple PCB Repairs Keep Old Vehicle Out Of The Crusher”

Repairing A Component On A Flex Connector

It used to be you could crack open a TV or radio and really work on the components inside. The smallest thing in there was maybe a disc capacitor a little smaller than your pinky’s nail. Nowadays, consumer electronic boards are full of tiny SMD components. Luckily [StezStix Fix?] has a microscope and the other tools you need. Someone sent him an Amazon Echo Show with a bad touchscreen. Can it be fixed?

The video below shows that it can, but there’s a twist. The bad capacitor was mounted on one of those flexible PCB cables that are so hard to work with. It is hard enough not to damage these when you aren’t trying to remove and replace a component from the surface of the cable.

Continue reading “Repairing A Component On A Flex Connector”

Repairing A Hallicrafters S-120

[MIKROWAVE1] claims he’s not a radio repair guy, but he agreed to look at a malfunctioning Hallicrafters S-120 shortwave receiver. He lets us watch as he tries to get it in shape in the video below. You’ll see that one of his subscribers had done a great job restoring the radio, but it just didn’t work well.

Everything looked great including the restored parts, so it was a mystery why things wouldn’t work. However, every voltage measured was about 20V too low. Turns out that the series fuse resistor had changed value and was dropping too much voltage.

Continue reading “Repairing A Hallicrafters S-120”

Video Baby Monitor Repair Uncovers Private Data

As the name of the channel implies, [BuyItFixIt] likes to pick up cheap gadgets that are listed as broken and try to repair them. It’s a pastime we imagine many Hackaday readers can appreciate, because even if you can’t get a particular device working, you’re sure to at least learn something useful along the way.

But after recently tackling a VTech video baby monitor from eBay, [BuyItFixIt] manages to do both. He starts by opening up the device and going through some general electronics troubleshooting steps. The basics are very much worth following along with if you’ve ever wondered how to approach a repair when you don’t know what the problem is. He checks voltages, makes sure various components are in spec, determines if the chips are talking to each other with the oscilloscope, and even pulls out the thermal camera to see if anything is heating up. But nothing seems out of the ordinary.

The scope uncovers some serial data.

While poking around with the oscilloscope, however, he did notice what looked like the output of a serial debug port. Sure enough, when connected to a USB serial adapter, the camera’s embedded Linux operating system started dumping status messages into the terminal. But before it got too far along in the boot process, it crashed with a file I/O error — which explains why the hardware all seemed to check out fine.

Now that [BuyItFixIt] knew it was a software issue, he started using the tools built into the camera’s bootloader to explore the contents of the device’s flash chip. He uncovered the usual embedded Linux directories, but when he peeked into one of the partitions labeled Vtech_data2, he got a bit of a shock: the device seemed to be holding dozens of videos. This is particularly surprising considering the camera is designed to stream video to the parent unit, and the fact that it could record video internally was never mentioned in the documentation.

Continue reading “Video Baby Monitor Repair Uncovers Private Data”

Unusual Tool Gets An Unusual Repair

In today’s value-engineered world, getting a decade of service out of a cordless tool is pretty impressive. By that point you’ve probably gotten your original investment back, and if the tool gives up the ghost, well, that’s what the e-waste bin is for. Not everyone likes to give up so easily, though, which results in clever repairs like the one that brought this cordless driver back to life.

The Black & Decker “Gyrodriver,” an interesting tool that is controlled with a twist of the wrist rather than the push of a button, worked well for [Petteri Aimonen] right up until the main planetary gear train started slipping thanks to stripped teeth on the plastic ring gear. Careful measurements of one of the planetary gears to determine parameters like the pitch and pressure angle of the teeth, along with the tooth count on both the planet gear and the stripped ring.

Here, most of us would have just 3D printed a replacement ring gear, but [Petteri] went a different way. He mentally rolled the ring gear out, envisioning it as a rack gear. To fabricate it, he simply ran a 60° V-bit across a sheet of steel plate, creating 56 parallel grooves with the correct pitch. Wrapping the grooved sheet around a round form created the ring gear while simultaneously closing the angle between teeth enough to match the measured 55° tooth angle in the original. [Petteri] says he soldered the two ends together to form the ring; it looks more like a weld in the photos, but whatever it was, the driver worked well after the old plastic teeth were milled out and the new ring gear was glued in place.

We think this is a really clever way to make gears, which seems like it would work well for both internal and external teeth. There are other ways to do it, of course, but this is one tip we’ll file away for a rainy day.