
Imagine a bare-bones electric pickup: it’s the size of an old Hilux, it seats two, and the bed fits a full sheet of plywood. Too good to be true? Wait until you hear that the Slate Pickup is being designed for DIY repairability and modification, and will sell for only $20,000 USD, after American federal tax incentives.
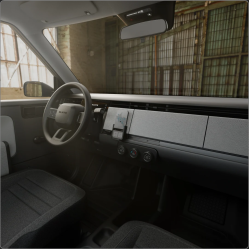
There are a few things missing: no infotainment system, for one. Why bother, when almost everyone has a phone and Bluetooth speakers are so cheap? No touch screen in the middle of the dash also means the return of physical controls for the heat and air conditioning.
There is no choice in colors, either. To paraphrase Henry Ford, the Slate comes in any color you want, as long as it’s grey. It’s not something we’d given much though to previously, but apparently painting is a huge added expense for automakers. Instead, the truck’s bodywork is going to be injection molded plastic panels, like an old Saturn coupe. We remember how resilient those body panels were, and think that sounds like a great idea. Injection molding is also a less capital-intensive process to set up than traditional automotive sheet metal stamping, reducing costs further.
That being said, customization is still a big part of the Slate. The company intends to sell DIY vinyl wrap kits, as well as a bolt-on SUV conversion kit which customers could install themselves. The plan is to have a “Slate University” app that would walk owners through maintaining their own automobile, a delightfully novel choice for a modern carmaker.
Continue reading “Is This The Truck We’ve Been Waiting For?”


