Resurrecting A PS3 Controller That Won’t Charge

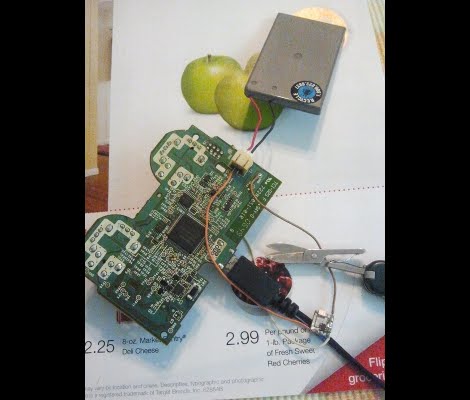
[SJM4306] grabbed a used PlayStation 3 from a game store that was going out of business. He got a pretty good deal on what had obviously been the floor model for a number of years. The one real problem was the controller that came with it. The thing was so filthy that he literally used gloves to disassemble and sanitize it. It worked just fine after that,until he discovered that it wouldn’t charge from the USB port as it’s supposed to. But he managed to replace the charging circuitry with some of his own.

When cleaning the insides of the controller he found there were numerous deposits of sludge which he attributes to spilled soda. This must have damage one of the chips responsible for charging because he was probing an unstable 2V rather than the regulated 5V which should be coming in on the USB lines. His solution was to desolder the USB port in order to separate its 5V pin from the PCB. He then etched a tiny board to host a MAX1555 charging IC. With the new hardware in place the controller is back in action.
Using An HD44780 Character LCD With The Raspberry Pi

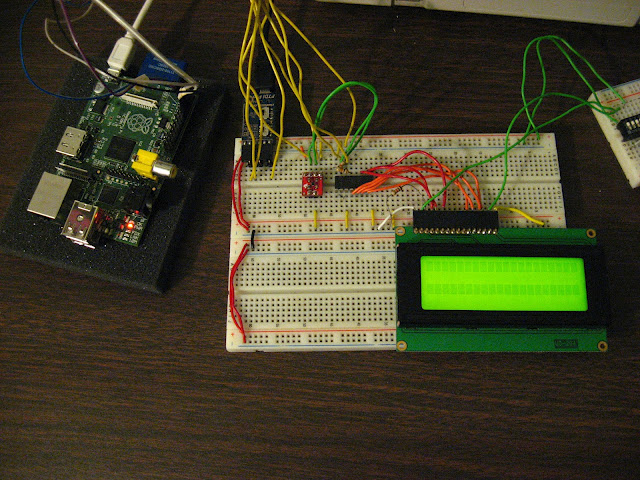
[Tech2077] is one of the lucky ones who already got his hands on a Raspberry Pi. He’s been looking into different interface options with the GPIO header and just posted a guide to using an HD44780 character display with the RPi. We like this approach because instead of doing some hard-core LCD work he’s using prototyping equipment you probably already have on hand.

Getting a character LCD running should be really simple. The gotcha is the logic level gap between the devices. If you’ve been working with Arduino, your add-ons are probably meant for a 5V power rail  and logic levels. The RPi outputs 3.3V logic. You could use a level converter (you’d need at least 7 pins to be converted in this case) or you can be a bit more clever. [Tech2077] grabbed an I2C port expander that uses just 2 of the RPi lines to address even lines of the display (four data bits plus three control bits). This is a bit of a hack, as the 3.3V logic is 0.2V below the recommended minimum for a digital 1 on the port expander. But it seems to work just fine! If it didn’t, a couple of NPN transistors would do the trick as well.

Addressing the new peripheral is just a matter of loading the i2c module and writing some Python.

Building A Pick And Place With 3D Printed Parts

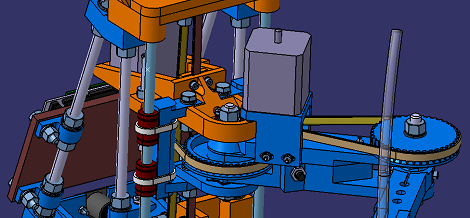
For the last few months, [HeliumFrog] has been building a SCARA bot to serve as the basis for a pick and place machine. Somewhat amazingly, this is the first robot of its kind to be printed on a 3D printer.

A SCARA-type robot is an articulated arm perfectly suited for transferring components from tubes and reels to a PCB. [HeliumFrog] began his build with an arm with large gears in joints driven by stepper motors and toothed belts. The Z axis was originally driven with a lead screw, but after a thoughtful redesign that was changed over to another toothed belt.

We’ve seen our share of DIY pick and place machines, but most of those have been based on a traditional X/Y Cartesian frame. [HeliumFrog]’s SCARA bot should be – theoretically, at least – faster and more accurate while taking up a smaller footprint in the workshop.

[HeliumFrog] is more or less done with the basics of his build, and is now moving on to building a plastic extrusion tool head for his SCARA bot. Very cool, and should make this robot capable of self-reproduction for under £400 (~$600).

You can check out a video of this articulated arm bot after the break.

Thanks, [Kyle] for sending this one in.

Continue reading “Building A Pick And Place With 3D Printed Parts”

MakerFaire K.C.: Incredible Wasp Wings

First off let me say that the Redbull contest has consumed ALL of my time and I haven’t been able to get these Makerfaire coverage posts out as quickly as I’d hoped. Please be patient, there are several more to come I promise.

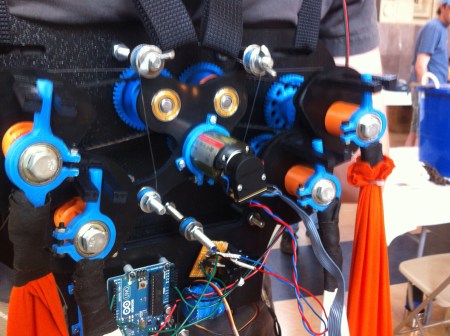
As I was walking around, I glanced up and saw a really cool set of wasp wings on a mannequin flapping away. The motion was quite nice, but I was really blown away when they folded down to a different position when not in use. I managed to track down the creator at the even and asked him some questions.

[Jordy] was commissioned to build these as part of a costume. He started by just googling ornithopter designs and ended up coming up with a rather nice contraption. Many of the bits are 3d printed specifically to his needs, including the drive gears. This must have saved tons of time and effort. As you can see in the video after the break, the motion is really nice and the fact that they fold down is really cool.

Continue reading “MakerFaire K.C.: Incredible Wasp Wings”

VGA Message Board Displays SMS Without A Computer

[Achu Wilson’s] latest creation is a VGA message board which is written to via SMS text messages. This doesn’t sound too interesting at first, until you find out he’s doing this with a microcontroller rather than a PC. All of the complexity is in the code that drives the VGA. He managed to do it without any jitter while using an 8-bit microcontroller.

But first, the cellular side of things. A GSM modem takes care of connectivity. To communicate with the modem [Achu] used an ATmega8. He mentions the he could have used a much smaller uC, like an ATtiny, but this is what he had lying around. When a message is received the ATmega8 feeds the characters to an ATmega16 which is driving the VGA monitor. Rather than deal with the analog voltages necessary to run a color display he simply ganged the three color lines together and drives them from one of the microcontroller pins. This results in white and black which correspond to voltage or no voltage.

You can see him showing off the system in the clip after the break.

Continue reading “VGA Message Board Displays SMS Without A Computer”

DIY ROV Explores The Watery Depths

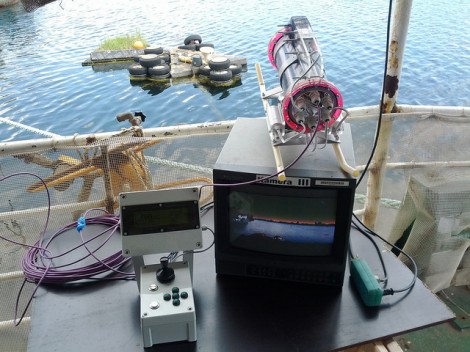
This rig looks so good it’s hard to believe this is the first ROV that [DZL] has ever built. It houses an HD camera which feeds the display at the operator’s station. You can see the controller to the left of that screen which uses a joystick and buttons to pilot the underwater vessel.

In order to simplify construction, [DZL] decided not to use propellers. The problem with that technique is that you need to have bearings that will allow the propeller shafts to turn without letting water in. Propulsion is instead provided by a group of small water pumps whose intake is on one end and outflow is on the other. These are mounted at various places on the body and each have one power cable that connects to the control circuitry in the main housing. The passage of cables through the enclosure is another possible leak point, but [DZL] found some off the shelf bushings that ended up making it pretty easy.

The link at the top is a round-up of all the different project posts. For us, the most interesting Flickr set is the one showing how the enclosure is put together. There is also a pretty neat dive video after the break that shows the craft being tested underwater.

Continue reading “DIY ROV Explores The Watery Depths”

Penetration Testing With The Raspberry Pi

PwnPi is a penetration testing distribution rolled up for the Raspberry Pi platform. This should come as no surprise to anyone. The RPi board has a beefy processor, it’s relatively low power, has the option of the on-board NIC or a USB WiFi dongle, and it already has Linux kernel and desktop sources available to start from.

Now we will admit we’re a bit disappointed from this tip. Don’t get us wrong, the distro looks like it’s well done, and we’re sure there are a lot of folks out there who will be happy to have these tools to help test their network security. But this is a software only hack and we were expecting to see a nice little covert package that could be plugged into an outlet (SheevaPlug style), or a battery-powered module that can be plugged into an Ethernet port and hidden away.

Now you know what we want, don’t forget to send in a link once you pull it off.

[Thanks Scott]