Knitting Machine Hack By Keypad Emulation

[Travis Goodspeed] and Hackaday alum [Fabienne Serriere] joined forces to develop an alternative interface for a knitting machine. They’re working with the Brother KH-930E machine. We saw [Becky Stern] use the same model by manipulating data on an emulated floppy drive for the device. [Travis] and [Fabienne] went a different route, and are emulating the keypad using an Arduino and a set of transistors.

They started by reverse engineering the keypad matrix using a continuity tester. Once they worked out the column and row layout they connected each to an NPN transistor. The Arduino sketch simulates button presses to set knitting bits for each row, with just one reset button for user input. This can be used to send data from a PC, or as a standalone system. Either way, it’s not only a great way to add functionality to the kitting machine, but a good example of how to interface with the keypad on just about any device.
Star Trek Inspired Pocket Doors

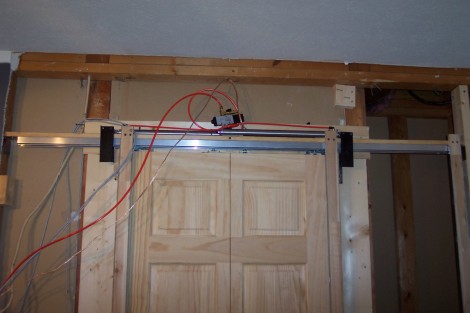
Do you have enough confidence in your hacking abilities to build a project into the walls of your home? [Marc] used his skills to build an air-powered sliding door for his bedroom. It is similar to the sliding door you’d find on the Enterprise, two sections that slide nicely into the wall to let you pass. Although the picture above shows the internals, he followed through and ended up with a fully finished room that looks fantastic. A compressor in the attic provides the pressure necessary to move the door sections. It is automated, but uses a button press or keypad combination to run instead of detecting motion. Of course, since he’s using a PIC microcontroller to drive the system there’s always room for future changes. Check out how great the finished look is in the video after the break.

Continue reading “Star Trek Inspired Pocket Doors” →

Hot Resistors Used For Color-changing Clock Face

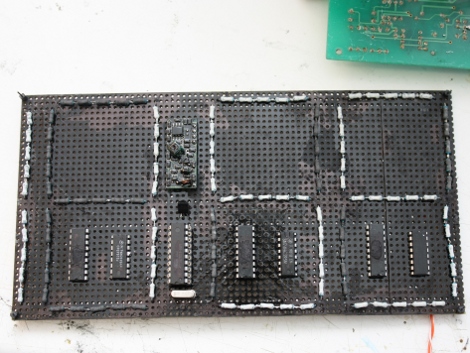
[Sprite_TM] built a full clock display using thermochromic paint. This picks up where he left off with his paint-based 7-segment display prototype. He never really saw that design through to a finished project, but he recently came across the leftover paint and decided to do something with it. Instead of making thin traces on a PCB he’s heating up resistors mounted on protoboard. Each resistor has been coated with the black/light grey paint after getting a rough sanding on the tops of the packages. Run around 500mW through a segment and they heat up enough to change the paint to light grey. Once shut off, the segments gradually fade over the next 60 seconds.

Breathing Motion Powered USB Charger

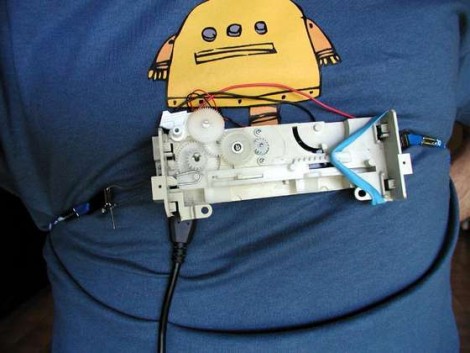
When your batteries run low you can use your body to recharge them. This contraption generates power from chest expansion while breathing. [Jmengel] used some gears from old optical drives to boost the RPM generated by a belt around your torso that he calls a thorax expansion coupler. When you breath in, that belt pulls on a plate that spins the gears, ultimately rotating a small motor. The AC current generated by that motor is run through a rectifier and a boost converter, then fed to a charging circuit.

Does it work? Not really, as this only outputs around 50 mW. But we like the twinge of Dune nostalgia we get looking at it. Wouldn’t this be a perfect addition to a stillsuit?

Classical VCR Head Jog Wheel

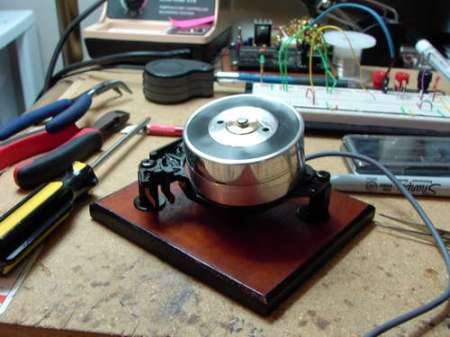
[Osgeld] takes on the classic VCR head jog wheel in this instructable. He has done a fantastic job not only in his build quality, but in the quality of the writeup. As he points out, the idea of using the head as a jog wheel isn’t new. His construction and build quality however have yielded a fantastic looking reliable device that we would be proud to have sitting on our desk.

As usual, the most interesting bits of the writeup are how he solved problems he encountered. For example, he’s using an optical mouse to detect the motion of the wheel. This requires that he print out a pattern to mount opposite the optical sensor. This sounds straight forward enough, but he found the results to be less than stellar. He documented his fix, basically reworking it in GIMP, so others can save some time. That is how tutorials should be. Great job [Osgeld].

Sluggy Wind Speed Sensor

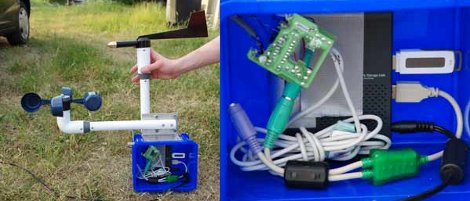
Sometimes when we look at a hack, its to see how someone chose those parts for the project. In this case, it would have been hard to see it coming. [Janne Jansson] decided to combine a set of measuring cups, a hacked Linksys NSLU2 NAS, and a PS/2 Mouse together to make a self-contained Wind Speed Sensor for his roof. The measuring cups act as wind catchers, which in turns drives the rotation of one of the mouse ball sensors. This data is then logged and transmitted by the NSLU2. The NSLU2 is running a custom Linux based firmware, similar to how OpenWRT works for wireless routers.

To calibrate the device, he also made the best logical choice: to duct tape it to the hood of his car along with a much more expensive wind sensor and use that data to make his own device as accurate as possible. When placed atop his house with a 1500VA 220V UPS, the device managed 250 days of uptime before meeting its demise. Those 250 days also included 5 days of being frozen solid, yet still transmitting (somewhat meaningless) data. All of the relevant code and build instructions are available, for those of you with similar parts to spare.

Composite Video With MSP430 Chip

[NatureTM] used part of the Thanksgiving holiday to get composite video output working with an MSP430 microcontroller. He’s using one of the chips that came with the TI Launchpad, which is a big hardware limitation because of the relatively small code memory and RAM. The chip displays one still image at a resolution of 192×40 pixels. Still, this is a great way to learn about composite video signals, as a lot of other projects use a TVout library to save you the headaches. All you’ll need is a TI Launchpad, a 16 MHz crystal oscillator, two resistors, and an RCA jack. Dig through the code and see what a great job [NatureTM] did of offloading as much work onto the chip’s peripherals as possible.