Motion Activated Wildlife Camera (or A Spy Device)

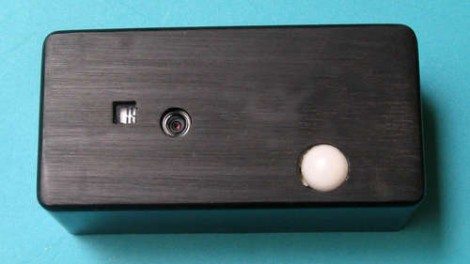
Now you can capture pictures of our furry friends by building a motion activated wildlife camera. [Doug Paradis] took his Air Freshener hack and used it to trigger a camera. The white dome in the picture above is the PIR sensor from an Air Wick Freshmatic, along with a cheap keychain camera and an MSP430 microcontroller. He used one of the chips that came with the TI Launchpad, a transistor, and some discreet components to interface the devices and then put them into a project box. Now he’s got a fully configurable motion-sensing camera.
Adding Pan And Tilt To A Webcam

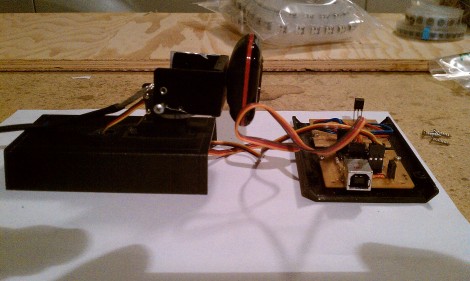
[Brent] and his wife wanted a way to provide more family time for Grandparents that lived far away. They tried a webcam, but their daughter just didn’t oblige by staying in the frame. Instead of chasing her around the room with with the camera he added pan and tilt features to the device. He settled on IR control using a common television remote, similar to our USB remote control receiver tutorial except that it drives servo motors instead of forwarding signals over the serial connection. [Brent] used a Picaxe 08M, connecting two servos together as a base on top of the project box. If you try this yourself there’s a lot of room to grow. Once you’ve assembled the hardware it wouldn’t be too hard to make this web enabled so that Grandpa can click on a web interface to look around the room.

Retro Adapter For Canon SLR

[calculon] was able to modify a “dumb” adapter to allow his Canon SLR to use the aperture and focus on a retro lens.  With his new flip mounted wide angle lens he was able to achieve some pretty neat macro shots.  By cutting away some of the cheaper ring he was able to feed the wire through and glue it onto the the cameras contact points.  The wire was then attached to the inputs on the “new” lens. With a new adapter running about $375 not only was this a neat little hack but it was also a money saver. You can see some more of his photos on his flicker

Beginner Concepts: Powering Your Projects

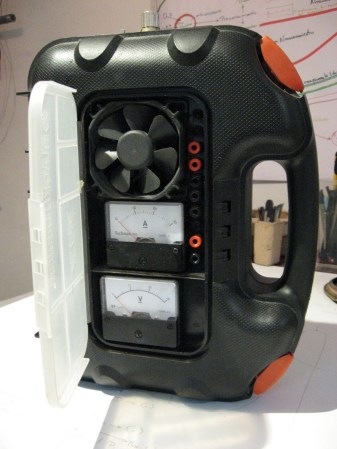
Powering your gadgets generally seems like a necessary evil. To help with this [Felipe La Rotta] made a really nice bench power supply using a PC power supply and a LM317 adjustable voltage regulator. PC power supplies are an example of a switched power supply(more on that later).  The LM317 is a type of linear voltage regulator that allows for adjusting the output voltage by varying some resistors. Whats the best way to power your circuits? well that depends…

Continue reading “Beginner Concepts: Powering Your Projects” →

AVR Programming 04: Writing Code, Etc.

Welcome back to this fourth and final installment of the series. The first three parts should have been enough to get you off the ground, but a few more learning examples wouldn’t hurt. It’s also a good time to discuss some of the other things these little chips can do. Join me after the break to:

  • Expand the sample code, adding features to our simple program while I challenge you to write the code yourself.
  • Discuss AVR fuse bits, how to use them, and what to watch out for
  • Touch on some of the peripherals you’ll come across in these chips

As a grand flourish to the series, I’ve used the example hardware from this final part to build a bicycle tail light. Hopefully this will inspire you to create something much more clever.

Series roadmap:

Continue reading “AVR Programming 04: Writing Code, Etc.” →

Communicating With An LED Matrix

Most of the LED matrix posts we run delve into the hardware design. This time around [J Bremnant] used prefab modules and focused on writing code to address the display. The hardware combines two 24×16 LED boards from Sure Electronics with a Teensy 2.0 to drive the display and provide a USB connection. The firmware comes in just under 8k, leaving graphic manipulation up to a PC.

[J Bremnant’s] Python script offers a lot of flexibility when working with the display. There are three modes selectable through a terminal interface. One just tests the display and then drops into Conway’s Game of Life. The second mode lets you send commands via serial interface so it can be used as a message ticker. The final feature is frame addressing that allows graphics to be dropped into the display. See each of these featured in the video after the break.

Continue reading “Communicating With An LED Matrix” →

Arduino + Java + Joystick

Interfacing your own hardware with a Java app couldn’t be easier than this example. [Pn] created this proof-of-concept using an Arduino, an analog joystick from a gaming controller, and a few lines of Java code. The Arduino reads an ADC value from the joystick’s x-axis and transmits it over the serial connection ten times a second. The Java program triggers on every serial event, parsing the data based on the @ symbol that the Arduino sends as a start and end condition.

We like this kind of example because there’s nothing extra involved. It lets you take the concept and run with it in any project imaginable. Be it a more complicated Joystick, or simple sensors that you’d like to interface with.