Sometimes, simple things can make a world of difference. Take for example a non-verbal person who can’t necessarily control a touch screen in order to tell someone else what they need or want or think.
 This is where Augmentative and Alternative Communication (AAC) devices come in. Recently tasked with building such a device, [Thornhill!] came up with a great design that houses 160 different phrases in a fairly small package and runs on CircuitPython.
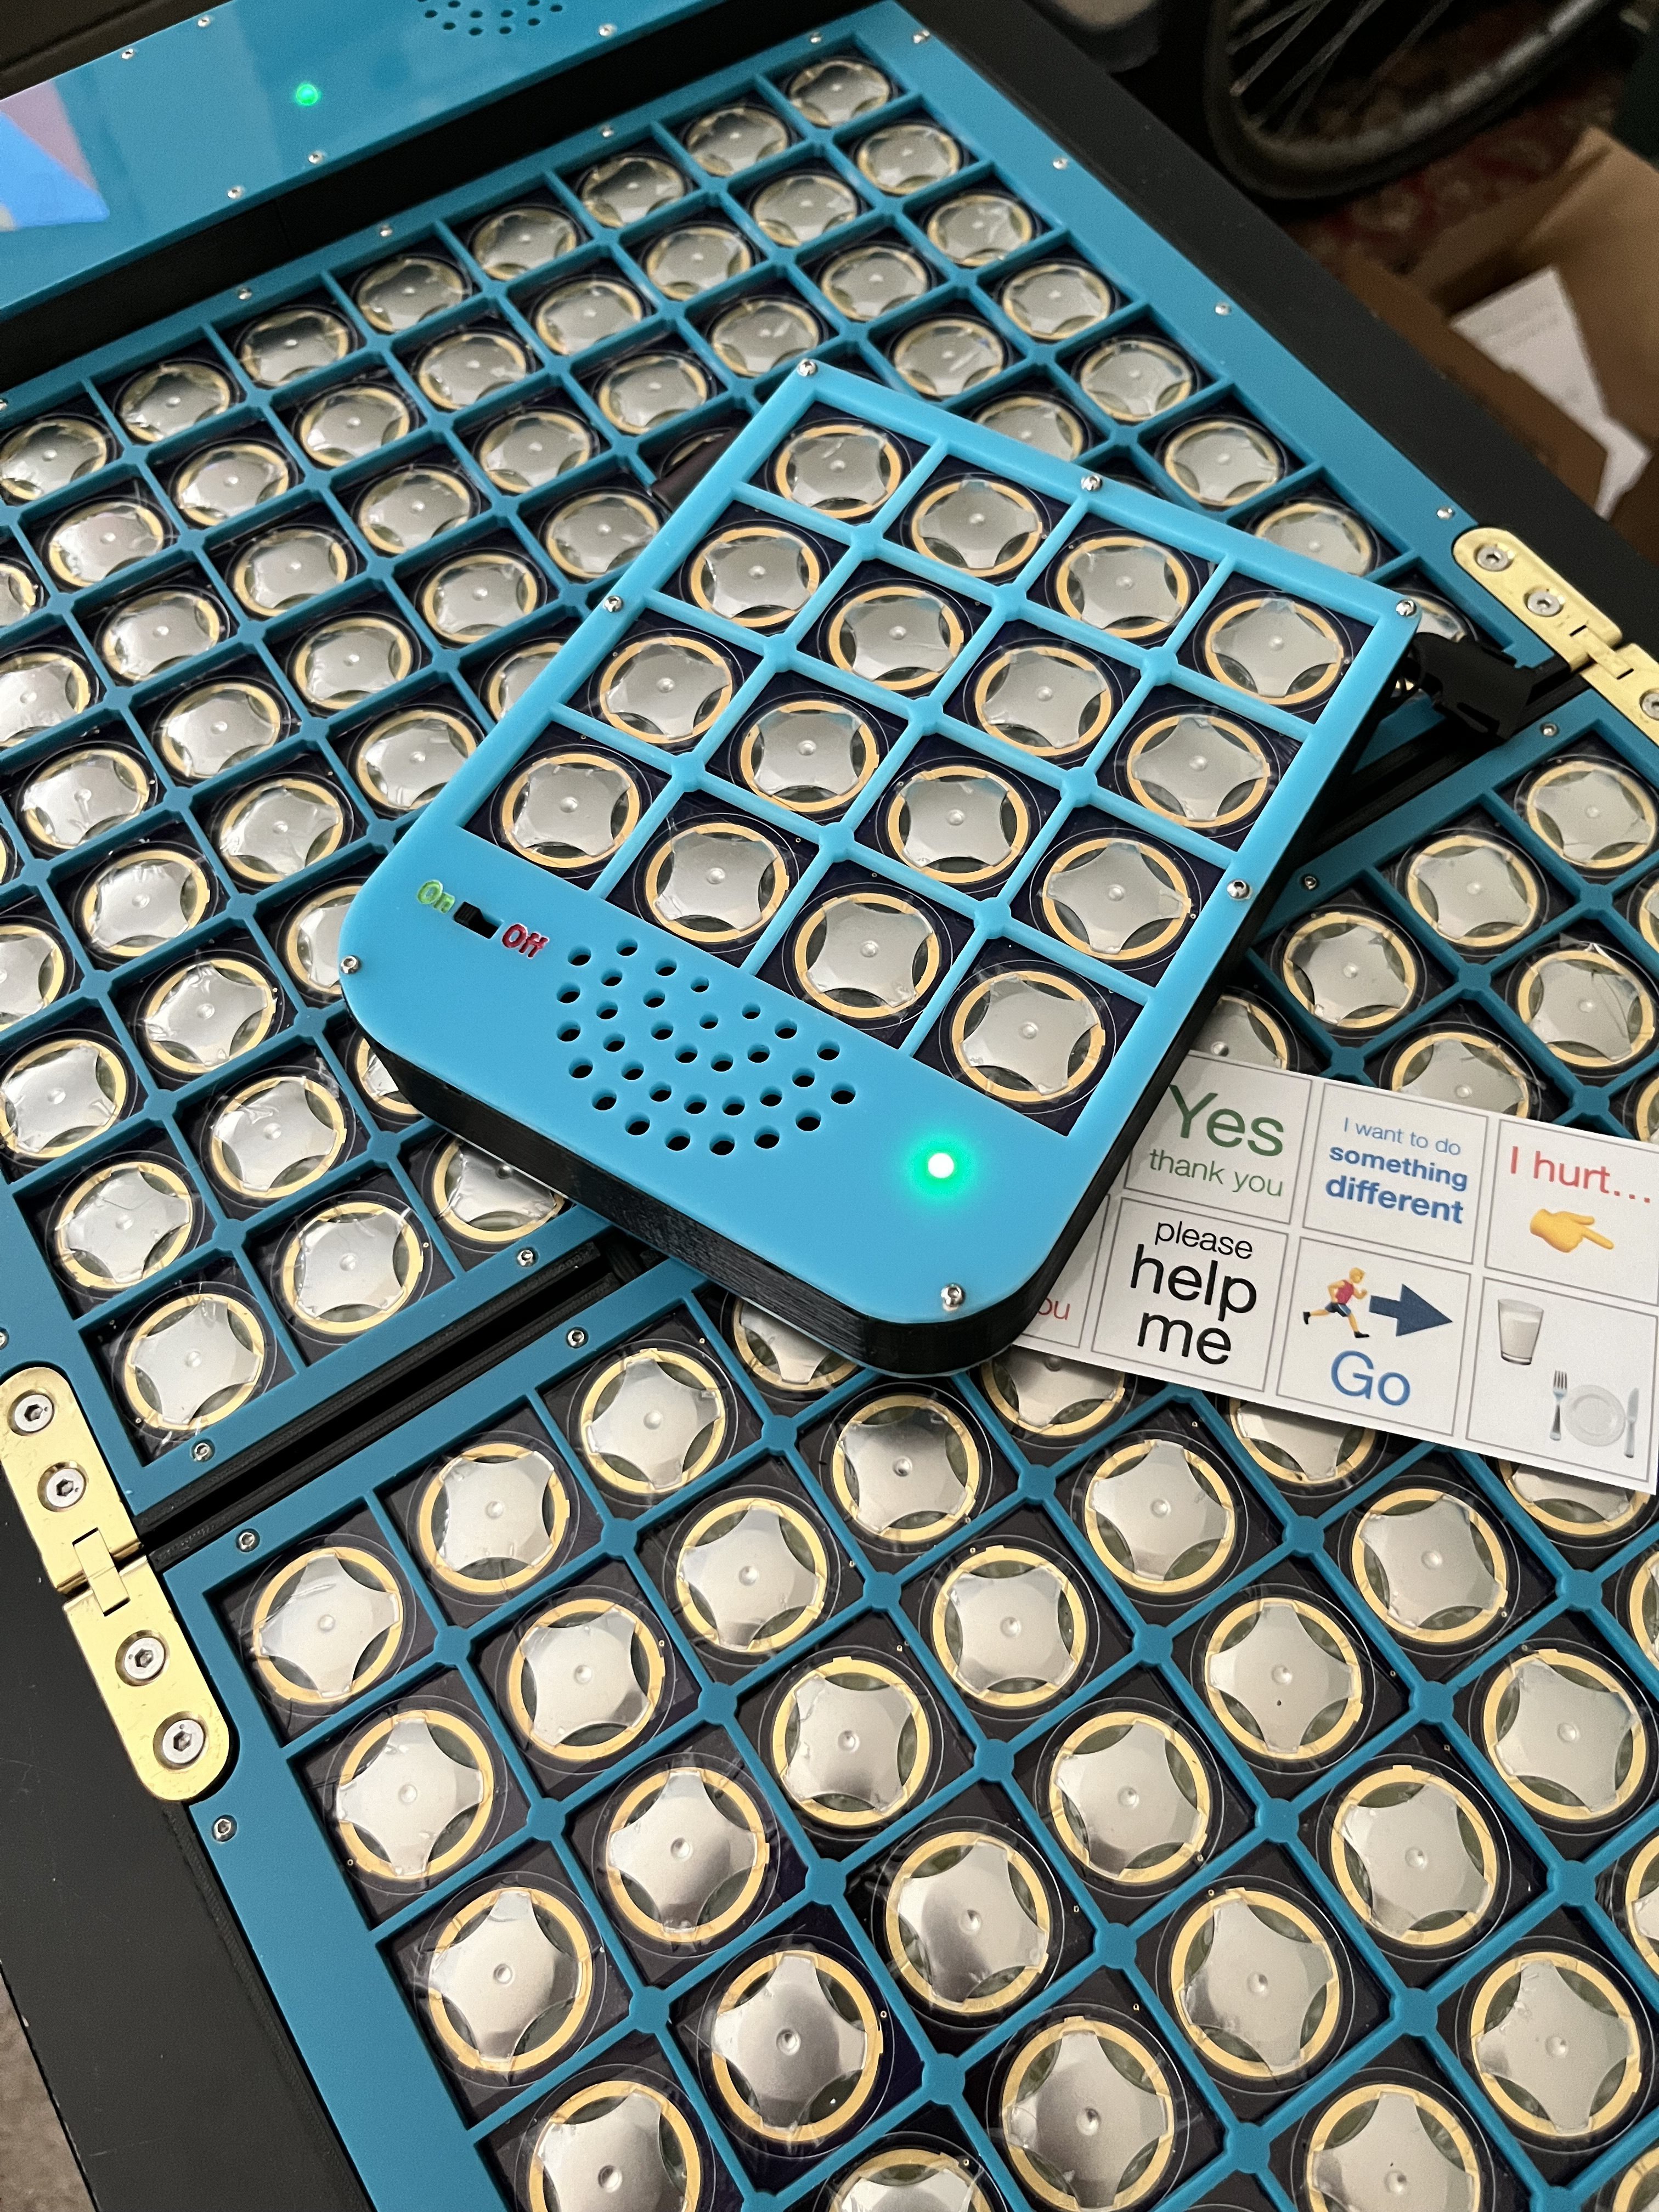
Basically, the client presses the appropriate snap-dome button button and the corresponding phrase is spoken through the speaker. The 10×16 grid of buttons is covered with a membrane that both feels nice and gives a bit of protection from spills.
The buttons can achieve high actuation forces and have a crisp tactile response, which means they’re probably gonna go a long way to keep the user from getting frustrated.
This handy AAC board is built on the Adafruit RP2040 Prop-Maker Feather and two keypad matrices. If this weren’t useful enough as it is, [Thornhill!] also built an even smaller version with 16 buttons for the client to wear around their neck.
Did you know? AAC boards aren’t just for humans.