If there’s one place where the old ways of doing things live a longer life than you’d otherwise expect, it’s the woodshop. Woodworkers have a way of stubbornly sticking to tradition, and that usually works out fine. But what does it take to change a woodworker’s mind about a tool that seems to have little role in the woodshop: the 3D-printer?
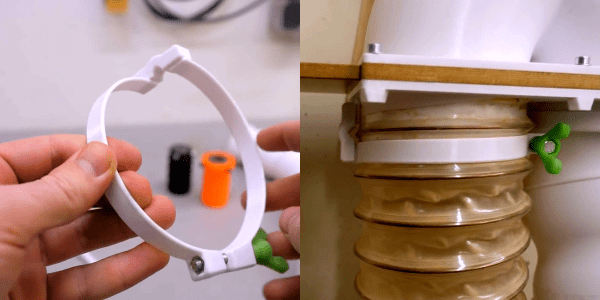
That’s the question [Marius Hornberger] asked himself, and at least for him, there are a lot of woodworking gadgets that can be 3D-printed. [Marius] began his journey into additive manufacturing three years ago as a skeptic, not seeing how [Benchy] and friends could be of any value to his endeavors. But as is often the case with a tool that can build almost anything, all it takes is a little ingenuity to get started. His first tool was a pair of soft jaws for his bench vise. This was followed by a flood of useful doodads, including a clever center finder for round and square stock, custom panels for electrical switches, and light-duty pulleys for some of the machines he likes to build. But [Marius] obviously has an issue with dust, because most of his accessories have to do with helping control it in the shop. The real gem of this group is the hose clamp for spiral-reinforced vacuum hose; standard band clamps don’t fit well on those, but his clamps have an offset that straddles the wire for a neat fit. Genius!
[Marius] has kindly made all his models available on Thingiverse, so feel free to dig in and start kitting out your shop. Once you do maybe you can start building cool things like his all-wood scissors lift.
Continue reading “Woodworker Goes From 3D-Printing Skeptic To Believer”

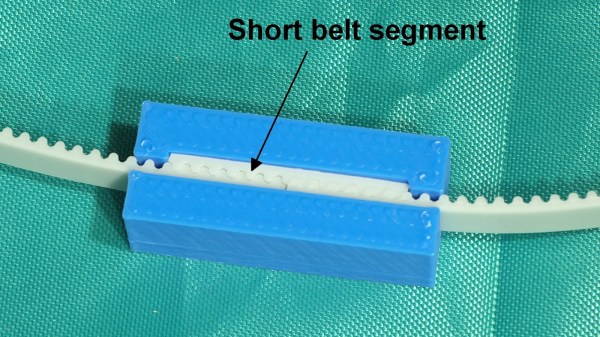
 The belts used were common steel-core polyurethane GT2 belts, and the clamp design uses a short segment of the same belt to lock together both ends, as shown above. It’s a simple and effective design, but one that isn’t sustainable in the longer term.