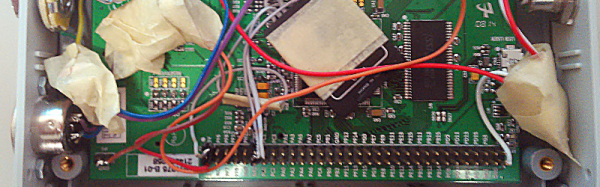
[Igor b] plays in a band and wanted a way to use a foot pedal to trigger samples. Since he had a STM32F429 evaluation board handy, he decided to build the Stmpler using the board, a touch screen, an SD card, and not much else.
[Igor b] plays in a band and wanted a way to use a foot pedal to trigger samples. Since he had a STM32F429 evaluation board handy, he decided to build the Stmpler using the board, a touch screen, an SD card, and not much else.
Before you overreact to the title, keep in mind the latest version of Eclipse is code named “Mars.” It is always a bit of a challenge to set up a generic ARM tool chain. If you don’t mind sticking to one vendor, shelling out a lot of money, or using Web-based tools, then you might not have this problem. But getting all the tools together can be annoying, at best.
[Erich Styger] works with students and knows they often stumble on just this step so he’s provided clear documentation for getting Eclipse, the ARM gcc compiler, and a full set of tools installed. He focuses on Windows and the Kinetis platform, but the steps are virtually the same regardless. Just get the right tools for your operating system and skip the Kinetis-specific parts if you don’t need them.
Forth isn’t a shiny new programming language, but it has a staunch following because it is lightweight and elegant. The brainchild of [Chuck Moore], the language is deceptively simple. Words are character sequences delimited by spaces. In its simplest form, Forth knows a few basic words including–and this is the key–a word to define other words.
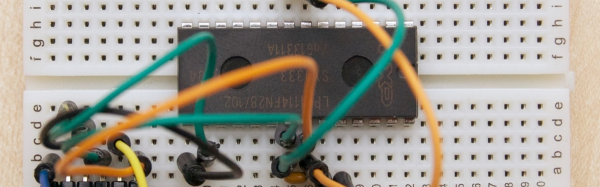
[Jean-Claude Wippler] likes to experiment with physical computing and he found a Forth image ready-made for the LPC1114. Why is that interesting? The LPC1114 is one of the few (or maybe the only) modern ARM processor in a breadboard-friendly DIP package. Since [Jean-Claude] had a chip sitting around, he had a Forth system up in no time. All he needed was a breadboard and a 3.3V serial connector. The chip has its own bootloader and the The Mecrisp-Stellaris Forth he used has over 300 words as well as the ability, of course, to add more.
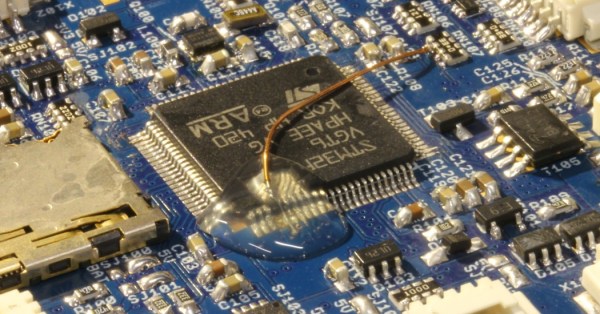
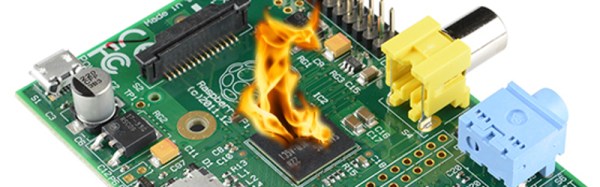
[Carsten] messed up. He was soldering an ARM CPU onto a quadcopter board in haste, failed to notice that the soldering iron was turned up to eleven, and pulled some of the traces up off the PCB. In the process of trying to fix that, he broke three pins off of the 100-pin CPU. The situation was going from bad to worse.
Instead of admitting defeat, or maybe reflowing the CPU off of the board, [Carsten] lasered the epoxy case off of the chip down to the lead frame and worked a little magic with some magnet wire. A sweet piece of work, to be sure!
Continue reading “CO2 Laser Decapping To Fix Soldering Mistake”
As far back as we can remember, there have always been hacks, exploits, and just curiosity about undocumented CPU instructions. The Z80 had them. Even the HP41C calculator had some undocumented codes. The HCF (Halt and Catch Fire) instruction was apocryphal, but we always heard the old video controller chips could be coaxed into blowing up certain monitors. You don’t hear too much about things like that lately, perhaps because fewer people are working in assembly language.
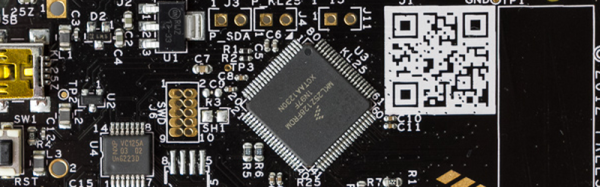
[Sergi Àlvarez i Capilla] not only works in assembly language, he was writing an ARM assembler when he noticed something funny. Instructions are built in a regular pattern and some of the patterns were missing. What to do? [Sergi] lost no time trying them out.
Even though the Arduino was hardly the first 8 bit microcontroller board to support a bootloader and the C/C++ language, it quickly became the de facto standard for hobby-level microcontrollers as well as a common choice for one-off or prototype projects. I’m sure there are a lot of reasons why this occurred, but in my mind there were three major reasons: price, availability of lots of library and sample code, and the existence of a simplified GUI IDE that you could install in a few minutes. The build process is simple, too, even though if you ever have to actually figure it out, it is quite ugly. For most people, it works, and that makes it not ugly.
I like the ATMega chips. In fact, I had boards based around the ATMega8 and a bootloader way before there was an Arduino. However, they are fairly small parts. It is true that the Arduino infrastructure has grown to support more ATMega chips, many with more memory and I/O and clock speeds. However, 32-bit processors are getting inexpensive enough that for all but the simplest or highest volume projects, you should be thinking about using 32-bit.
If you’ve tried to go that route before, you’ve probably been daunted by the price, especially the price of development tools. Your alternative is to roll your own tool chain which is very doable (and there are some nice scripts out there that will help you). You also need to worry about libraries and how to integrate them. Not to mention, many of the advanced processors require a lot of setup to get, say, an A/D converter turned on. Most processors keep things they aren’t using turned off, and each pin requires setup to select the 4 or 5 things shared on that pin.
All of this has been a barrier to entry. The vendors have all figured this out, though, and many have tried to build tools aimed at breaking up the Arduino market ranging from inexpensive development boards to code-generating wizards, to full blown IDEs. I want to tell you (and show you, in the video below) how you can make the jump from 8-bit to 32-bit much easier than you might think.
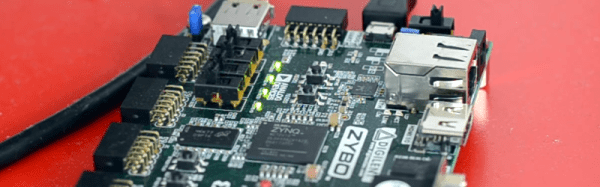
We’re big fans of the Zynq, which is an answer to the question: what do you get when you cross a big ARM processor with a big FPGA? So it isn’t surprising that [GregTaylor’s] project to emulate the OPL3 FM Synthesis chip in an FPGA using the Zynq caught our eye.
The OPL3 (also known as the Yamaha YMF262) was a very common MIDI chip on older PC sound cards. If you had a Sound Blaster Pro or 16 board, you had an OPL3 chip in your PC. The OPL3 was responsible for a lot of the music you associate with vintage video games like Doom. [Greg] not only duplicated the chip’s functions, but also ported imfplay from DOS to run on the Zynq’s ARM processors so he could reproduce those old video game sounds.
The Zybo board that [Greg] uses includes an Analog Devices SSM2603 audio codec with dual 24-bit DACs and 256X oversampling. However, the interface to the codec is isolated in the code, so it ought to be possible to port the design to other hardware without much trouble.
To better match the original device’s sampling rate with the faster CODEC, this design runs at a slightly slower frequency than the OPL3, but thanks to the efficient FPGA logic, the new device can easily keep up with the 49.7 kHz sample rate.
Using an FPGA to emulate an OPL3 might seem to be overkill, but we’ve seen worse. If you prefer to do your synthesis old school, you can probably get a bulk price on 555 chips.


