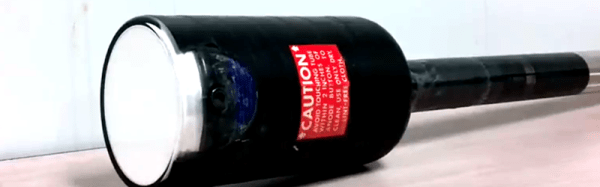
The Nixie Tube Killer That Never Was

With the wealth of Nixie projects out there, there are points at which Hackaday is at risk of becoming Nixieaday. Nixie clocks, Nixie calculators, Nixie weather stations, and Nixie power meters have all graced our pages. And with good reason – Nixie tubes have a great retro look, and the skills needed to build a driver are a cut above calculating the right value for a series resistor for an LED display.

But not everyone loved Nixies back in the day, and some manufacturers did their best to unseat the venerable cold cathode tubes. [Fran Blanche] came across one of these contenders, a tiny cathode ray tube called the Nimo, and after a long hiatus in storage, she decided to put the tube to the test. After detailing some of the history of the Nimo and its somewhat puzzling marketing — its manufacturer, IEE, was already making displays to compete with Nixies, and seven-segment LEDs were on the rise at the time — [Fran] goes into the dangerous details of driving the display. With multiple supply voltages required, including a whopping 1,700 V DC for the anode, the Nimo was anything but trivial to integrate into products, which probably goes a long way to explaining why it never really caught on.

If you happen to have one of these little bits of solid unobtanium, [Fran]’s video below will go a long way to bringing back its ghostly green glow. You might say that [Fran] has a thing for oddball technologies of the late 60s — after all, she’s recreating the Apollo DSKY electroluminescent display, and she recently helped a model Sputnik regain its voice.

Continue reading “The Nixie Tube Killer That Never Was”

DIY 9V Battery

Volta’s pile — the first battery — was little more than silver and zinc discs separated by paper soaked in salt water. A classic classroom experiment is to build a pile from copper pennies, tin foil, and vinegar or lemon juice. [Omars2] has a different take on this old experiment. He creates a 9V battery using some zinc screws, copper wire, and salt water. There’s a video of the battery, below.

A syringe piston serves as a substrate for the cells, and each cell is just a screw with paper wrapped around it and then 35 turns of copper wire on top of that. The battery is soaked in salt water, although we suspect vinegar or lemon juice would work even better. Heating the electrolyte is also a good idea.

Continue reading “DIY 9V Battery”

Echo Dot Finds Swanky New Home In Art Deco Speaker

The phrase “They don’t make them like they used to” is perhaps best exemplified by two types of products: cars and consumer electronics. Sure, the vehicles and gadgets we have now are so advanced that they may as well be classified as science-fiction when compared to their predecessors, but what about that style. Our modern hardware can rarely hold a candle to the kind of gear you used to be able to buy out of the “Sears, Roebuck and Company” catalog.

So when [Democracity] came into possession of a wickedly retro art deco speaker, it’s no surprise he saw it as a perfect opportunity to bring some of that old school style into the 21st century by rebuilding it with an Amazon Echo Dot at its core. The fact that the original device was a speaker and not a full radio made the conversion much easier, and will have everyone trolling yard sales for months trying to find a donor speaker to build their own.

To start the process, [Democracity] popped the panels off and ripped out what was left of the speaker’s paper cone and coil. In a stroke of luck, the opening where the driver used to go was nearly the perfect size to nestle in the Echo Dot. With a 3D printed cradle he found on Thingiverse and a liberal application of epoxy, the Dot could get snapped into the speaker like it was always meant to be there.

[Democracity] then picked up some absolutely gorgeous speaker cloth on eBay and hot glued it to the inside of the panels. What was presumably the volume knob was pulled out of the bottom and turned out to be a perfect place to run the Dot’s USB cable out of.

A lesser man would have called this project completed, but [Democracity] knows that no hack is truly complete without the addition of multicolored blinking LEDs. With the RGB LED strips installed inside, the light is diffused through the cloth panels and creates a pleasing subtle effect. You can almost imagine a couple of vacuum tubes glowing away inside there. Judging by the final product, it’s no surprise [Democracity] has a fair bit of experience dragging audio equipment kicking and screaming into the modern era.

This isn’t the first time we’ve seen an old piece of audio equipment get a high-tech transfusion, and isn’t even the first time we’ve seen the Dot used to do it. But it’s certainly the one we’d most like to see sitting on our shelf.

Build Your Own Wave Tank

Wave tanks are cool, but it’s likely you don’t have one sitting on your coffee table at home. They’re more likely something you’ve seen in a documentary about oil tankers or icebergs. That need no longer be the case – you can build yourself a wave generator at home!

This build comes to use from [TVMiller] who started by creating a small tank out of acrylic sheet. Servo-actuated paddles are then placed in the tank to generate the periodic motion in the water. Two servos are controlled by an Arduino, allowing a variety of simple and more complex waves to be created in the tank. [TVMiller] has graciously provided the code for the project on Hackaday.io. We’d love to see more detail behind the tank build itself, too – like how the edges were sealed, and how the paddles are hinged.

A wave machine might not be the first thing that comes to mind when doing science at home, but with today’s hardware, it’s remarkable how simple it is to create one. Bonus points if you scale this up to the pool in your backyard – make sure to hit the tip line when you do.

Apple II FPGA

[Stephen Edwards] had some time one Christmas. So he took a DE2 FPGA board and using VHDL built a pretty faithful reproduction of an Apple II+ computer. He took advantage of VHDL modules for the 6502 CPU and PS/2 keyboard, and focused more on the video hardware and disk emulation.

According to [Stephen], you can think of the Apple II as a video display that happens to have a computer in it. The master clock is a multiple of the color burst frequency, and the timing was all geared around video generation. [Stephen’s] implementation mimics the timing, although using more modern FPGA-appropriate methods.

Continue reading “Apple II FPGA”

A Converter You Won’t Have: PS/2 Mouse To Serial Mouse

When did you last buy a mouse? Did it have a little adapter in the box? There was a time when if you bought a USB mouse, in the box was also an adapter to allow it to be used with the older PS/2 interface. And if you were to go back a few more years into the past, you’d have found when you bought a mouse with a PS/2 connector fitted, it may well have come with an adapter for a 9-pin RS232 serial port. Those mice from a decade or more ago would have contained the software to recognise the interface into which they were plugged, and emulate it accordingly. It is unlikely then that you could take a modern USB-only device and an unholy chain of USB-to-PS/2-to-serial adapters, and have it work as a serial mouse. Want to run Windows 3.1 on a 386DX? You need a serial mouse.

Happily, [matze525] has come along with a solution for those of you with a need to drive an ancient PC with a serial mouse. He’s created a PS/2 to RS232 mouse converter, and it takes the form of a little PCB with an AT90S2313P microcontroller to do the translation and an RS232 level converter chip.

It might sound like a rather unexpected device to produce, but we can see it fills an important niche. In the early 1990s mice were not the reliable optical devices we have today, instead they had nasty mechanical connections inside, or if you were extremely lucky, optical encoder wheels. The supply of still-reliable RS232 mice must therefore be dwindling, and if you have a Windows 3.1 PC to keep alive then we can see the ability to use a more modern pointing device has a lot going for it.

If you have one of those machines from that era that came with proprietary interfaces, maybe you can make use of a USB to quadrature converter.

RetroModem For The Commodore 64

Retrocomputers are fun, but ultimately limited in capability compared to modern hardware. One popular pursuit to rectify this is the connection of early home computers to the Internet. To that end, [que] built the Retromodem for the Commodore 64.

The build starts with a case from an Intel 14.4 modem. A little fast for the Commodore 64 era, but anachronism is charming when done tastefully. Inside is an Arduino with an ethernet module to handle the heavy lifting of carrying packets to the outside world.  [que] took the time to wire up status LEDs for the proper vintage look, which really adds something to the project. They switch on and off to indicate the various settings on the modem – it’s great to see in the video below the break the “HS” LED light up when the baud rate is changed to a higher speed.

The project implements most of the Hayes command set, so you can interface with it over a serial terminal just like it’s 1983. [que] doesn’t go into too many details of how it’s all put together, but for the experienced code warrior it’s a project that could be whipped up in a weekend or two. For a more modern take, perhaps you’d like to hook your C64 up over Wifi instead?

Continue reading “RetroModem For The Commodore 64”