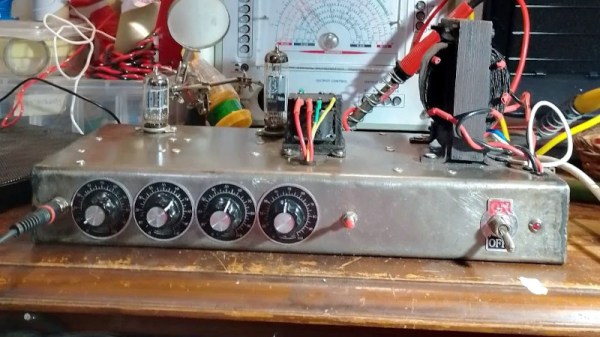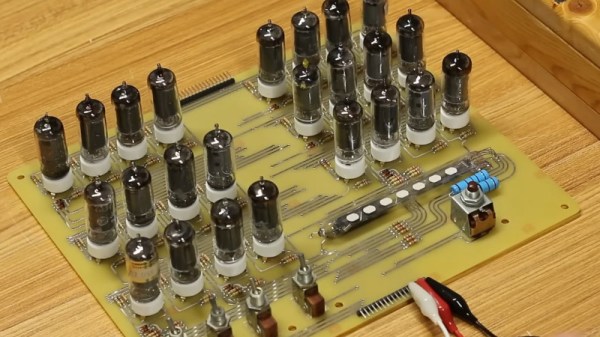
We have occasionally featured vacuum tube computers here at Hackaday and we’ve brought you many single board computers, but until now it’s probable we haven’t brought you a machine that combined both of these things. Now thanks to [Usagi Electric] we can see just such a board, in the form of his UE-0.1, a roughly 260 by 210 mm PCB with 24 6AU6 pentodes on board that implements a simple one-bit CPU.
The architecture starts with the MC14500B 1-bit microcontroller, which was the subject of a previous vacuum tube computer. People found the unusual architecture difficult to understand, so this board is an even simpler take. It doesn’t have all the features of the Motorola original but it is (just) enough to be a CPU.
The tubes are arranged in groups of four with heaters in series from a 24 V supply, while the inputs and clock come in the form of on-board suitably retro-looking switches. The final touch is a VFD of the type used in bar graphs, were used to show the state of the various bits. It’s a fully working computer in the simplest sense, and definitely worth a look in the video below the break.
It would be interesting to see whether the tube count could be reduced further, or is this a record. The number of physical devices could be cut by using tubes with more than one device in them such as double-triodes, but perhaps that would be cheating.
Meanwhile, if you think vacuum computing is all about the old stuff, perhaps you should look at the state of the art.
Continue reading “A Single Board Computer, With Vacuum Tubes”
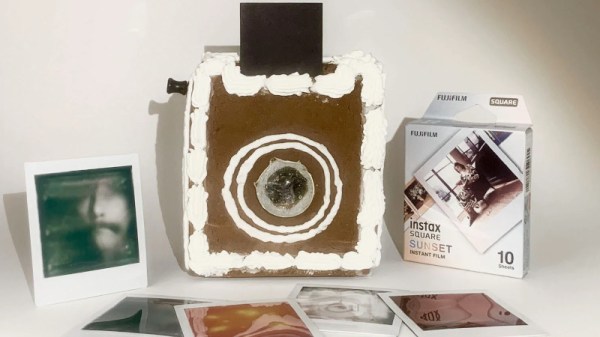
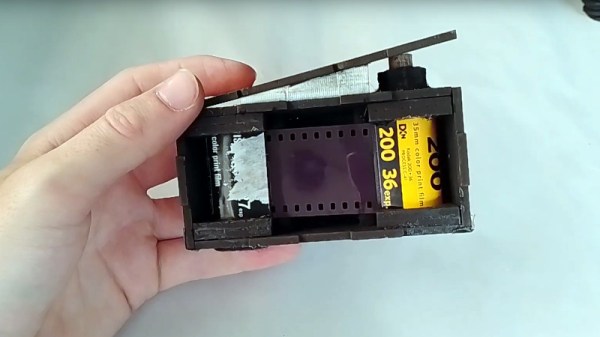
 It can be built from almost any flat light-proof 3 mm thick stock, though something that you can run through a laser cutter is probably ideal. Once snapped together to make to box-like structure, tape is added along the joins for light-proofing. The film is reeled from a full 35 mm cartridge to an empty one, and cranked back frame-by-frame by means of a wooden key that engages with the spindle.