One of the best things about 3D printers and laser cutters is their ability to produce specialized tools that steal time back from tedious processes. Seed sowing is a great example of this. Even if you only want to sow one tray with two dozen or so seeds, you still have to fill the tray with soil, level it off, compress it evenly, and poke all the holes. When seed sowing is the kernel of your bread and butter, doing all of that manually will eat up a lot of time.
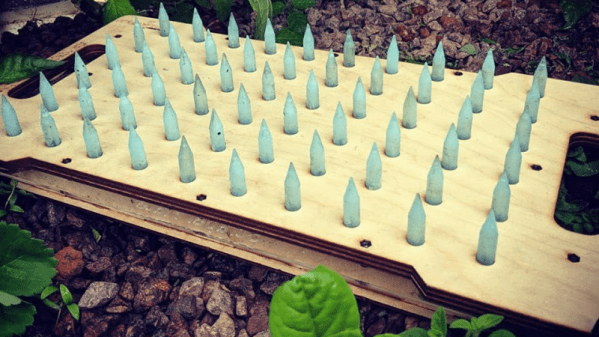
There are machines out there to do dibbling on a large scale, but [Michael Ratcliffe] has been dabbling in dibbling plates for the smaller-scale farm. He’s created an all-in-one tool that does everything but dump the soil in the tray. Once you’ve done that, you can use edge to level off the excess soil, compress it with the back side, and then flip to the bed-of-nails side to make all the holes at once. It comes apart easily, so anyone can replace broken or dulled dibblers.
[Michael] is selling these fairly cheaply, but you can find all the files and build instructions out there in the Thingiverse. We planted the demo video after the break.
More into micro-greens? 3D printing can feed that fixation, too.
Continue reading “This Dibbling Plate Will Grow Your Love For Sowing”