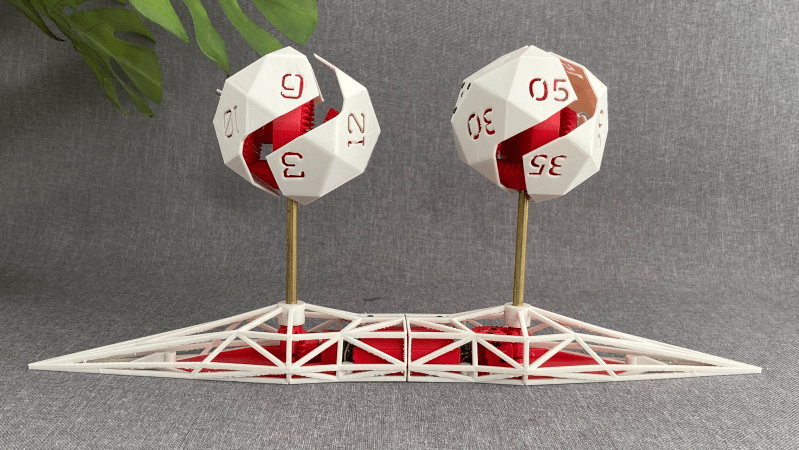
An angular, 3D-printed base holds two icosahedra with numerals on their faces. Each icosahedron has a zig-zagging path running through it, showing red gears inside.

Keeping Time On Tumbling Icosahedra

Clocks are almost the ideal devices to inspire creativity in hackers — they have a simple, well-defined task, but there’s an almost unlimited number of ways to carry it out. [ekaggrat singh kalsi]’s OVODYO is a particularly intriguing approach, tumbling a pair of icosahedral counters to display the current time.

Each 3D-printed icosahedron has numerals sunk through each of its twelve sides, and is raised above the base of the clock on a brass support shaft. An inner drive shaft runs through the center of the support shaft and drives a set of beveled gears. These spin the outer shells around two axes, periodically cycling through all twelve faces. The pattern in which an icosahedron rotates means that only set of numerals appears upright at a time, making it easier to distinguish the time.

A split path around the icosahedra both lets them rotate around the support shaft and shows off the internal gearing. On the control side, an ATmega8 drives a pair of stepper motors with drv8833 motor drivers, using a hall effect sensor to detect each indicator’s position. Since the minutes dial only gives the time in five-minute intervals, it also drives an LED strip to indicate the exact minute.

[ekaggrat] has a long history of creative clock designs, from this dynamic chain-link sculpture to a hair-tie clock or a mechanical seven-segment display.

Continue reading “Keeping Time On Tumbling Icosahedra”

Big Infinity Mirror Clock Invites You To Gaze Deeply

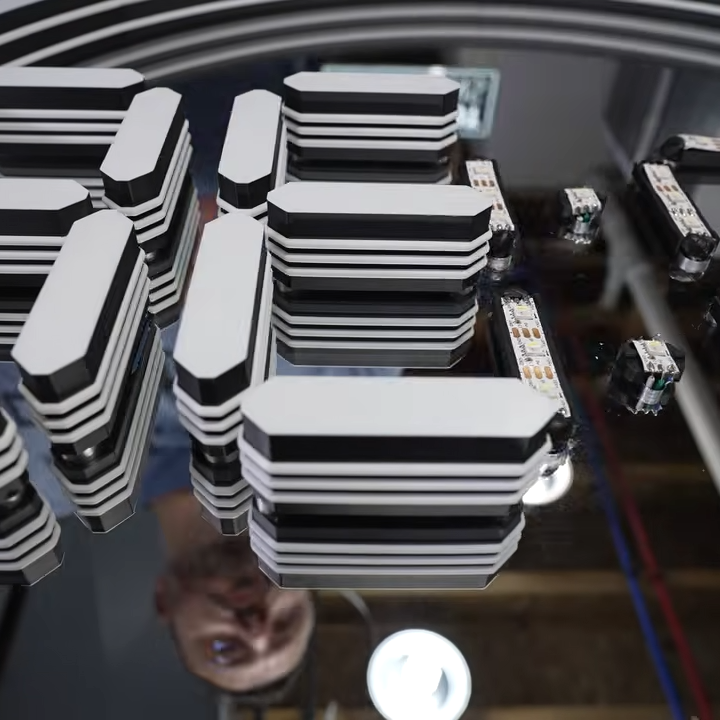
[Andy Huot] has a fantastic-looking infinity mirror digital clock that really raises the bar. It uses high quality components, smart use of RGB LED animations, and a clever “stacked diffuser” vertical design to the 7-segment display elements that really enhances the infinity mirror effect. It needs to be seen in action, so check it out.

The end result is expressly portal-like, with the smooth animations of the LEDs really playing into the effect. The size helps, too. It’s 24 inches in diameter, giving it considerable presence.

The stacked diffuser design for each display element really enhances the effect.

A basic infinity mirror design consists of lit elements sandwiched between a reflective back surface and a partially-reflective, partially-transmissive top cover. That same basic principle is used here, but with great care given to ensure nothing so much as a fingerprint spoils the illusion. For example, the top cover is a disk of acrylic with a 90% reflective film affixed to the inside surface. That’s easy enough to DIY with some car tint, but [Andy] found that for the very best results it was worth having high-quality film professionally applied.

We like the use of 3D-printed custom jigs for soldering the segments of RGB LED strips, and holding the pre-measured wires in place with some putty is a great way to keep them in place while working. In case you’re wondering, the mirrored acrylic making up the back wall has holes in it for mounting each segment’s LED strip in a holder, and running the wires to the rear.

The video (embedded below) documents every step of the assembly, and it’s a serious build. While the design files for the 3D-printed parts are not free, there’s certainly enough detail for an enterprising hacker to replicate the design in their own way.

Continue reading “Big Infinity Mirror Clock Invites You To Gaze Deeply”

ESP32-P4 Powers Video Alarm Clock

Once upon a time, you had the option of waking up to a bell, a harsh buzzer, or whatever happened to be on the radio that morning. Now that it’s the 21st century, we’ve gotten used to being able to set our alarms to whatever sound or song we want, but what if you don’t just want to wake up to sound? Enter [Impossible_Agent1436] a.k.a. [brunokeymolen]’s Video Alarm Clock that will wake you up to whatever clip you want, as long as it fits on the 720 pixel square display.

That display is a pre-built Waveshare module powered by an ESP32-P4, which looks like a handy bit of kit aside from being out of stock at the moment. The dev board makes this almost entirely a software project– the only hardware [bruno] had to come up with was the 3D-printed stand to hold it on his bedside. That’s not a slight to [bruno]; it was a good choice in the spirit of “work smarter, not harder”. Sometimes you want to reinvent the wheel, and sometimes you just want an alarm clock.

The module’s RTC means it keeps good time, and the built-in SD card reader means you can load up a whole library of clips to wake up to. The only caveat is that those files have to be AVI containers holding 720×720 MJPEG video with PCM stereo audio at 44.1 kHz, and you’re limited to old FAT filename rules: eight characters, and none of them special.

This is an easier project and a better idea than the exploding capacitor alarm clock, but there’s no arguing which would get us out of bed faster. If you miss the old days of clock radios, you can always bring them back with the right microcontroller.

Story via reddit.


Smart Clock Helps With Medication Management

There are all kinds of smart devices on the market these days, but if you want one to solve a particular personal problem, sometimes it’s easiest to just build your own. That’s precisely what [hvermaak.projects] did when it came to the Ouma Ria Smart Clock.

The clock was primarily intended to act as a useful tool for providing medication reminders, before some extra useful home functionality was folded in. The heart of the build is an ESP32-WROOM-32 hooked up to four 8×8 WS2812B addressable LED panels acting as a display. A further 30 WS2812Bs in a strip act as a status indicator. A DS3231 real-time-clock module ensures the clock keeps accurate time, while a BH1750 ambient light sensor makes sure the clock is responsive to current lighting conditions. There’s also a DFPlayer Mini audio module for spoken announcements and chimes, while there are inputs for AM312 passive infrared motion sensors that allow the clock to act as a rudimentary security monitor. There’s even a web interface for control and scheduling.

The device ultimately evolved into something that helped with daily live, handling everything from medication management to remembering birthdays, and even helping out with kitchen timing tasks.  We’ve featured some other innovative builds in this space in recent years, too, like this explosively loud alarm clock.

This DIY Time Server Is More Accurate Than You Need

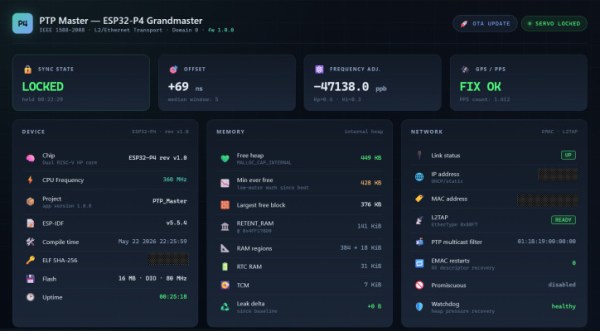
You almost certainly don’t have an application for the sort of accurate timekeeping that’s made possible by this enhanced version of [Cristiano Monteiro]’s satellite-backed time server. By his own admission, the vast majority of users will be more than happy to have their system’s time synchronized by the traditional Network Time Protocol (NTP). But if you’re really chasing those last few microseconds, that’s where the Precision Time Protocol (PTP) comes in.

With NTP, you can get within 10 milliseconds or so of your upstream time source — but PTP is accurate down to nanoseconds. Unless you’re performing some kind of scientific research, running a robotic assembly line, or perhaps doing high-speed financial trading, there’s no reason for this level of accuracy. In fact, PTP is such a niche technology that until the release of the ESP32-P4, [Cristiano] couldn’t even find an affordable enough chip that supported it.

Hardware-level support for PTP is important as there’s no way to achieve this level of accuracy with software alone, the capability needs to be baked into the Ethernet controller. As you might expect, it takes a highly accurate time source to make the most of PTP, and that’s where the navigation-grade Global Navigation Satellite System (GNSS) receiver comes in. All told the cost of the build is unsurprisingly higher than that of its predecessor, but [Cristiano] says it’s still a couple zeros shy of what a commercial offering would run.

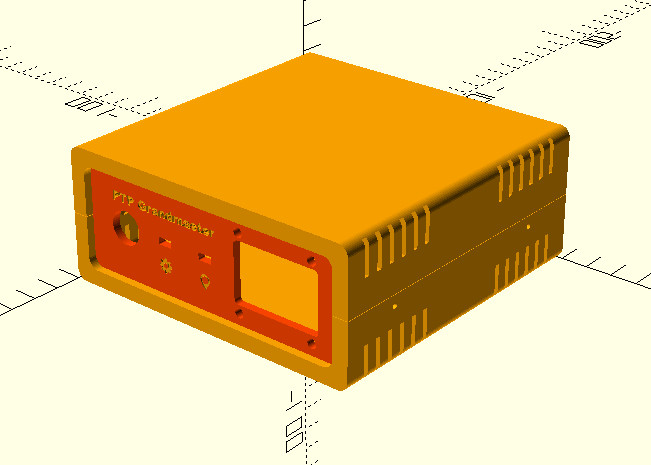
As with his original time server from 2021, [Cristiano] made sure this build was as friendly as possible for hackers and makers. We especially like the 3D printed case designed in OpenSCAD, and his insistence that the gadget have a front panel with blinking status LEDs. Again, the vast majority of us don’t need our clocks to be accurate down to the nanosecond…but it’s nice to know we have the option.

Time Never Moves Slowly With This Clock

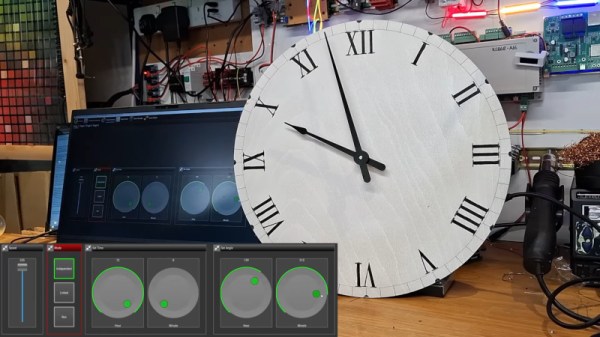
A clock is by its very nature a device for measuring time, and thus it moves forward at a constant rate. But how about in a theatrical setting, where time runs at the whim of the director? For the stage, a clock with more flexibility is required. To this endeavor [Playful Technology] has you covered, with a larger than life stage clock whose hands are independently controllable by DMX.

Behind the clock is a very unusual part, not the modified clock mechanism one might expect, but a dual stepper motor with a concentric shaft. This is driven by an Arduino with a stepper driver shield more familiar from the world of 3D printers, and an RS485 interface for DMX interfacing. The hands are built in OpenSCAD, and 3D printed to be an interference fit on the shafts. The DMX controller software has a handy rotating knob style interface, allowing easy hand manipulation.

You can see the results in the video below, complete with an exhaustive dissection of the Arduino code. Meanwhile DMX is itself a fascinating subject, and in the past we’ve taken a deep dive into RS485.

Continue reading “Time Never Moves Slowly With This Clock”

VFD Clock Runs On A Single AA

There are lots of different ways to build a clock. [Sciter_] came into the possession of some old calculator parts, and decided to reuse them for just such a project.

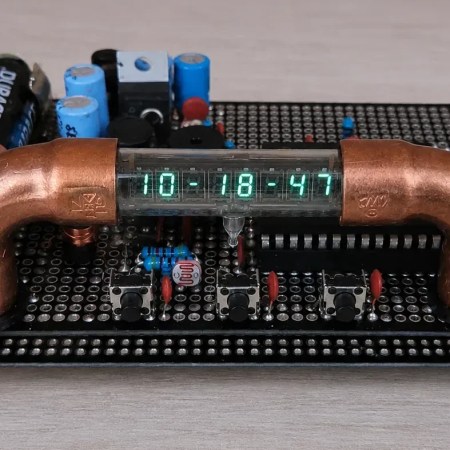
The heart of the build is an ATmega328P microcontroller, running off of a 32.768 kHz crystal. This allows the chip’s counters to neatly divide down the frequency to get a steady 1 Hz pulse for accurate timekeeping. Time is displayed on a vacuum fluorescent display (VFD) harvested from an old calculator. These displays need rather high voltages to run, which in this case are produced by a HV5812 driver chip and supporting circuitry. The display itself is neatly cradled in a pair of copper pipe elbows for a stylish look, with some addressable RGB LEDs present to provide some charming underglow.

Power for the device comes from a single AA battery, using a transformer-based low voltage converter. Alternatively, it can run off a USB 5 V power supply, which also charges the NiMH AA cell while available with the aid of an LM2576-ADJ buck converter.

Overall, it’s a neat homebrew clock that taught [Sciter_] plenty during its construction, and not the first time we’ve seen somebody put together a clock with second-hand VFDs. If you’re finding fun ways to reuse old display tech, don’t hesitate to let us know on the tipsline.