Circuit-less PCB Featured As Faceplate For A Digital Clock

If there’s no circuitry on a printed circuit board, does it cease being a “PCB” and perhaps instead become just a “PB”?

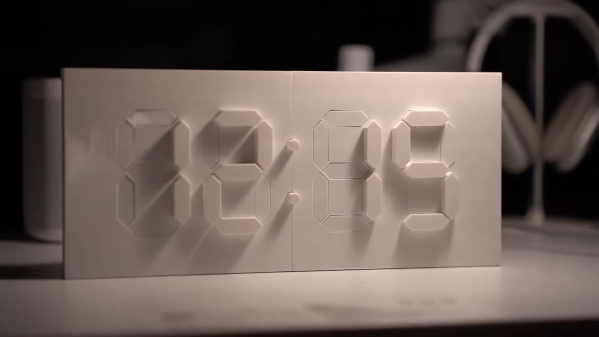
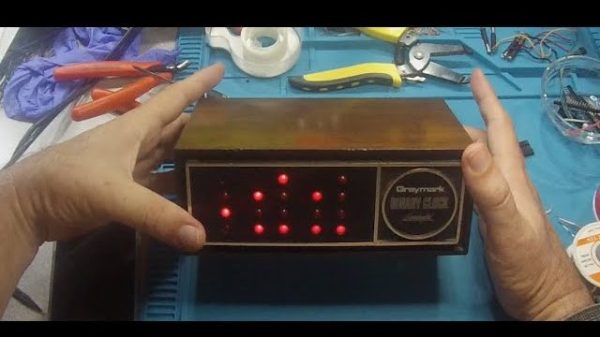
Call them what you will, the fact that PCBs have become so cheap and easy to design and fabricate lends them to more creative uses than just acting as the wiring for a project. In this case, [Jeremy Cook] put one to work as the faceplate for his “742 Clock,” a name that plays on the fact that his seven-segment display is 42 mm tall, plus it’s “24/7” backward.

In addition to the actual circuit board that holds the Wemos ESP32 module and the LEDs, a circuit-less board was designed with gaps in the solder mask to act as light pipes. Sandwiched between the boards is a 3D printed mask, to control the light and direct it only through the light pipes. [Jeremy] went through a couple of iterations of diffuser and mask designs, finally coming up with a combination that works well and looks good. He mentions a possible redesign of the faceplate board to include a copper backplane for better opacity, which we think is a good idea. We’d also like to see how different substrates work; would boards of different thickness or using FR-4 with different glass transition temperatures work better? Check out the video below and see what you think.

We’re seeing more and more PCBs turn up as structural elements, from enclosures to control panels and even tools, and we approve of this trend. But what we really approve of is what [Jeremy] did here by making this clock just a dumb display that gets network time over NTP. Would that all three digital clocks in our kitchen did the same thing — maybe then they wouldn’t each be an infuriating minute out of sync with the others.

Continue reading “Circuit-less PCB Featured As Faceplate For A Digital Clock”

2022 Hackaday Prize: Talking Clock Built With Old-School Gear

Any smartphone or laptop could be a talking clock if you wished it so. However, we think this build from [Marek Więcek] is more fun, which uses discrete vintage chips to get the job done the old fashioned way.

The work started when [Marek] was tinkering with a 65C02 CPU, giving it an EPROM, some RAM, and some logic ICs to create something akin to a modern microcontroller in functionality. It came to be known as the 6502 Retro Controller Board. Slowly, the project was expanded with various additional modules, in much the same way one might add shields to an Arduino.

In this case, [Marek] expanded the 6502-powered board with a series of 7-segment displays, along with an RTC to keep accurate time. A classic SP0256-AL2 speech synthesis chip was then added, allowing the system to not only show the time, but read it aloud, too. As a bonus, not only can it tell you the hour, minute, day, and date, but it will also read various science-fiction quotes on demand.

Like most 80s speech synths, the output is robotic and a little difficult to parse. However, that’s part of the charm that makes it different compared to the speaking virtual assistants of today.

Continue reading “2022 Hackaday Prize: Talking Clock Built With Old-School Gear”

Should’ve Used A 555 — Or 276 Of Them

When asked to whip up a simple egg timer, most of us could probably come up with a quick design based on the ubiquitous 555 timer. Add a couple of passives around the little eight-pin DIP, put an LED on it to show when time runs out, and maybe even add a pot for variable timing intervals if we’re feeling fancy. Heck, many of us could do it from memory.

So why exactly did [Jesse Farrell] manage to do essentially the same thing using a whopping 276 555s? Easy — because why not? Originally started as an entry in the latest iteration of our 555 Contest, [Jesse]’s goal was simple — build a functional timer with a digital display using nothing but 555s and the necessary passives. He ended up needing a few transistors and diodes to pull it off, but that’s a minor concession when you consider how many chips he replaced with 555s, including counters, decoders, multiplexers, and display drivers. All these chips were built up from basic logic gates, a latch, and a flip-flop, all made from one or more 555s, or variants like the 556 or 558.

As one can imagine, 276 chips take a lot of real estate, and it took eleven PCBs to complete the timer. A main board acts as the timer’s control panel as well as serving as a motherboard for ten other cards, each devoted to a different block of functions. It’s all neat and tidy, and very well-executed, which is in keeping with the excellent documentation [Jesse] produced. The whole thing is wonderfully, needlessly complex, and we couldn’t be more tickled to feature it.

Continue reading “Should’ve Used A 555 — Or 276 Of Them”

What’s The Time? It’s Casino’clock!

As the saying goes, nothing can be said to be certain, except death, taxes, and the never-ending inventiveness of clock hacks. No matter how tried and proven a concept is, someone will always find a new twist for it. Case in point: notorious clock builder [Shinsaku Hiura] took the good old split-flap display approach, and mixed things up by using a deck of playing cards to actually represent the time.

Technically, the clock works just like a regular flip clock, except that only the upper half of the split-flap is used to display the digits, while the lower half is showing the cards’ backsides. Other than that, the mechanics are the same: a set of hinges holding the cards are arranged on a rotor that’s moved by a stepper motor until the correct digit is shown (STLs available on Thingiverse). Aces low, Jokers are zeroes, and the queen strikes at noon.

At the center of it is an ESP32 that controls each digit’s motor driver, and retrieves the time via WiFi, keeping the general component count conveniently low. Of course, one option is to arrange the cards in their order to keep rotations at a minimum, but let’s be real, the flapping sound is half the fun here. So instead, [Shinsaku Hiura] arranged the cards randomly and mapped it in the code accordingly. You can see it all in action, along with some additional design information, in the video after the break.

For some more of his clock creations, check out this different flip clock approach and the Hollow Clock. But if the future is of more interest to you than the present, here’s a matching Tarot deck.

Continue reading “What’s The Time? It’s Casino’clock!”

DIY Retrograde Clock Is 3D Printed

Retrograde clocks are unique, in that they eschew the normal fully-circular movement for the hands. Instead, the hands merely sweep out a segment of a circular arc, before jumping back to their start position to begin again. They’re pretty rare to find, but [Jamie Matthews] decided he had to have one. Thusly, he elected to build his own!

For his build, [Jamie] started with a regular off-the-shelf clock movement you might find in any hobbyist clock build. From there, he affixed his own witches’ brew of racks and gears to the output in order to create the desired semi-circular mechanism. The arcane mechanism enables the clock to tell time over roughly a 180-degree arc.

It’s relatively simple to make one of your own, too. The parts are all readily 3D printable, with [Jamie] reporting it took less than 8 meters of filament to produce the geartrain for his build. You can even print the clock face if you don’t want to CNC cut it out of acrylic.

Overall, it’s a fun look at an often-forgotten part of our horological history. Desktop 3D printing really does enable the creation of some exciting, different clock designs. Video after the break.

Continue reading “DIY Retrograde Clock Is 3D Printed”

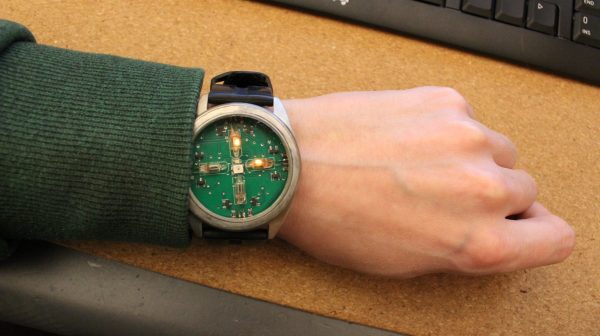
Simple Binary Watch Uses A PCB Body

There are many ways to tell the time, from using analog dials to 7-segment displays. Hackers tend to enjoy binary watches, if only for their association with the digital machines that seem to make the world turn these days. [Vishal Soni] decided to build one of their own.

It’s a straightforward design, that uses six bits to show the time. A red light is illuminated at the top of the watch to indicate the watch is showing minutes, and these are displayed in binary on the six blue LEDs below. Then, the watch indicates it is showing hours, and again uses the six blue LEDs to show the relevant number. Continue reading “Simple Binary Watch Uses A PCB Body”

The Casio Smartwatch You Never Had

In a way, you have to feel a bit sorry for the engineers at Casio. They can produce the most advanced digital watches ever to grace the wrist, but their work will forever be associated with one of their more lowly creations. The Casio F91 is the archetypal digital watch — it’s affordable, it’s been in production since the Ark, it does the job so well that it’s become a design classic, and it remains a very tough act to follow.

If it has a flaw though, it’s that the functions of a watch from 1989 are very basic. Wouldn’t it be nice if a Casio F91 could be a modern smartwatch! Well thanks to [Pegor] it can, with a complete re-engineering of the classic watch’s internals. Now the simple classic timepiece is fully up-to-date!

All the Casio internals are removed, and a new movement holder supports a fresh PCB with an OLED display mounted via a flexible sub-PCB. The brains comes courtesy of a Texas Instruments CC2640 BLE microcontroller. This gives it a 15-day battery life, which is nothing like what the original watch would have but compares favorably to smartwatches. He admits that the software needs some work, but with hardware this well-executed we hope that others can contribute some improvements.

This is probably the most impressive F91 hack we’ve seen, but it’s by no means the first revamped Casio we’ve shown you.