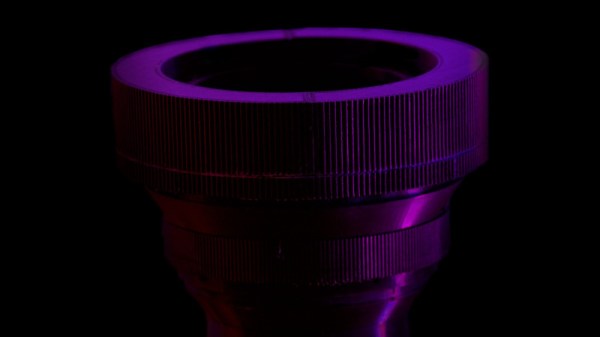
Soviet Super 8 Camera Hides Raspberry Pi Zero

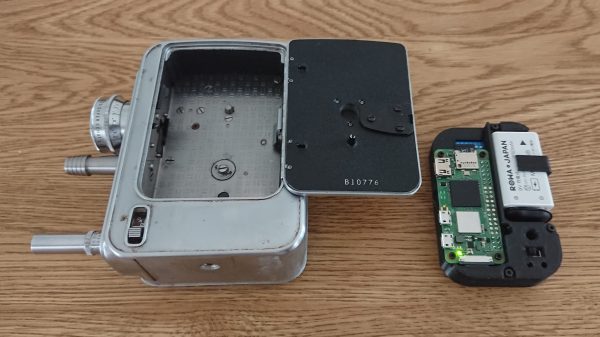
A few years ago [Xabier Zubizarreta] got it into his head that he wanted to put a modern digital image sensor into a classic Super 8 camera, but he didn’t want to ruin a gorgeous piece of vintage hardware in the process. After a bit of research, he discovered an export version of the Avrora camera made for the 1980 Summer Olympic Games in Moscow that could be had for cheap. Figuring nobody would miss a camera built with the utilitarian aesthetics you’d expect of a Soviet-era piece of consumer tech, he set off to cram a Raspberry Pi into its film compartment.

On the Hackaday.io page for this project, [Xabier] explains a bit about the optical properties that make this project challenging. Specifically, the miniature sensor used by the official Raspberry Pi camera module is far smaller than the 8 mm film the camera was designed for. So when the sensor placed at the appropriate focal length for the original film, the image will be cropped considerably. As you can see in the video below, this gives the impression of everything being filmed with a fairly tight zoom.

To perform this modification, [Xabier] first had to liberate the sensor of the Pi Camera from the original optics, and then carefully install it in proper position on the Avrora. To make sure he had it aligned, he watched a live feed from the camera while the epoxy holding the sensor down was curing. This allowed him to make slight adjustments before everything was solidified. With the sensor in place, he only had to stuff the Pi Zero and battery pack into the film compartment, and wire the original camera trigger to the GPIO pins so he could read it in software.

Considering the incredible amount of effort some photographers have put in to adapt their vintage cameras to digital, it’s refreshing to see such a straightforward approach. The resulting video might not be up to modern standards, but with projects like this, that’s sort of the point.

Continue reading “Soviet Super 8 Camera Hides Raspberry Pi Zero”

An Anamorphic Lens Adapter For Very Pretty Video

Anamorphic lenses are a great way to shoot in widescreen, but they’re prohibitively expensive on digital formats. Enthusiasts have experimented with using anamorphic adapter lenses from old projectors, but focusing can be a chore and results sub-par. [Andrew] found a way to use these cheap old anamorphic adaptors on a modern camera without sacrificing too much functionality.

Pretty, no?

Anamorphic filming techniques came about in the era of film. The aim was to record cinema-style widescreen footage on 3:2 aspect ratio 35 mm film. The way this was done was by using a lens that squeezes a wide aspect ratio to fit the format, and then a corresponding lens to squeeze it back on the projector. This allows for higher resolution than simply letterboxing onto the 35 mm frame and wasting the extra space.

Adam’s hack involves 3D printing a lens housing that pairs an anamorphic projector adapter lens with a Sony E-mount taking lens. Gears are set up so that both lenses can be focused together, rather than typical adapter setups that require the user to juggle multiple focus rings at once. This makes the rig much more usable in real shoots where there’s no time for messing about.

It’s a useful hack, and one we could imagine quite a few low-budget filmmakers will be rushing out to replicate. Files are on Thingiverse for the eager. Consider whipping yourself up a camera slider while you’re at it for really boss shots. Video after the break.

Continue reading “An Anamorphic Lens Adapter For Very Pretty Video”

A Hot-Swappable Battery Grip Keeps The Camera Rolling

There’s nothing worse than being in the middle of an important shot, only to have the camera’s batteries die on you. The losses can be very real, so it’s best to avoid them entirely. In an effort to do so, [funkster] built himself a battery grip for his Canon EOS M.

The hack is based around the venerable 18650 battery, packing 3.6V of lithium-ion goodness into a compact metal can. [funkster]’s build has slots for two of these cells, powering the camera off of one and keeping the other in reserve. The cells are monitored by a STM32 microcontroller, which switches from one battery to another as they run out or are removed. This allows batteries to be swapped while the camera is on – a highly useful feature. There’s even an OLED display to keep an eye on the state of charge of each cell.

The manner in which power is connected to the camera is rather amusing. An original Canon battery that slides inside the camera was gutted and turned into a simple adapter for the battery port. The battery grip, which wraps around the camera body, connects to this via pin headers that pass through a hole drilled in the camera’s case. It’s a permanent mod, but one [funkster] is happy with for the added usability – especially as doing it this way still provides easy access to the SD card slot.

Keeping a camera juiced on the go can be a headache without the right gear. [funkster] demonstrates that if you can’t buy it, you can always build it yourself. If your problem isn’t battery power, but your camera is overheating, you can of course fix that too. Video after the break.

Continue reading “A Hot-Swappable Battery Grip Keeps The Camera Rolling”

Large Format Lego Camera Is A Bit Near-Sighted

Photography doesn’t have to be expensive, something that’s especially true in the realm of film photography, where the imperfections of the medium can be half the appeal. There are many DIY plans and kits available for analog cameras, but [bhiga143] had couple spare components and a pile of small, colorful bricks lying around, so he decided to build a functional 4×5″ film camera out of Lego.

Details are light for this build, but with a little knowledge about camera structure we can guess at what’s going on inside. Simplicity makes for robust design, and what we have here is in effect a box with a lens on one side and photographic film on the other. The center section of the front, which actually supports the lens, is capable of sliding in and out to adjust focus. On the far side (not pictured) is a slot just wide enough to insert a standard film holder.

The camera really is a hack. [bhiga143] stayed true to the “Lego” part of Lego camera, so there is no glue, no black paper lining, and no frills. The tripod is whatever stack of books lay underneath it. The lens is, quote, “barely functional”. There are light leaks galore, and it can’t focus beyond about 3 feet (1 meter). But every one of those points just makes us love it more. Every nugget of imperfection is a few words added to the story each picture tells. And we honestly can’t wait to see more pictures.

Other Lego cameras we’ve seen have been smaller and less colorful, but using a simple pinhole lens can reduce the overall cost. Of course, you’re not limited to Lego if you want to build your own pinhole camera. Although, the ubiquitous plastic bricks can also be useful in later stages of the film photography process.

An AI-Free Way To Catch Wildlife On Camera

Judging by the over-representation of the term “AI” in our news feeds these days, we’re clearly in the exponential phase of the artificial intelligence hype cycle, and very nearly at the dreaded “Peak of Inflated Expectations.” It seems like there’s nothing that AI can’t do, and nowhere that its principles can’t be applied to virtuous — and profitable — effect.

We don’t deny that AI has massive potential, but we strongly suspect that there will soon come a day when eyes will roll and stomachs will turn at yet another AI application that could have been addressed with something easier. An example of the simpler approach can be seen in this non-AI wildlife photo trap, cobbled together by [Sebastian] to capture pictures of some camera-shy squirrels. Rather than train an AI with gigabytes of squirrel images, he instead relies on his old Sony Alpha camera, which has a built-in WiFi. A Python script connects to the camera, which is trained on a feeder box and set to a very narrow depth of field. That makes a good percentage of the scene out of focus until a squirrel or other animal comes along looking for treats. The script detects the increased area of the scene that is now in-focus with a Laplace operator in OpenCV, and triggers the camera shutter. [Sebastian] ended up with some wonderful shots of the shy squirrels using this scheme; the video below describes the setup in more detail.

It’s not the first time we’ve seen Laplace transforms used to gauge image sharpness, of course, but we really like the approach [Sebastian] took here for its simplicity. The squirrels are cute too.

Continue reading “An AI-Free Way To Catch Wildlife On Camera”

Image Sensors Demystified By [IMSAI Guy]

The February 1975 issue of Popular Electronics had what was — at the time — an amazing project. The Cyclops, a digital camera with a 32 by 32 pixel resolution with 4 bits per pixel. It was hard to imagine then that we would now all carry around high-resolution color cameras that were also phones, network terminals, and so many other things. But how much do you know about how those cameras really work? If you want to know more, check out [IMSAI Guy’s] recent video on how image sensors work.

The video doesn’t cover any practical projects or circuits, but it has a good explanation of what goes on in modern digital cameras. If you don’t know what digital cameras have in common with an octopus, you might want to watch.

If you want to see what the state of the art in 1975 was, have a look at this post. The image sensor in that camera didn’t have much in common with the ones we use today, but you have to admit it is clever. Of course, 1975 was also the year Kodak developed a digital camera and failed to understand what to do with it. Like the Cyclops, it had little in common with our modern smartphone cameras, but you have to start somewhere.

New Part Day: Onion Tau LiDAR Camera

The Onion Tau LiDAR Camera is a small, time-of-flight (ToF) based depth-sensing camera that looks and works a little like a USB webcam, but with  a really big difference: frames from the Tau include 160 x 60 “pixels” of depth information as well as greyscale. This data is easily accessed via a Python API, and example scripts make it easy to get up and running quickly. The goal is to be an affordable and easy to use option for projects that could benefit from depth sensing.

When the Tau was announced on Crowd Supply, I immediately placed a pre-order for about $180. Since then, the folks at Onion were kind enough to send me a pre-production unit, and I’ve been playing around with the device to get an idea of how it acts, and to build an idea of what kind of projects it would be a good fit for. Here is what I’ve learned so far.

Continue reading “New Part Day: Onion Tau LiDAR Camera”