Why Are Digital Cameras Still Boring?

In the matter of technological advancement, we are as a species, mostly insatiable. The latest toy, the fastest silicon, the largest storage, the list goes on. Take digital cameras as an example, what was your first one? Mine was a Casio QV200 in about 1997, I still have it somewhere though I can’t immediately lay my hands on it, and it could hold a what was for its time a whopping 64 VGA-resolution pictures in its 4Mb of onboard memory.

The QV200 showing off its VGA capabilities. It's March 1998, and this is a brand-new PlayStation that I'm about to install a mod chip inside.
The QV200 showing off its VGA photography capabilities. It’s March 1998, and this is a brand-new PlayStation that I’m about to install a mod chip inside.

It’s a shock to realise that nearly a quarter century has passed since then, and its fixed-focus 640×480 camera module with a UV-sensitive CMOS sensor that gave everything a slight blue tint would not even grace the cheapest of feature phones in 2020. Every aspect of a digital camera has improved beyond measure since the first models in the 1980s and early 1990s that started to resemble what we’d know today as a standalone digital camera, they have near-limitless storage, excellent lenses, huge and faithfully-reproducing sensors, and broadcast-quality video capability.

But how playful have camera manufacturers been with the form factor? We see reporters in sci-fi movies toting cameras that look nothing like their film-based ancestors. What do our real-life digital cameras have on offer as far as creative body design goes?

Continue reading “Why Are Digital Cameras Still Boring?”

Scanning Analog Film For The Last Time

Film cameras are capable of great resolution, and for a long time were superior in this regard to their digital successors. However, it’s now possible to store digital copies of analog images in superior detail, so [Jan] built a rig to scan their photos for the last time.

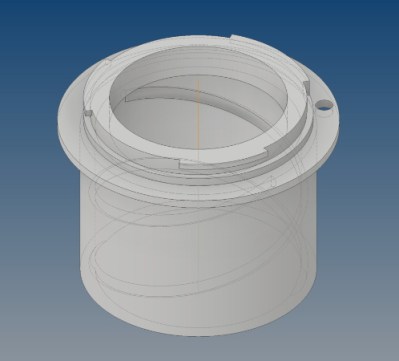
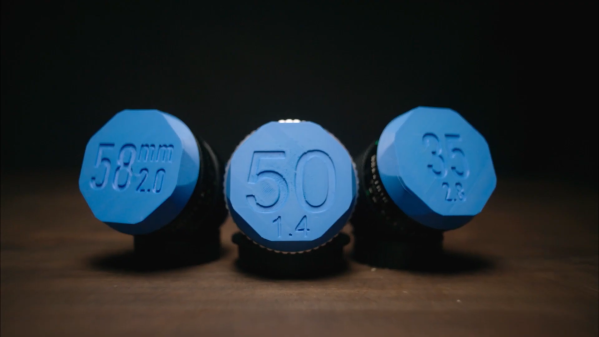
The general idea is to take a high enough resolution scan of film negatives or slides, such that there is no need to rescan the images when technology moves forward. To achieve this, [Jan] decided to employ a DSLR to photograph the materials in question. To do this quickly and accurately, with minimal fuss, special lens hoods were 3D printed to hold slides in perfect register in front of the lens. With a flash to provide even light, the results are excellent. Film negatives proved harder, requiring a carefully designed transport mechanism to avoid damaging the fragile materials. With some perseverance, the final tool worked well.

It’s a tidy way of digitally archiving analog photos, and with the resolution of modern cameras, one needn’t worry about lost resolution. We’ve seen mechanised builds for handling other formats too, such as this 8mm scanner. Video after the break.

Continue reading “Scanning Analog Film For The Last Time”

Giant Bearing Is At The Heart Of A Camera Mount

We bet you have all some cool part in your bin that is just gnawing at you to build something cool. That doodad, possibly from a garage sale, surplus store, or clearance rack deserves a project fitting of its near-infinite potential. [isaac879] finally marries a giant ball bearing with his passion for photography in the form of a pan-tilt camera mount for his Canon DSLR. The problem with tossing your golden-ticket part into a project is that not everyone has a MacGuffin, or a brand new one might be bank-breakingly expensive, so he does us a favor and makes a drop-in replacement that you can print and fill with 6mm brass bbs. This sort of thing is why we love hackers.

The camera mount has the features we expect to see in a robust stepper mount, such as infinite spinning, time delay, and an Xbox controller interface. Inside the base is the industrial bearing or its plastic replica, and that wide base won’t be tipping over anytime soon. Gearing all around is of the herringbone style, of the type you find in classroom pencil sharpeners because they transfer power smoothly. Speaking of things going smoothly, we enjoyed his assembly montage where every part fits together perfectly and there is not a naughty word to be uttered. Just like real life.

If you like homemade bearings, check out this slew bearing that looks like it was made with Perler beads, and we have a self-aligning camera tripod mount for the photography buffs.

Continue reading “Giant Bearing Is At The Heart Of A Camera Mount”

External Battery Mod For Action Camera Does It Non-destructively

[Facelesstech] owns an SJCAM SJ4000 action camera, but the internal battery was no longer functional. Not wishing to buy a replacement and unwilling to hook up an ungainly USB cable to feed power, the solution was to design and 3D print an adapter to power the camera from a single rechargeable 14500 sized battery (which is the same size as an AA cell, and a good match for the width of the camera.)

The adapter works by mimicking the original battery, so the camera never knows the difference. A 3D-printed holder for the 14500 battery (which doubles as a GoPro compatible mount) has an extension the same size and shape of the camera’s original internal battery. The tricky part was interfacing to the power connectors buried inside the camera’s battery bay. For a solution, [Facelesstech] eventually settled on the small connectors harvested from inside a female header, using them to connect to the small blades inside the camera. We broke open a spare female 0.1″ header, shown here, to make it clear where these little pieces come from. The only other battery hardware needed are the contacts for an AA cell, but those are also easy to harvest and reuse.

The GitHub repository for the project includes STL files as well as the FreeCAD files for the parts. A video overview is embedded below.

Continue reading “External Battery Mod For Action Camera Does It Non-destructively”

Building A Custom Camera Mic

Most consumer-grade cameras these days come with adequate microphones built in. However, as with all hardware made down to a price point, there’s room for improvement. [M. Ploegmakers] decided to whip up a better microphone setup for his Sony A6300, with the Dumbbell Mic as the result.

The microphone is based around an electret condensor element, which provides good performance at a remarkably low price. This is then integrated with a preamp circuit to bring the audio up to the appropriate level for the camera to record along with the video. Switches on board set the gain level, as well as changing the mic to operate with or without phantom power, where available.  The electronics is wrapped up in a 3D-printed enclosure, designed to mount on top of the camera for use out in the field.

It took some experimentation, but now [M. Ploegmakers] has a custom mic rig that records straight into the camera, avoiding the need to splice audio and video back together in post. If your camera lacks an audio input, you might have to do a little more work to hack one in, though!

Poking Around Inside Of A Linux Security Camera

This deep dive into the Linux-powered Reolink B800 IP camera started because of a broken promise from its manufacturer. When [George Hilliard] purchased a kit that included six of the cameras and a video recorder, the website said they were capable of outputting standard RTSP video. But once he took delivery of the goods, and naturally after his return window had closed, the site was updated to say that the cameras can only function with the included recorder.

Taking that as something of challenge, [George] got to work. His first big break came when he desoldered the camera’s SPI flash chip and replaced it with a socket. That allowed him to easily take the chip out of the device for reading and flashing as he tinkered with modifying the firmware. After adding cross-compiled versions of busybox, gdb, and strace to the extracted firmware, he bundled it back up and flashed it back to the hardware.

If you think that’s the end of the story, it isn’t. In fact, it’s just the beginning. While getting root-level access to the camera’s OS would have potentially allowed for [George] to dump all the proprietary software it was running and replace it with open alternatives, he decided to take a different approach.

Instead of replacing the camera’s original software, he used his newly granted root powers to analyze it and figure out how it worked. This allowed for to sniff out some very suspect “encryption” routines built into the software, and eventually write his own server side in Rust that finally allowed him to use the cameras with his own server…albeit with a bit more work than he bargained for.

Projects like these are a fantastic look at real world reverse engineering, and a reminder that sometimes achieving your ultimate goal means taking the long way around. Even if you’re not in the market for a hacked security camera, there’s no doubt that reading the thorough write-up [George] has prepared will teach you a few things. But of course, we’d expect no less from a guy who runs Linux on his business card.

ESP32 Trail Camera Goes The Distance On AA Batteries

There’s no shortage of things to like about the ESP8266 and ESP32, but if we had to make a list of the best features these WiFi-enabled microcontrollers have to offer, their power management capabilities would certainly be near the top. Which is how we assumed [Mark] was able to take a whopping 23,475 pictures on his ESP32 camera while powered by nothing more exotic than four AA batteries from the grocery store.

But as it turns out, the full story is quite a bit more interesting. As far as we can tell, [Mark] isn’t bothering with the ESP32’s sleep modes all. In fact, it looks like you could pull this trick off with whatever chip you wanted, which certainly makes it worth mentally filing away for the future; even if it depends on a fairly specific use case.

In the most simplistic of terms, [Mark] is cutting power to the ESP32 completely when it’s not actively taking pictures. The clever circuit he’s come up with only turns on the microcontroller when a PIR sensor detects something moving around in front of the camera. Once the chip is powered up and running code, it brings one of its GPIO pins high which in turn triggers a 4N37 optoisolator connected to the gate on the circuit’s MOSFET. As long as the pin remains high, the circuit won’t cut power to the ESP32. This gives the chip time to take the requested number of pictures and get everything in order before bringing the pin low and allowing the circuit to pull the plug.

If you’re looking to maximize runtime without wrangling any MOSFETs, we’ve seen some excellent examples of how the low power modes on the ESP8266 and ESP32 can be put to impressive use.

[Thanks to Jason for the tip.]