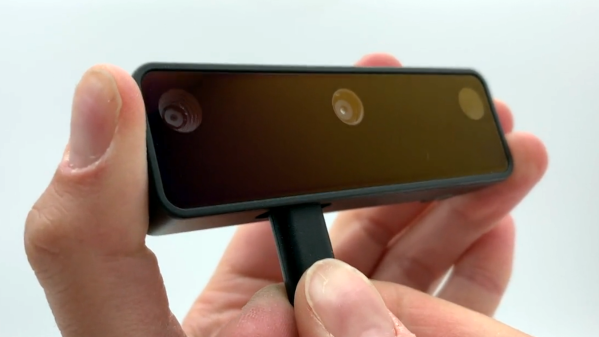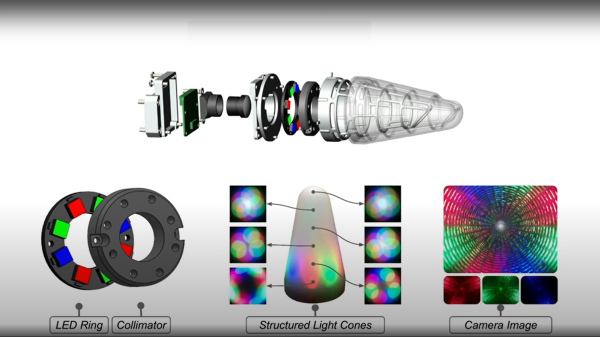
A team from the Max Planck Institute for Intelligent Systems in Germany have developed a novel thumb-shaped touch sensor capable of resolving the force of a contact, as well as its direction, over the whole surface of the structure. Intended for dexterous manipulation systems, the system is constructed from easily sourced components, so should scale up to a larger assemblies without breaking the bank. The first step is to place a soft and compliant outer skin over a rigid metallic skeleton, which is then illuminated internally using structured light techniques. From there, machine learning can be used to estimate the shear and normal force components of the contact with the skin, over the entire surface, by observing how the internal envelope distorts the structured illumination.
The novelty here is the way they combine both photometric stereo processing with other structured light techniques, using only a single camera. The camera image is fed straight into a pre-trained machine learning system (details on this part of the system are unfortunately a bit scarce) which directly outputs an estimate of the contact shape and force distribution, with spatial accuracy reported good to less than 1 mm and force resolution down to 30 millinewtons. By directly estimating normal and shear force components the direction of the contact could be resolved to 5 degrees. The system is so sensitive that it can reportedly detect its own posture by observing the deformation of the skin due its own weight alone!
We’ve not covered all that many optical sensing projects, but here’s one using a linear CIS sensor to turn any TV into a touch screen. And whilst we’re talking about using cameras as sensors, here’s a neat way to use optical fibers to read multiple light-gates with a single camera and OpenCV.
Continue reading “A Soft Thumb-Sized Vision-Based Touch Sensor”
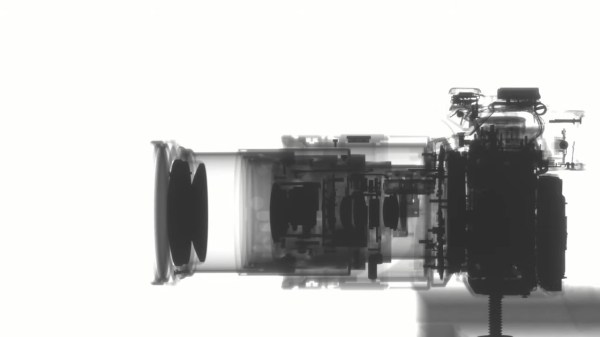
 The trick here is having an X-ray sensing panel that can be reused. It takes around five seconds of exposure to grab each 40×40 cm frame which are then assembled back into video.